Badge #3, Pt 1: Rhidochrine Jungle
Jasper Ward
Strap yourself in; this is a long one. Make your way back to the very top left of the Peridot Ward to find the gate to the Jasper ward. You'll get yet another Sephiroth cutscene, which also introduces Heather—another future important character.
This is the first time your actions can affect the route you're on. The route switching is a bit complicated in Reborn, with the majority of choices only locking you out of the Good Ending, but otherwise not changing the route. There's only two choices that actually set the route that you're on, and they're both much later in the game. This actions is purely about keeping you in or out of the Good Ending.
For the sake of simplicity, this walkthrough will explain how to achieve every action for the Good Ending, but both endings will be documented if you fail or choose to fail a specific requirement.
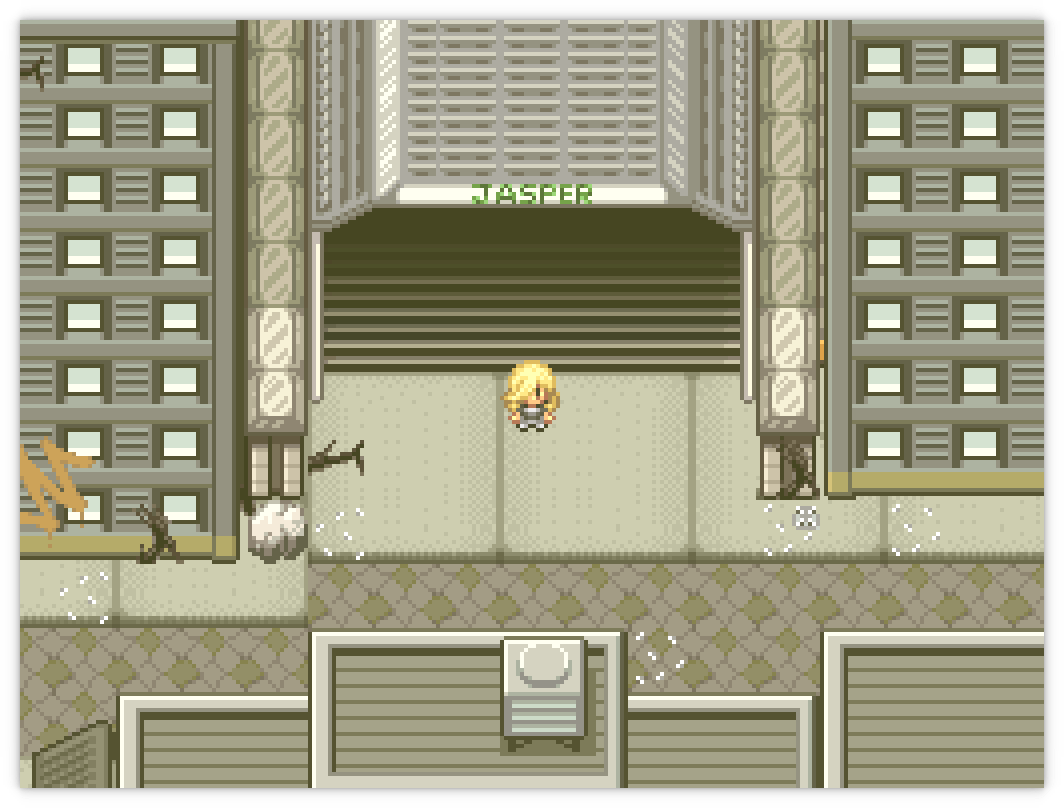
Go up and inside the piggy station immediately in front of the gate, and talk to the largest and fattest pig behind the desk. He asks you to go find his five little squealing piglets who have been lost on their way to market. The bad news is that you do have to do this as it is one of the criteria to get the Good Ending, but the good news is that one of them is already dead! There's nowhere else to go here, so continue to the left and into the ruined apartment building guarded by a dog and his Arcanine.
Travelling straight forwards will take you to the back of the Jasper Ward, where there is a Pokécentre available for you. To the far right is... nothing. It's blocked off. There is one of the five missing piggies, but you can't access him yet. There's another apartment building with a panicking man and an exit blocked off to the north; talk to him at least once to spawn a Mareep later on. Finally, in windy weather, there is an Emolga just below a cuttable tree directly below the Pokécentre.
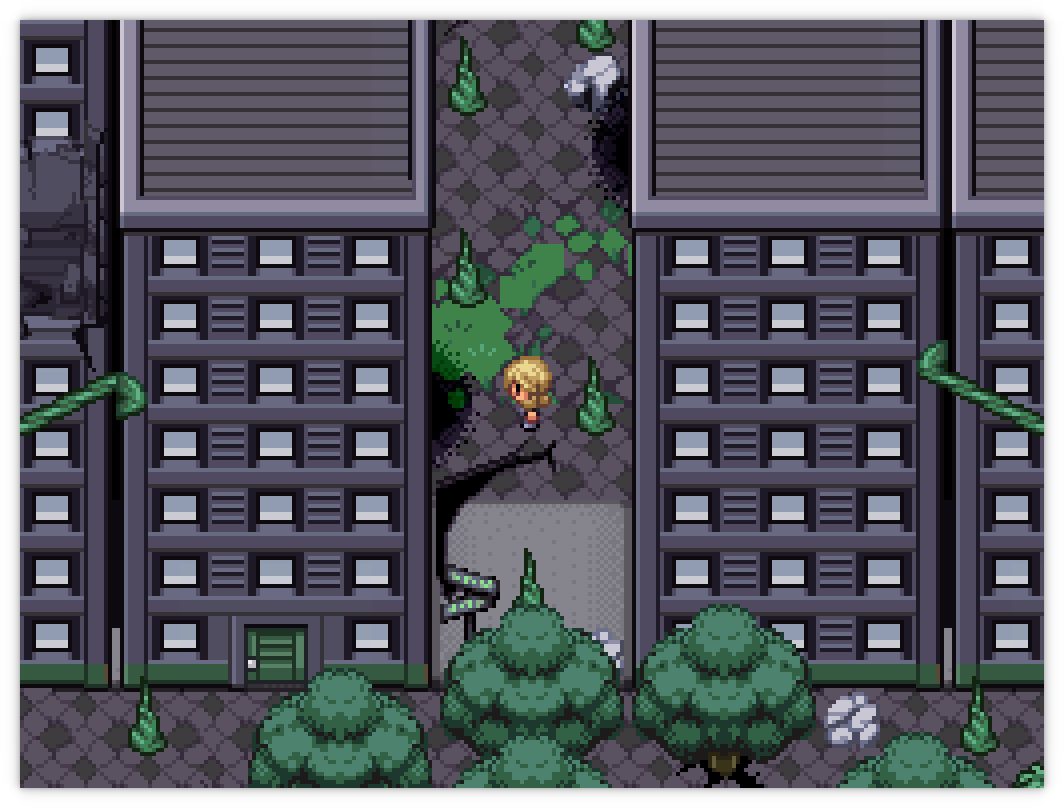
Go back into the building and walk through the left exit, where you will find a small alleyway that's blocked off at the top and bottom. There's a hidden entrance to the building to the left with a grunt inside; fight her and exit through the door at the bottom of the map to spawn a small cutscene with the mystery girl from before. Say Yes to beating up more Team Ustaše members, then proceed to the left to enter Malchous Forest Park.
Before trying to solve the "puzzle" here, if you walk upwards instead of to the left is the exit to a previously blocked part of the Jasper Ward; the first building on the left has one of the missing piggies and the building on the right currently has nothing of value. Fight the grunt and rescue the cop; that's one of five down already.
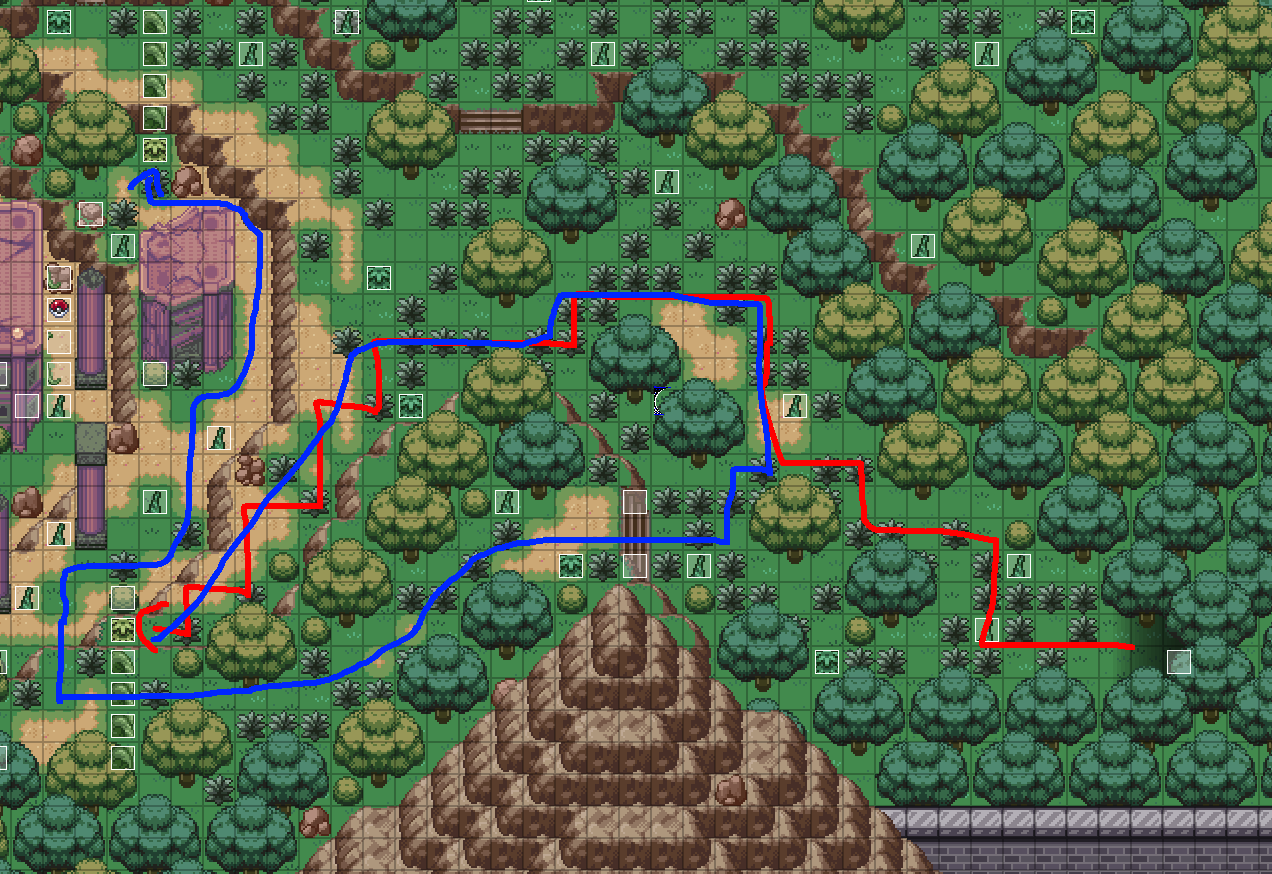
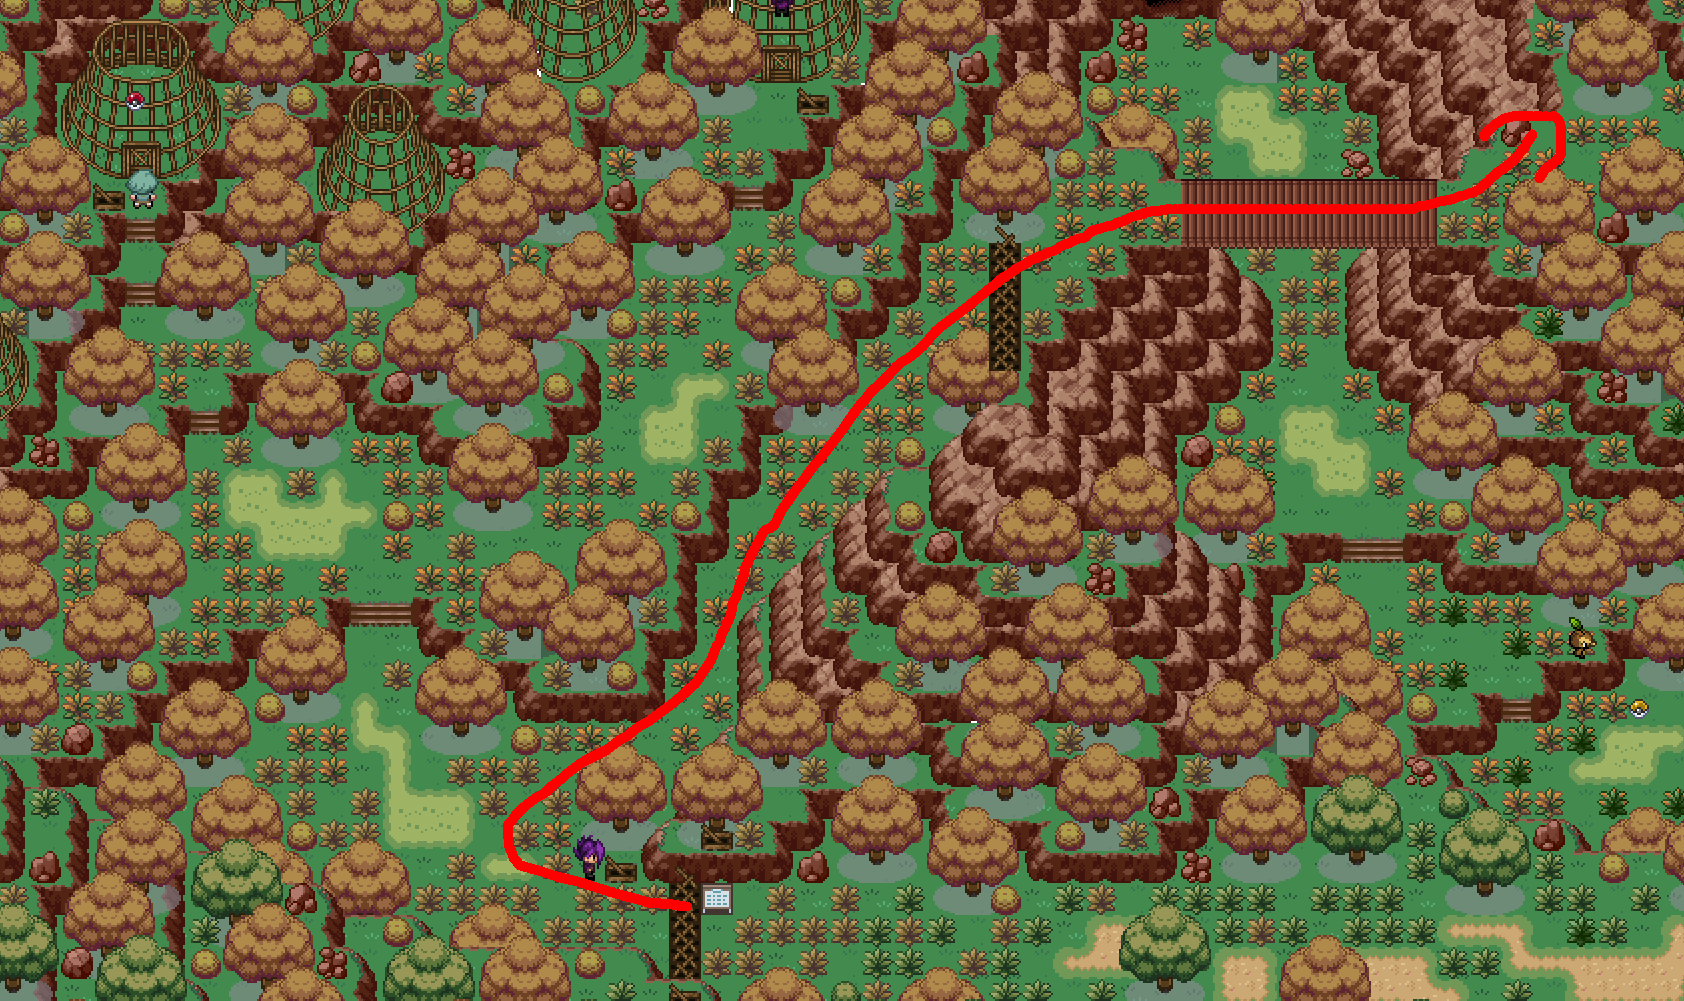
Returning to the forest park, there's a handful of vines blocking your progress forwards. This is a bit of a backtracking maze, so I'll go through the steps visually. For the first "puzzle", follow the red arrow and cut the tree down. Loop back following the blue arrow for a small cutscene with Heather. Optionally, you can keep walking straight to the left to cut down another vine; this will give you access to a PULSE readout when you loop back.
Follow the red arrow back upwards to unblock the path, and then follow the blue arrow to gain access to the former site of the Jasper Gym. Talk to Heather to get healed, and then "climb" (walk) up the building immediately to your north and jump ontop of the gym. Once inside you will find a giant hole that you need to jump through! Make sure to save the game soon!
Walk upwards to find a member of Team Ustaše guarding the second PULSE Tangrowth—Taka (Hitler Junior). He tries to get the jump on you with three grunts, but Heather falls down and takes them on instead. That leaves it to you to partisan the fuck out of this guy.
Meteor Admin Taka
| Sprite | Name | Level | Ability | Held Item | Moves | EVs |
|---|---|---|---|---|---|---|
|
|
Exeggutor-Alola | 35 | Harvest | Sitrus Berry |
|
0/0/0/0/0/0 |
|
|
Maschiff | 34 | Intimidate | Oran Berry |
|
0/0/0/0/0/0 |
|
|
Chatot | 34 | Soundproof | Wide Lens |
|
0/0/0/0/0/0 |
|
|
Tangrowth-PULSE B | 33 | Arena Trap | Oran Berry |
|
0/0/0/0/0/0 |
He "helpfully" informs you that there is in fact a third PULSE Tangrowth; this time, it's in the Beryl ward. Then some more cutscenes with Heather and Sephiroth—hold down text skip unless you enjoy teenage angst. Travel back through the upper exit to Jasper Ward where the vines have receded and you can now travel more freely. There's a few more events available now with the plant growth having disappeared.
The first building after the north exit is still blocked off by debris, but the lift in the second building now works; you can get your first sticker here. There's nothing else here by the upper exit, so go back through the park to the lower exit. Transit through the buildings again and exit out near the Pokécentre at the top of the ward.
In the house with the panicking man, you can travel into the lift room to find the Field Notes for the Forest Field. Keep going right to rescue the second piggy as well as get a Paralyze Heal. Even further right and you'll find that the route downwards is no longer blocked off. In the small block of houses at the far right of the ward, you will find a Mareep! (If you talked to the panicking guy, and have a Pokesnax.)
Rhidochrine Jungle
Now you can make your way to the Beryl Ward and—wait a second. Why is this music so sad? There's nothing interesting in the ward itself yet so continue straight to the left to enter the Rhodochrine Jungle. The Jungle itself is a bit labyrinthian, with several routes all around; it's recommended that you consult the map render in the link as a general guide of where to go (right click -> Open Image in New Tab). This might reduce some of the mystery if you do. Your ultimate goal is to open up the vines leading to the top of the map where the PULSE is kept.
Immediately upwards as you enter is a very obvious grass trap with a Rare Candy as bait; you can manuever around to get the item without falling through to the trap. (Or you can fall into the trap if you want.) Down to the left are some Team Ustaše grunts discussing about how boring life is in the jungle; you can sneak past them if you're precise—which will skip a few of the next sections—or you can make some noise in the surrounding bushes for them to capture you and throw you in a Nuzleaf cage. This guide assumes you get captured, as it's an easy shortcut.

Whichever way you take, if you end up captured Fern will come along and try to get you to beg him to let you out. If you have any shred of self-respect you should tell him to fuck off and to kill himself; he will walk away and shortly afterwards a Chatot will unlock the cage and let you out instead. If you agree, you have to say a handful of mantras to him (which nets you like six extra relationship points) and then to his credit he will actually let you out.
Your only way out of here is blocked off by a dysfunctional lever, so cut across the grass and up to a second cage to find... Cain. Ugh. Skipping ahead a little bit... First, we need to rescue two of the piggies. Make your way up towards the area following the red arrow, and fall into the pit when you try and get the PULSE readout. (If you really want it, you can loop around the tree to get it...) This will send you to The Underroot.
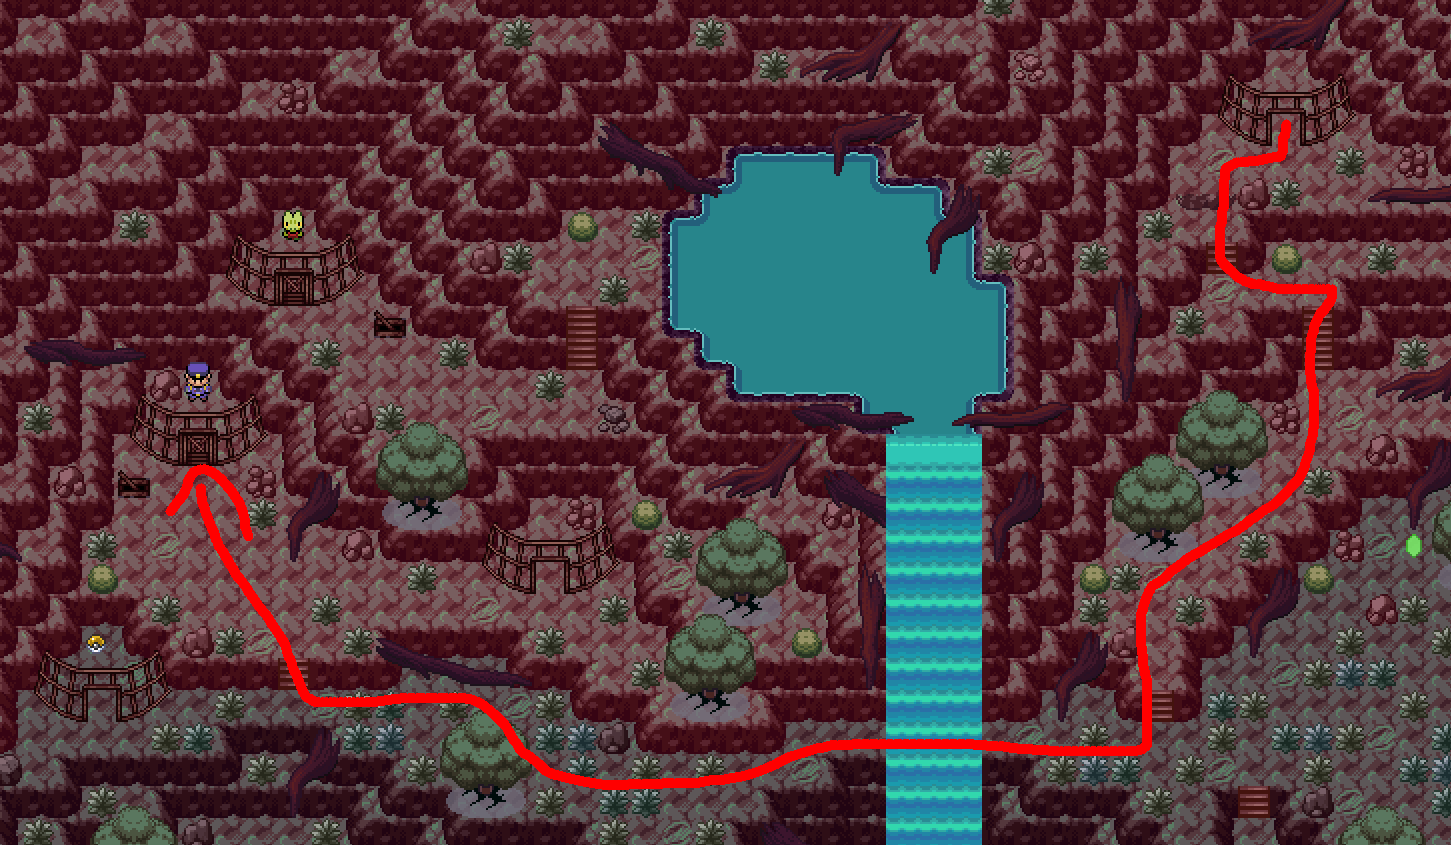
Follow the red arrow down across the waterfall to find another caged piggy (where he belongs) and pull the lever to open it. Talk to him, he thanks you, and runs off to beat people up in the non-destroyed part of the city.
Follow the blue arrow down to an exit back up to the Rhidochrine Jungle. This is a small secluded area that's only available from that one door in the Underoot. (On the way, by the pool of water, you can find a Seviper and catch it if you have a Pokésnax.) There's three ways you can go here:
- To the lower left is a building on its side. There's a hidden entrance there where you will find the fourth piggy blocked off by a Ustaše grunt; defeat them and talk to the piggy to set him free. One more to go!
- To the upper left is a static Stantler encounter.
- Finally, to the right is a house with a single lady in it. If you picked a Grass-type starter, she will teach Giga Drain as a tutor move. If not, she's an ecofascist. There's also a hidden Data Chip on her shelves ready to steal.
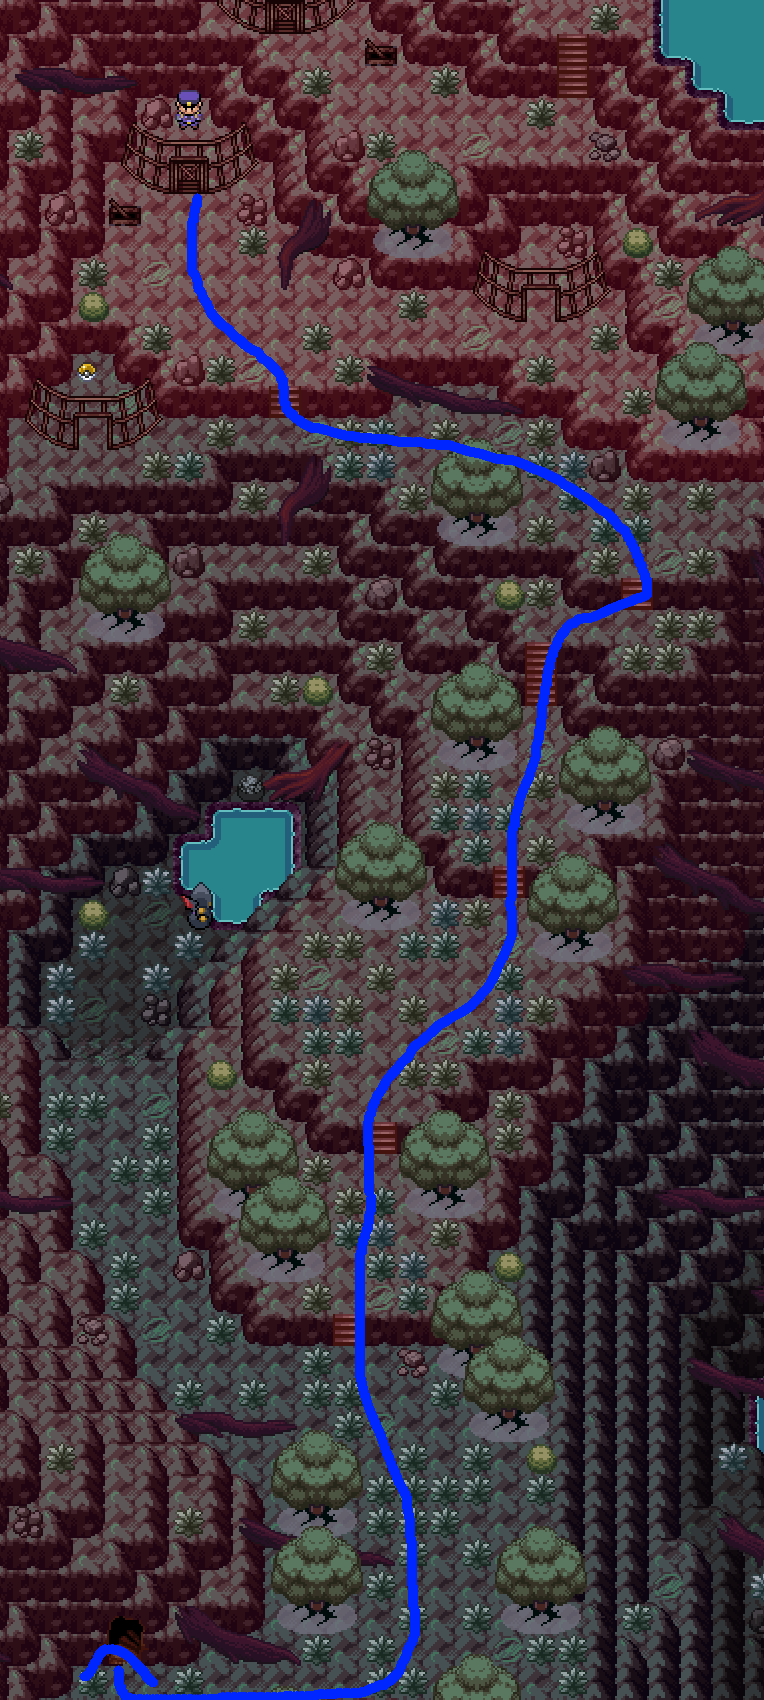
Go back down the stairs to the Underroot and backtrack across the waterfall. Follow the green arrow to find another exit to a part of the Jungle. This one spits you out next to the northern exit to Beryl Ward. There's two buildings accessible here, the Beryl Library and one with a secret entrance. First, walk into the Library and go up to the second floor. It's a bit hard to see, but you can actually walk onto the bookshelves here. The left bookshelves contain TM20 Safeguard on top; the right bookshelves let you access the otherwise blocked off right-sided room, revealing the last piggy - he's fucking dead!!! 🎉🎉🎉🎉🎉 There's also the field effect notes for the Corrosive Field here.
Go outside and travel through the second building to access the upper middle entrance for the Jungle. The only path here is to go upwards, where you'll meet Amaria; talk to her twice to get healed. There's a cuttable tree off to the side that will cut down some of the roots blocking you from the next PULSE Tangrowth.
Backtracking
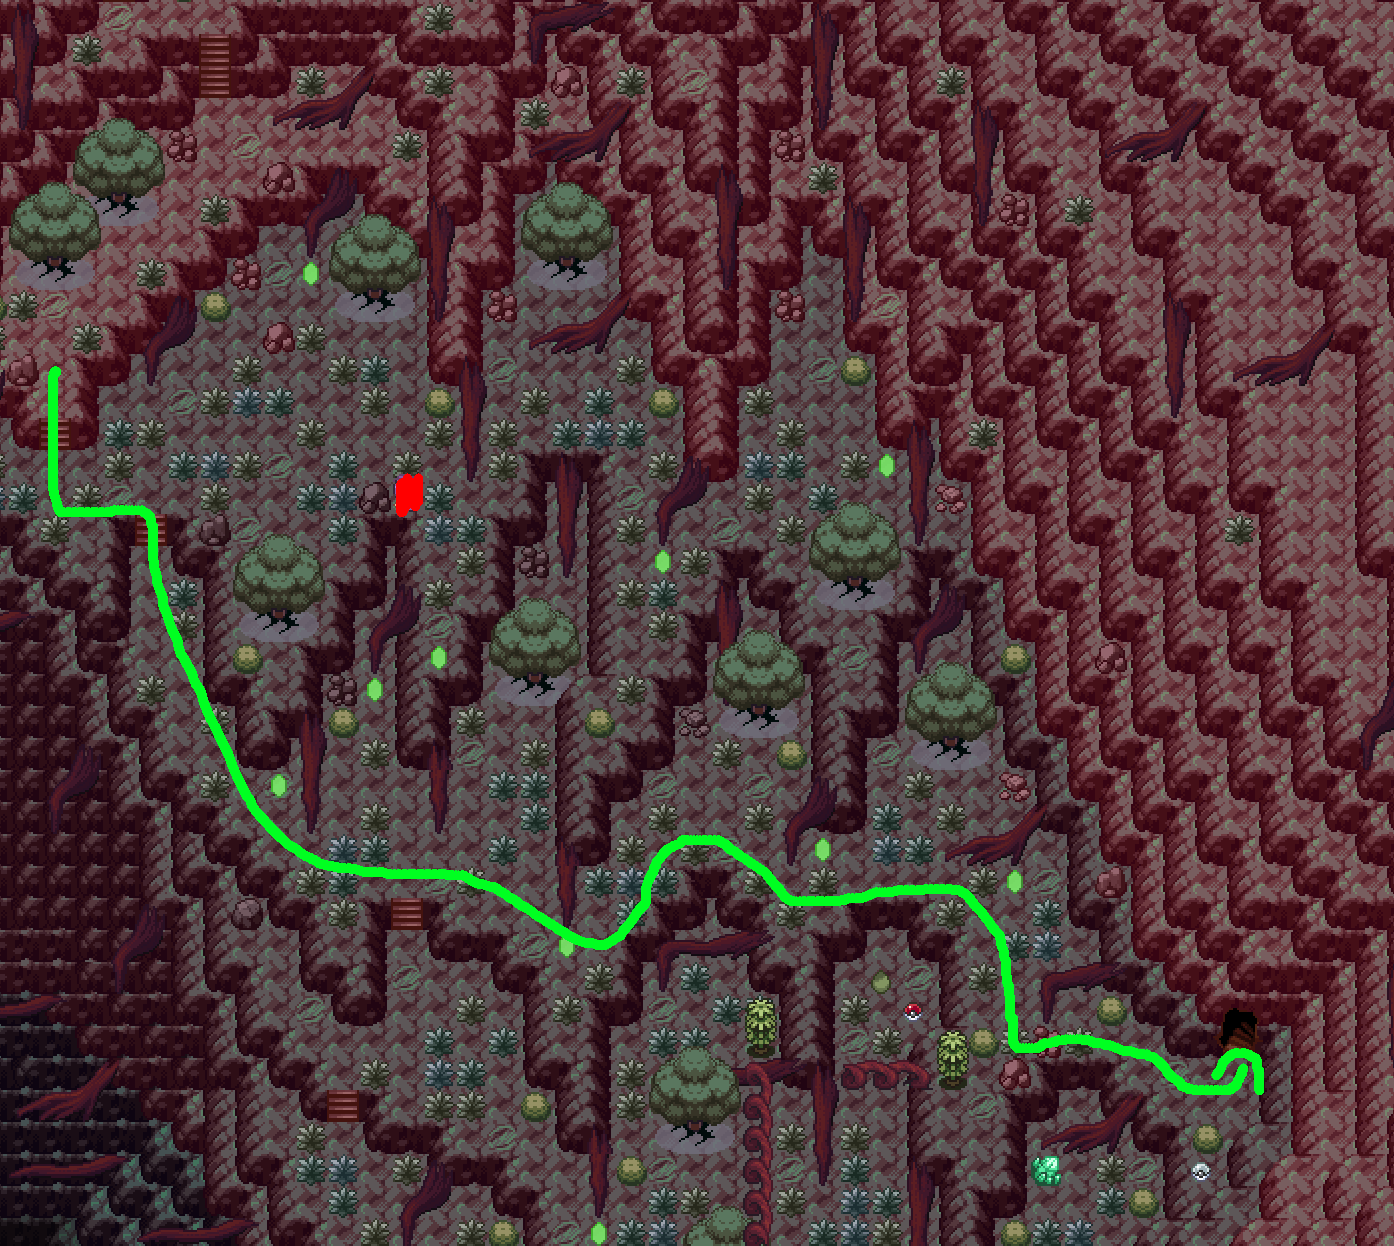
Okay, now here's a problem. We need to go ALL the way back to the Jasper Ward. Luckily, there's an exit to the bulk of the Rhidochrine Jungle. Walk all the way back to the Underroot and use the door right next to the cage that you fall into near the PULSE Readout (it's at the top right). This will spit you out near the area where you got caught by Team Ustaše.

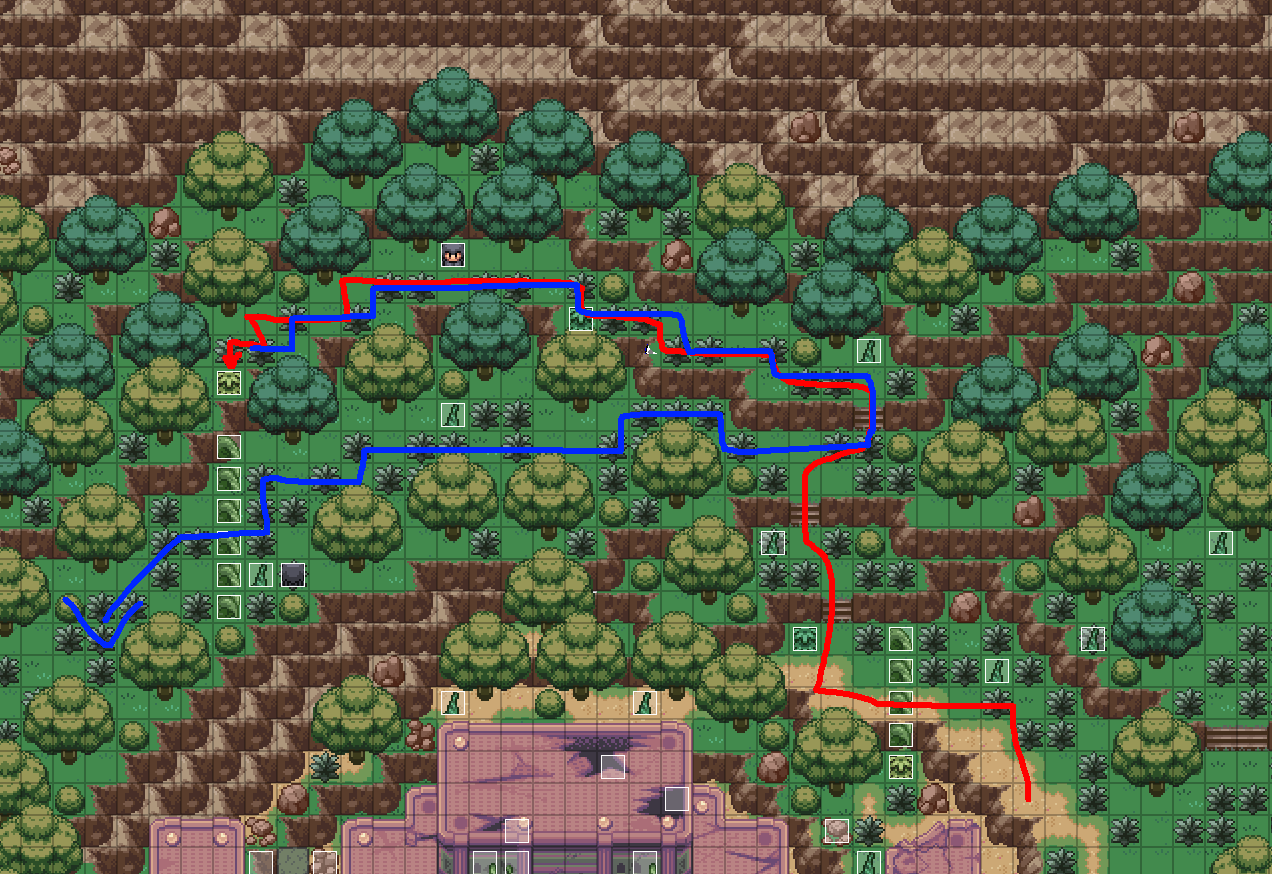
We'll take a quick diversion to cut down one of the vines that's blocking access to the PULSE Tangrowth, whilst we're already here. Follow the arrow to get to the second cuttable vine; then follow the path straight down south to make it back to the Beryl Ward. Return to the police station in Jasper to complete the missing officers quest; the chief will then give you the lost recruit's Growlithe. You should take it, if only for what it can get you. Talk to the piggy at the counter, then the lower far right (well, they're all far right) who will ask you to breed it and then come back to him. If you've rescued the daycare couple, you can do this now to get the Mystery Egg.
Make sure it's not a shiny egg. You'll get special dialogue if you give him a shiny egg. Don't be like me and accidentally trade a shiny.
Mystery Egg outcomes
The Mystery Egg lets you get some later-game Pokémon earlier than you normally would. Under the recommended settings, you can directly choose which Pokémon you get out of this selection; otherwise, it's either random or determined by the specified monotype password you put in (if any). Like the Slums egg, this can't be savescummed.
- Azurill
- Mareanie
- Staryu
- Togepi
- Sneasel (Johto)
- Shroomish
- Gastly
- Axew
- Vulpix (Both Kanto and Alola)
- Pawniard
- Litwick
- Trapinch
- Cottonee
- Elekid
- Starly
- Rockruff
- Larvesta
- Falinks
- Charcadet
- Cyclizar
- Falinks
- Greavard
- Darumaka (Galar)
- Qwilfish (Hisui)
- Indeedee
- Nacli
- Nymble
- Orthworm (wtf?)
- Pincurchin
- Toedscool
Now you can finally continue the story. The path directly above the main entrance to the jungle leads to the PULSE Tangrowth. Make sure you've forcefed EXP Candy to your Pokémon (if needed, go all the way back to Opal to pick some more up), save the game, and then travel underneath the bridge, straight up the stairs, and up the winding stairs to the left to find a route to Team Ustaše. The house to the right before the battle acts as a full healing spot too. It's time for the boss battle! This is a fairly easy fight, but it is a full boss battle, so I'll include some tips anyway:
- Something with Defiant or Contrary (like Purugly) can soak up a Parting Shot quite nicely.
- Something with Mega/Giga Drain will take the Tangrowth down in no time.
- You can bruteforce past things with field-boosted grass attacks, or use a fire type to burn the forest field.
Meteor Manager Ace of Clubs
| Sprite | Name | Level | Ability | Held Item | Moves | EVs |
|---|---|---|---|---|---|---|
|
|
Morgrem | 33 | Prankster | Eviolite |
|
0/0/0/0/0/0 |
|
|
Zorua-Hisui | 33 | Illusion | Telluric Seed |
|
0/0/0/0/0/0 |
|
|
Baltoy | 34 | Levitate | -- |
|
0/0/0/0/0/0 |
|
|
Floragato | 34 | Protean | Loaded Dice |
|
0/0/0/0/0/0 |
|
|
Braixen | 34 | Magic Guard | Sitrus Berry |
|
0/0/0/0/0/0 |
|
|
Tangrowth-PULSE A | 33 | Stamina | Pecha Berry |
|
0/0/0/0/0/0 |
After once again breaking some shins, everyone escapes including you and Borealis (the Team Ustaše guy you've been tracking. You remember him. Right?) He gets arrested... but then he doesn't. You're finally out of that fucking jungle! I glossed over a few events but you can go and find them yourself if you really want.
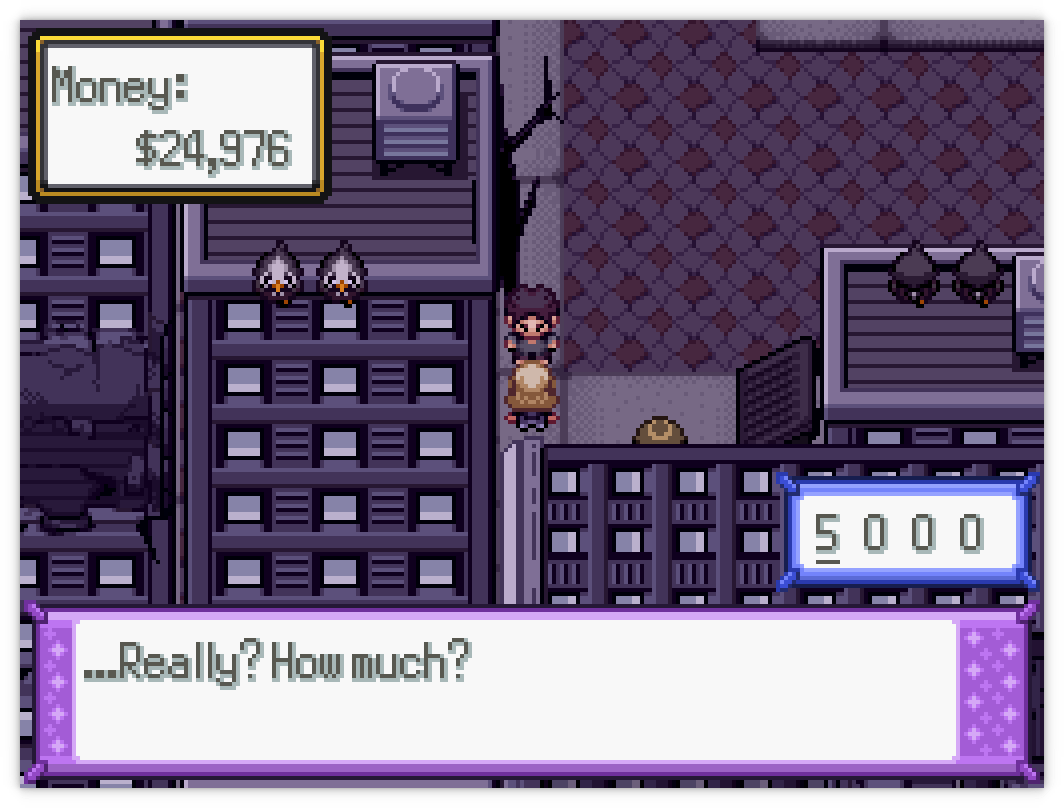
Now you have access to the northern part of Beryl Ward. Walking forwards and down will give you a small cutscene that varies depending on if you found all the piggies or not. Next, find this guy and give him at least 5000 dollarpounds. He then gives you a Magnetic Lure; when you give it to your leading Pokémon, you will only find Pokémon you haven't caught before in the wild. This is an absolutely essential item for shiny hunting (with the boosted rates, much easier) or catching Pokémon with those annoyingly small encounter rates. If you don't have 5000 dollarpounds, you can sell that Rare Candy to the shop attendant in the Pokémart above for 6000 dollarpounds.
The upper part of the ward, including a small outcrop at the top is now fully-ish accessible to you. If you set the weather to Sunny, then go into the lift inside the building to the immediate left of the Pokémart, you can find a Helioptile which will join you if you have a Pokésnax.
After that, your next stop is the third "gym". It's not really a gym, even though it has a (minor) puzzle and a monotype boss fight, because it doesn't give out a gym badge. It's located at the outcrop and is fairly obviously marked. Clear out all of the piggies so that they don't get in your way, and then move onto the tubes to solve the puzzle to progress forwards. You can interact with their front panel with the goal of turning them all blue. In this order:
- The tube at the bottom right
- The tube at the top right
- The tube at the middle bottom
- The tube at the top left
After doing all of this, it'll open a secret door to the right side of the tubes. Inside you'll find Corey and Heather; He challenges you to a pseudo-Gym battle in his former arena where he can be found. He'll be "Agent Corey" if you didn't save all five officers, and "Agent Borealis" if you did; only the moves here vary. Here's some tips:
- This can be a tough battle if you don't have a ground type available. There's a few options for this; Phanpy or Bunnelby can be caught literally outside of his arena in the upper Beryl Ward area.
- The field effect will poison you at the end of every turn; use your own Poison types to avoid this. Poison does resist Poison, but there's good dual types like Skuntank.
- His Nidorina can lower your stats into oblivion if you're not careful. Be sure to switch out if they get too low.
Agent Corey
| Sprite | Name | Level | Ability | Held Item | Moves | EVs |
|---|---|---|---|---|---|---|
|
|
Skrelp | 33 | Adaptability | Focus Sash |
|
0/0/0/0/0/0 |
|
|
Mareanie | 34 | Merciless | Telluric Seed |
|
0/0/0/0/0/0 |
|
|
Nidorina | 34 | Rivalry | -- |
|
0/0/0/0/0/0 |
|
|
Croagunk | 33 | Poison Touch | Black Glasses |
|
0/0/0/0/0/0 |
|
|
Skuntank | 34 | Aftermath | -- |
|
0/0/0/0/0/0 |
|
|
Crobat | 35 | Infiltrator | -- |
|
0/0/0/0/0/0 |
Agent Borealis
| Sprite | Name | Level | Ability | Held Item | Moves | EVs |
|---|---|---|---|---|---|---|
|
|
Skrelp | 33 | Adaptability | Focus Sash |
|
0/0/0/0/0/0 |
|
|
Mareanie | 34 | Merciless | Telluric Seed |
|
0/0/0/0/0/0 |
|
|
Nidorina | 33 | Rivalry | -- |
|
0/0/0/0/0/0 |
|
|
Croagunk | 33 | Poison Touch | Black Glasses |
|
0/0/0/0/0/0 |
|
|
Skuntank | 34 | Aftermath | -- |
|
0/0/0/0/0/0 |
|
|
Crobat | 35 | Infiltrator | -- |
|
0/0/0/0/0/0 |
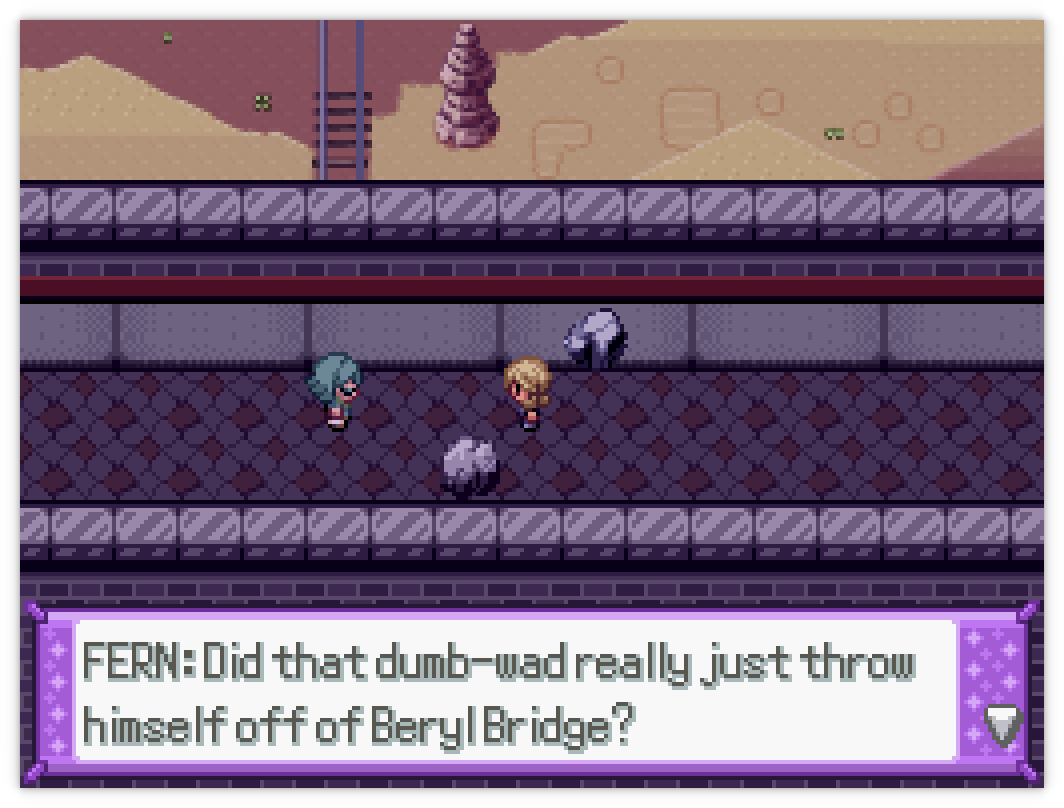
After you beat him, he invites you to the Beryl Bridge for "a show". He releases his Pokémon, tells you about the Ruby Ring, and then kills himself. Awesome! This lacks any emotional punch because all he's done is act like a dickhead to you for the five minutes he was on screen. There's an explosion in North Obisida Ward... but we're not going anywhere just yet.
Return to the hidden room in Beryl Gym to get the Silver Ring. This'll be useful for catching Corey's lost Pokémon; one of which—his Skrelp—you can go and catch now in the Underroot, next to the larger water pool. You can get there quickly by falling down the hole right next to the south entrance to the Jungle.