
Badge #11: Oh God Oh Fuck
Borderline Personality Disorder
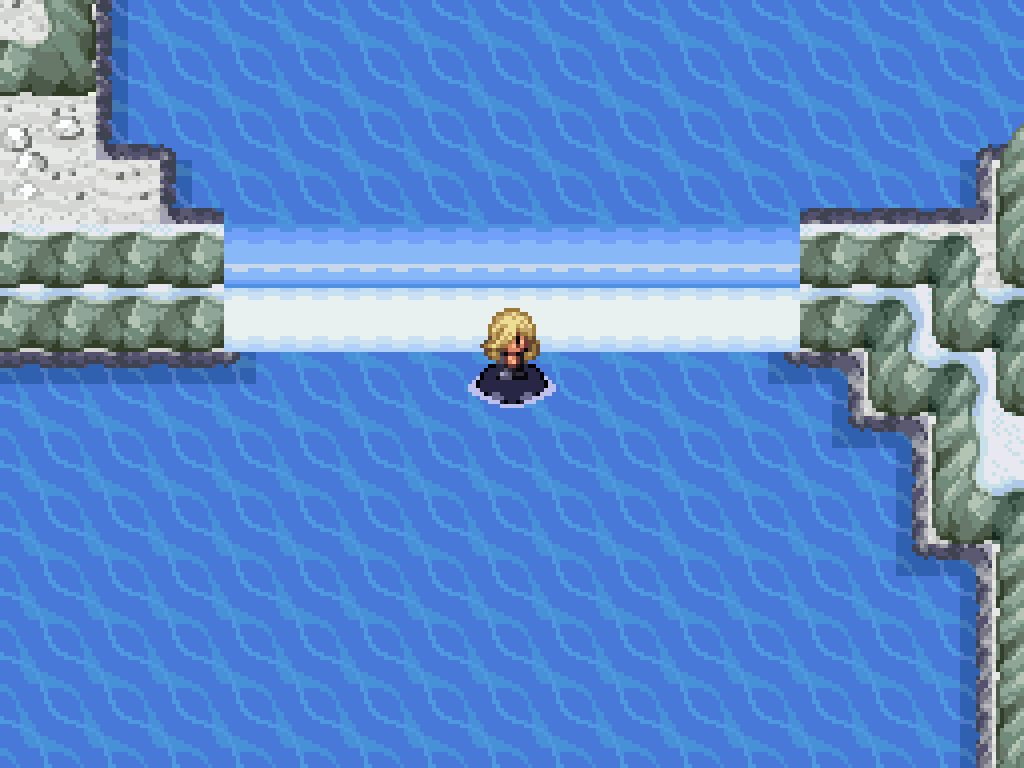
In order to get to the other half of the Celestine Cascade, we actually need Surf. Amaria offered it to you before you left, so let's go pick it up. Go into the house and talk to Titania for a cutscene. (Say no to lose a relationship point.)
You get dragged outside to mediate their relationship dispute, complete with some really dramatic music. (Say yes to lose some more relationship points.) Then Amaria kills herself. Great! Titania follows her again. Double great! Do you care? I don't really care.
Surf over to the other side of the Cascade to find... another jumping puzzle. This one is fake. If you solve it, it leads to a Reaper Cloth. (That's a waste of an item.) The one on the far right leads to an Ultra Potion (likewise). There is a clown here, with what looks like a mega evolution item behind him. Talk to him for a battle... where you'll win a Full Heal. Talk to him thrice more (select each option once) to get TM39 Rock Tomb.
If you go into the cave at the very end of the Cascade, you'll enter Citrine Mountain, one of the first mountains of doom. You can't go very far without access to waterfall, so return to the Cascade.
The Mountains of Doom
Reborn has three mountains: Celestrine, Citrine, and Ametrine. They all connect to each other multiple times, and are completely non-navigable. Since you're going to Ametrine City, you need to get through the Ametrine Mountain. Whilst it is possible to get to Ametrine through Citrine, you should just use the shortcut you built in the north section of Route 2 instead as it is far quicker.
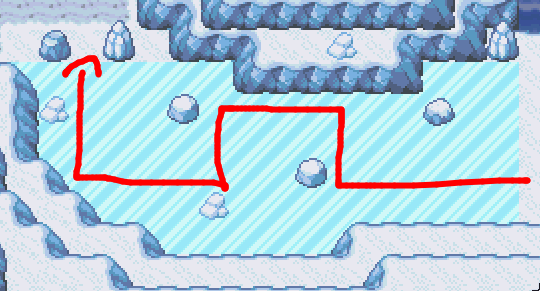
Cross the river to the previously blocked side of Ametrine Mt 2F, and solve this "puzzle" to get the rest of your group. Talk to Ayaya for a cutscene, and then proceed immediately upwards and across the surfing paths to make it to Route 3!
Unfortunately... you can't actually make it up into Calcenon City because the path gets shot by a laser. Advance through some cringe-worthy dialogue to find that you need to go all the way to the other end of Route 3. Fantastic! There's a suspicious spot to the lower right here that overlooks Route 2. Keep going right for another cutscene, whereupon you gain Ayaya as a partner. The path here is pretty obvious; keep through the caves until you make your way into the LCCC the second time.
Upon finding the LCCC a second time, you'll end up in a battle with Eclipse and Aster again. This is basically a 12v12 miniboss, so make sure to save up first.
Meteor Private Aster
| Sprite | Name | Level | Ability | Held Item | Moves | EVs |
|---|---|---|---|---|---|---|
|
|
Solrock | 70 | Levitate | Light Clay |
|
0/0/0/0/0/0 |
|
|
Golurk | 70 | No Guard | -- |
|
0/0/0/0/0/0 |
|
|
Passimian | 70 | Receiver | Life Orb |
|
0/0/0/0/0/0 |
|
|
Krookodile | 70 | Intimidate | Muscle Band |
|
0/0/0/0/0/0 |
|
|
Lycanroc-Midnight | 70 | No Guard | Life Orb |
|
0/0/0/0/0/0 |
|
|
Ceruledge | 66 | Flash Fire | Sitrus Berry |
|
0/0/0/0/0/0 |
Meteor Private Eclipse
| Sprite | Name | Level | Ability | Held Item | Moves | EVs |
|---|---|---|---|---|---|---|
|
|
Lunatone | 70 | Levitate | Light Clay |
|
0/0/0/0/0/0 |
|
|
Vileplume | 70 | Effect Spore | -- |
|
0/0/0/0/0/0 |
|
|
Oranguru | 70 | Telepathy | Light Clay |
|
0/0/0/0/0/0 |
|
|
Milotic | 70 | Marvel Scale | Leftovers |
|
0/0/0/0/0/0 |
|
|
Lycanroc-Midday | 70 | Sand Rush | Life Orb |
|
0/0/0/0/0/0 |
|
|
Armarouge | 66 | Weak Armor | Weakness Policy |
|
0/0/0/0/0/0 |
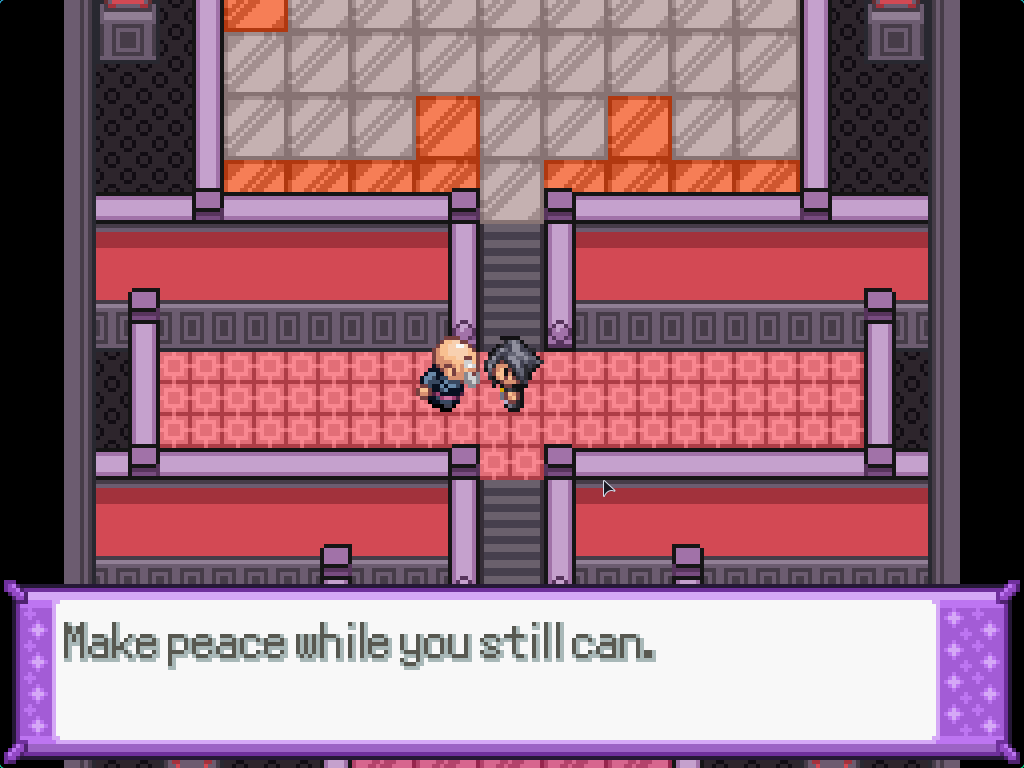
After that, there's another long cutscene where Sirius sends Eclipse to Mikoshi and Ayaya gets captured. Rats! The LCCC collapses and the path up into Labadorra is now cut off. The left exit nets you TM43 Flame Charge, and the right exit leads back to Calcenon City. (Or, more specifically, it leads to the lower half of Route 4.) Avoid getting trolled by the trainers up here and enter Calcenon City from the right entrance.

There's not much to do here in the city until you've seen a few cutscenes. Go up north and find the gym for the first one; find Saphira at the front of the city and talk to her for the second one. Say "yes" when prompted for a ton of relationship points, and then return to the checkpoint. After that's done, find the building on the lower left of the city and enter it for a big cutscene with the runaway kids, where you get TMX6 Dive. (If you do this after getting the badge, you get some more relationship points.)
There's still a handful of events to do here, but none of them give anything good, so who cares.
Charlottification
Before reading any further, go fight Charlotte in her gym. Trust me. You won't lose.
This can be hardest gym in the game by a strong margin. All of her Pokémon are fast, the field effect is the most advantageous in the game, and it's a double battle, to boot.
Calcenon Gym Puzzle Walkthrough
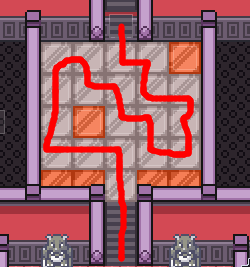
Yeah, obviously there's going to be a gym puzzle first. The problem here is simple; you need to walk up to the steps at the back of each segment whilst stepping on every tile exactly once.
The first one here is pretty simple. Just follow the path upwards.
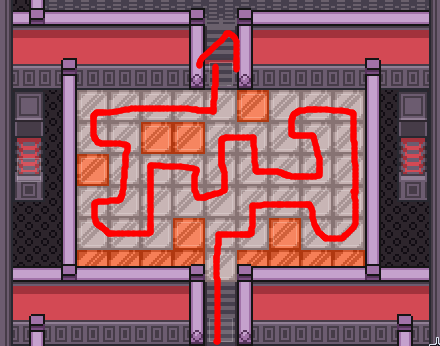
The next one is a bit tougher, but not that hard to figure out.
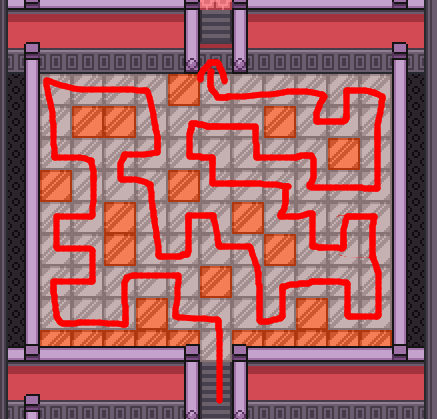
The last one looks intimidating, with several possible paths, but it's less scary than it looks.
There's another half-a-puzzle here, but you're not meant to be able to solve until later, so we'll come back to it. If you keep going ahead, you'll face Charlotte. Let's go over some tips, as per usual.
- Her field effect massively boosts fire types, and massively nerfs water types. This means you'll need to focus on using Ground and Rock types instead, which don't have a damage penalty. There's a handful on Route 2 and 3 available.
- What it doesn't nerf, however, is Scald, which gets a boost. This will single-handedly decimate her team, even after Light Screen is up.
- Her Delphox has Light Screen, and her Cinderace has Protean. This means that otherwise useful moves will hit weakly when it counts.
- If she gets up the Burning Field via any of her fire type moves, it's game over. Catch a Hippowdon from the caves in Route 3 to snuff out the Burning Field immediately.
- Similarly, a Lycanroc-Midday with Sand Rush outspeeds a lot of her problematic Pokémon and can one-hit kill with Stone Edge or Earthquake.
- Her Coalossal hits a whopping 492 (!) speed when Steam Engine activates, which more than makes up for its general lack of speed. (It outspeeds max speed Greninja, for example). Likewise, your Lycanroc can outspeed it in sand.
- This is like an Armored Core battle; you cannot be defensive and expect it to pay off. You need to take the initiative here! You need to have a strong offense and take risks.
- Flash Fire Pokémon are completely immune to her Fire moves, and get a bit of a boost from the field. Arcanine with Flare Blitz can dish out a lot of damage even with resisted hits.
- If you held on to your Talonflame, priority Acrobatics can act as an emergency revenge kill (especially on Volcarona).
- If you're feeling especially brave, you can try using Blizzard to terminate the field. This will let you steamroll her with water types like normal, but there's no Blizzard setter that's fast enough to outspeed both Darmanitan and Coalossal.
- Speaking of steam, if you use certain water type moves, the accuracy of all Pokémon on the field will drop. This is more of a cheese strategy than anything else.
- You might want to actually try using hazards; Stealth Rocks will chunk all of her Pokémon and Toxic Spikes can force forwards progress.
- Once again, gems. Gems are your friend. They turn a two-hit into a one-hit, even on a resisted attack.
Firebug Charlotte
| Sprite | Name | Level | Ability | Held Item | Moves | EVs |
|---|---|---|---|---|---|---|
|
|
Typhlosion-Johto | 70 | Blaze | Sitrus Berry |
|
0/4/0/252/0/252 |
|
|
Coalossal | 70 | Steam Engine | Focus Sash |
|
0/0/0/252/252/4 |
|
|
Cinderace | 70 | Libero | Wide Lens |
|
4/252/0/0/0/252 |
|
|
Volcarona | 70 | Flame Body | Charti Berry |
|
0/4/0/252/0/252 |
|
|
Delphox | 70 | Blaze | Light Clay |
|
0/4/0/252/0/252 |
|
|
Ninetales-Kanto | 72 | Drought | Telluric Seed |
|
0/4/0/252/0/252 |
After that, you'll get the Cinder Badge, which nets you a level cap increase all the way up to level 75 (!), as well as the TM for Flamethrower, and the ability to use Dive. Make sure to pick it up if you forgot to get it before the gym. If you go down to the very south of Calcenon and find the checkpoint, you can donate forty thousand dollarpounds to repair the stairs to Route 3, letting you avoid having to walk all the way back through Route 4 and the broken bridge again.
Next stop: Ametrine City!