
Badge #14, Pt 2: Devon Corp? & Fairy Gym
As soon as you're ready to advance the story, fly to the Grand Hall and talk to Ame in front of the bench. You'll need to find three others: DJ Arclight is out in front of the nightclub, Adrienn is in front of the Coral Gym, and Victoria is in the Beryl Cemetery. Talk to all three to get them back to the Grand Hall. Return back to the Grand Hall and talk to Ame again for a cutscene.
The plan: Infiltrate Devon Corp. You, Arclight, and Victoria will take the underground section and the others will do a full-frontal assault. The actual place you need to meet up is in a rather inconvenient section of the Railnet: you can either pass through the Slums and go up into the dark area (where you found Flash before); or you can go through the entrance in the Obsidia Ward (or Peridot Ward) into the train puzzle and exit next to where you found the pair of switches before. Whichever one you pick, you'll meet up with Victoria and Arclight down there; talk to Arclight to advance the plot.
Before you enter, you should seriously think about your team composition because there are two very hard boss battles coming up. I recommend using some Ground types and maybe some Psychic or Flying types as well. You should also have at least one thing that can mega-evolve by now.
Devon Corp?
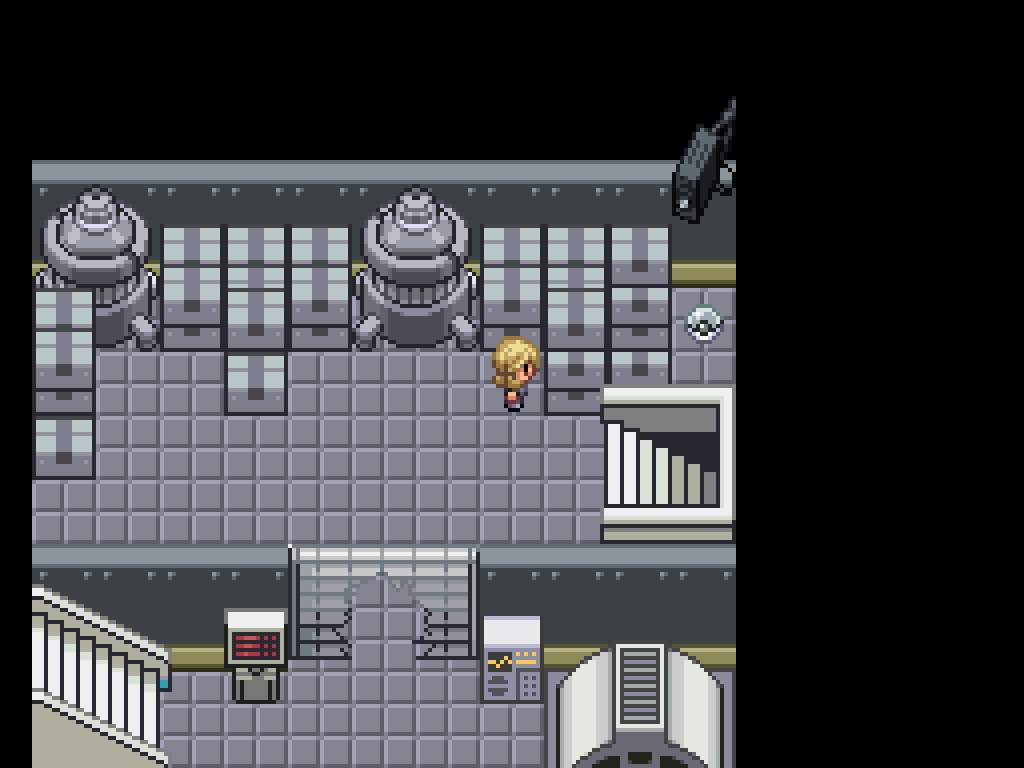
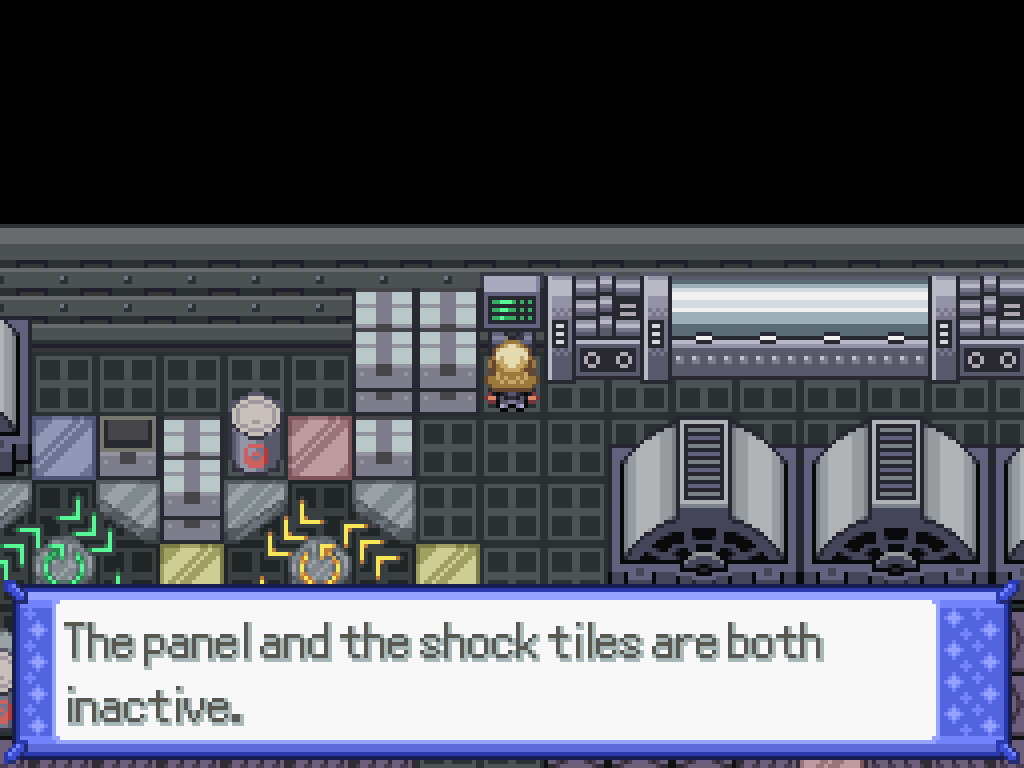
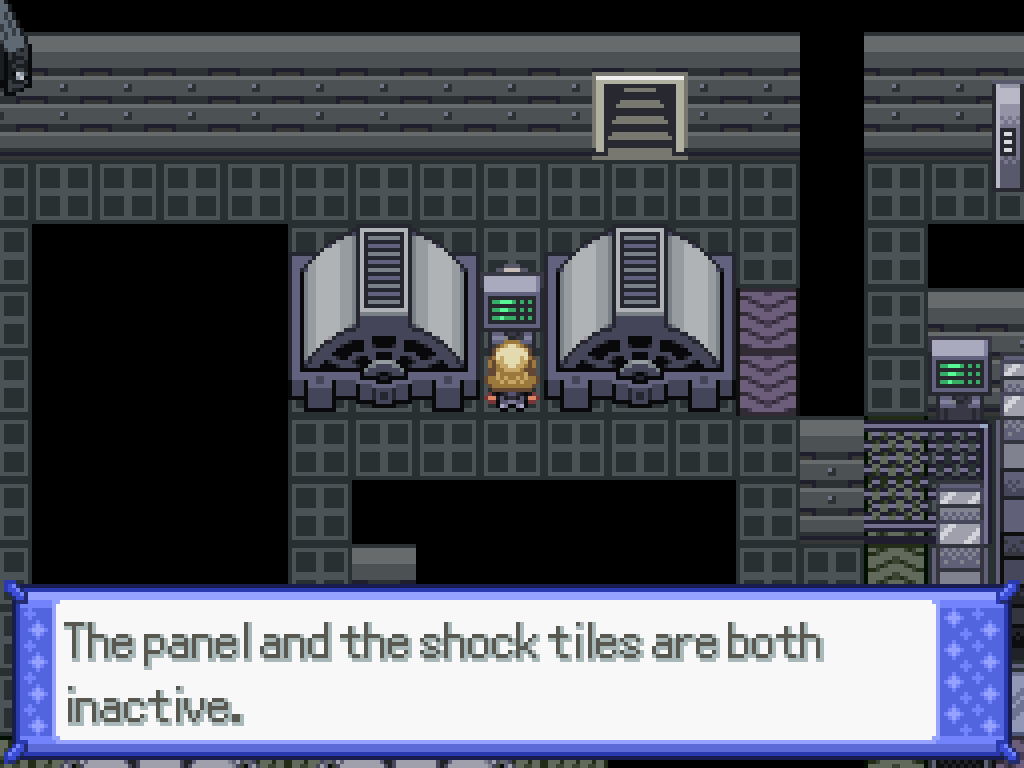
As soon as you walk up, you'll get locked into a double battle with some orderlies. Go upstairs to advance the plot; then, check the shop front to find the Radio Transceiver. Then go back upstairs again for another cutscene; you can press A (on my controller, it's 'X'—or the top button) to change the patterns on the floor. If you step onto a dark coloured tile, you'll get zapped and all of your Pokémon will take damage (but not if you step onto a light coloured tile), except for Ground types. Manipulate the patterns to make it to the top stairs without getting zapped. (Sorry, but you're not getting screenshots for these ones as the "puzzle" is too trivial.)
On the next floor, you get roped into another double battle as soon as you enter; solve the slightly lengthier puzzle and fight the orderlies at the door (with Victoria helpfully teleporting to your side). There's a small cutscene, and then the next room has to be done by yourself. There's two other orderlies here you need to fight, but they're pushovers. Onto the next room...

Fall for the obvious trap here to get teleported to a healing room. This isn't a good sign. When you walk out to the left, you'll find an arena... and if you walk to the side, you'll have to fight Victoria. To the death. Mwa ha ha. This is a hard fight but not too hard; some tips:
- Something like Talonflame with Acrobatics is good here, as per usual.
- Her Cobalion has Body Press, and Iron Defence raises defence by three stages in the factory field. Break it with Earthquake to avoid this, and then use a special attacker to kill it—it's not especially fast.
Sensei Victoria
| Sprite | Name | Level | Ability | Held Item | Moves | EVs |
|---|---|---|---|---|---|---|
|
|
Gallade | 80 | Sharpness | -- |
|
0/4/252/0/0/252 |
|
|
Mienshao | 80 | Regenerator | -- |
|
4/252/0/0/0/252 |
|
|
Cobalion | 80 | Justified | -- |
|
0/4/252/0/252/0 |
|
|
Togekiss | 80 | Serene Grace | King's Rock |
|
0/4/0/252/252/0 |
|
|
Urshifu-Single Strike | 80 | Unseen Fist | Protective Pads |
|
0/164/92/0/252/0 |
|
|
Incineroar | 80 | Intimidate | Assault Vest |
|
0/252/252/0/0/4 |
Now we get into the really bad part of the puzzle. For some reason, the radio transceiver is still connected to the panels, so you can avoid being shocked here.
Devon Corp? Sub-Puzzle 1 Solution
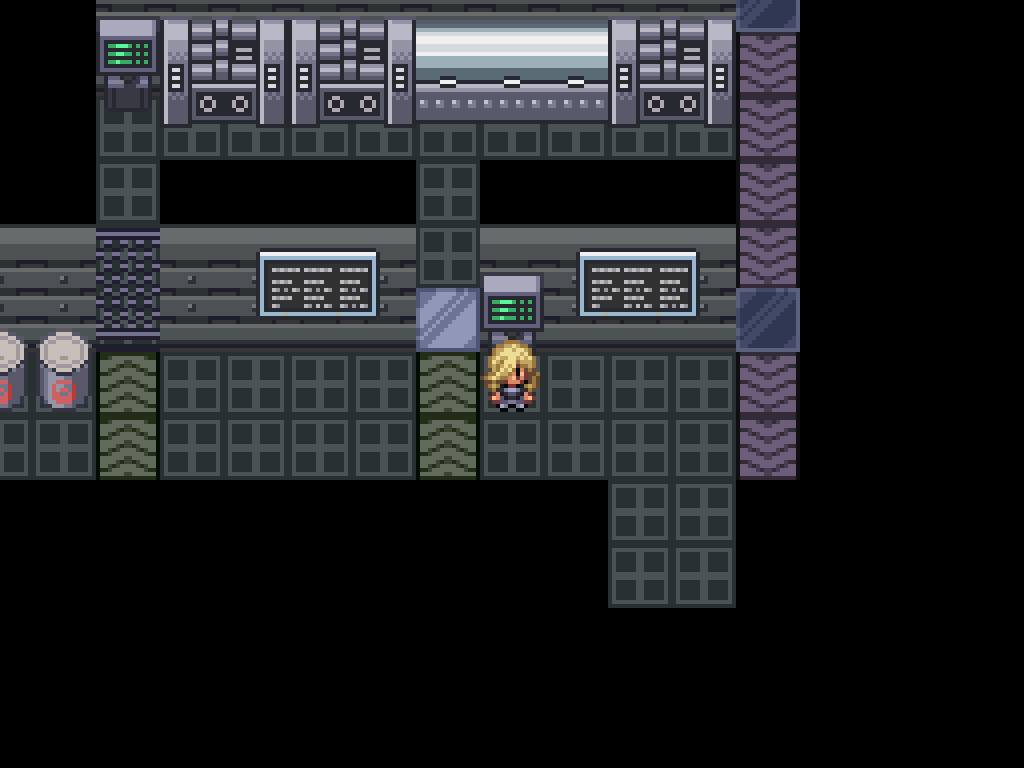
First, activate this computer and turn on the grey tiles to avoid being shocked, then walk on the panels to be shifted upwards, activating the second computer in the area. Switch to the red tiles and walk all the way to the right to return to the starting area, then activate the lower computer again to continue.
Hop onto the next transport belt section, and after going through the second red panel, press A/X twice to swap the shock panels again. Activate the computer but continue on to the right, swapping the shock panels again.
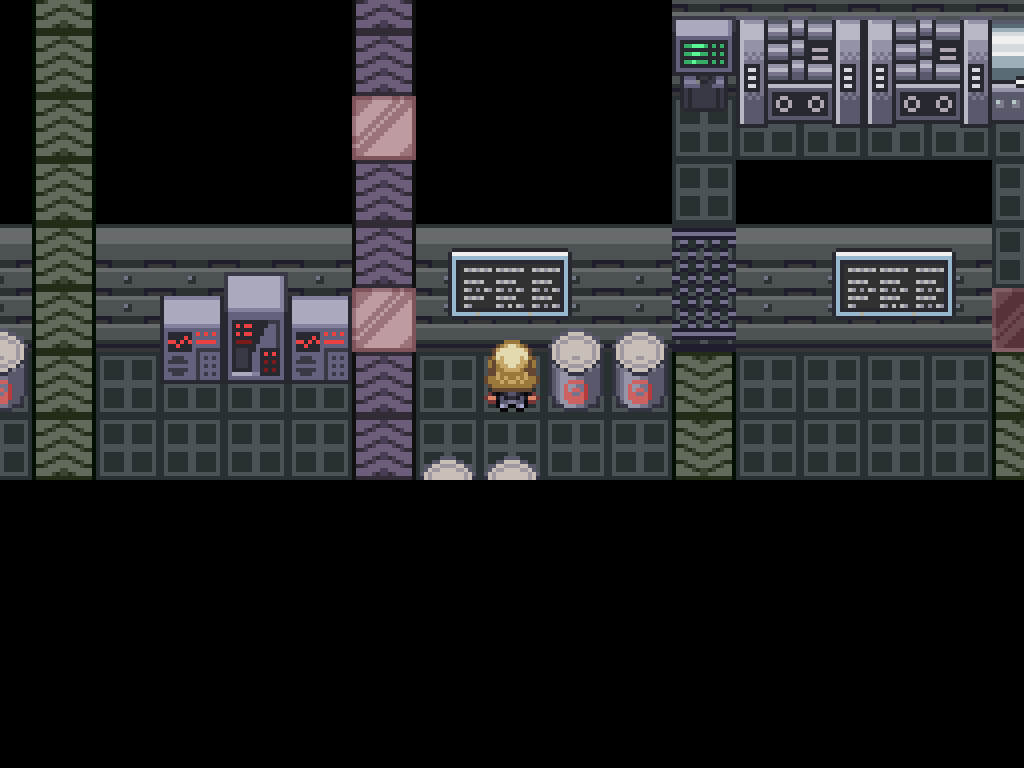
Follow this path to make it to the computer on the right, being careful not to shock yourself. Activate it, walk back on the lower belt (that's now been inverted), and keep going until you get sent back down to the bottom of the map. Walk to the right and upwards to get to the upper section of the hell puzzle.
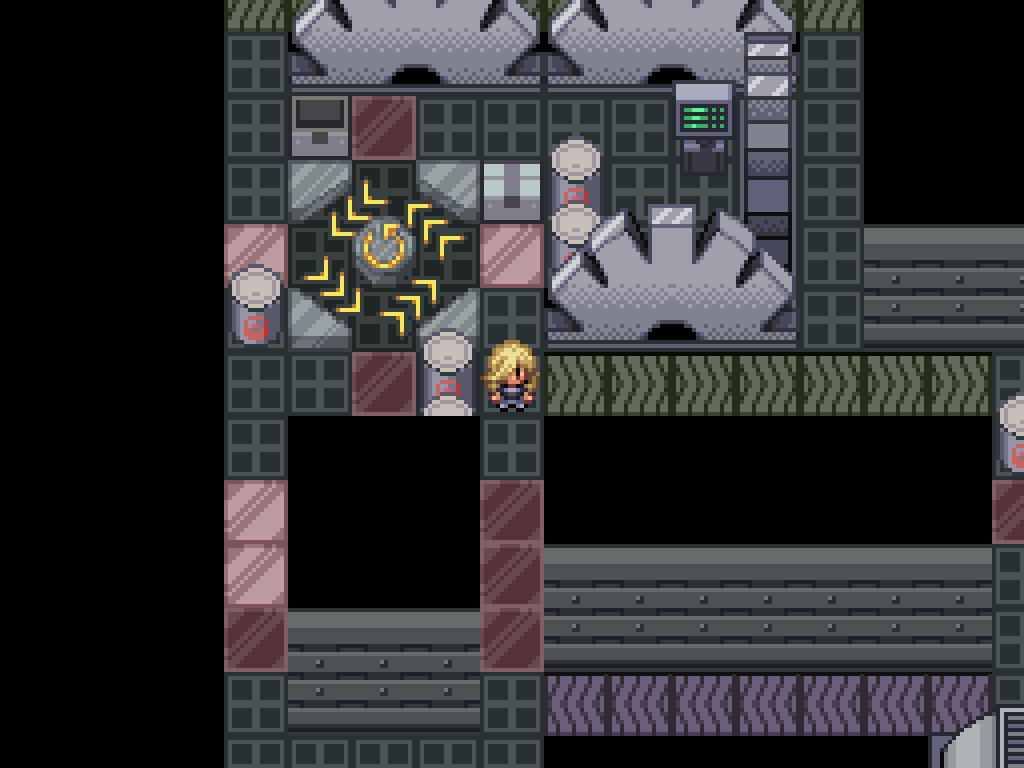
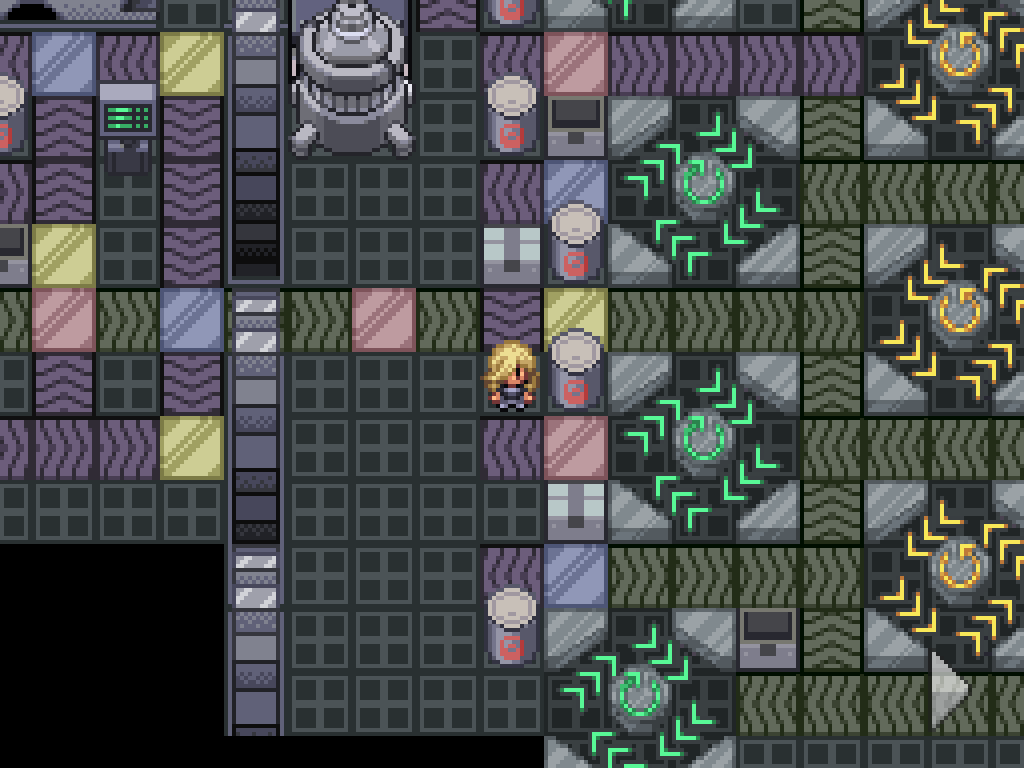
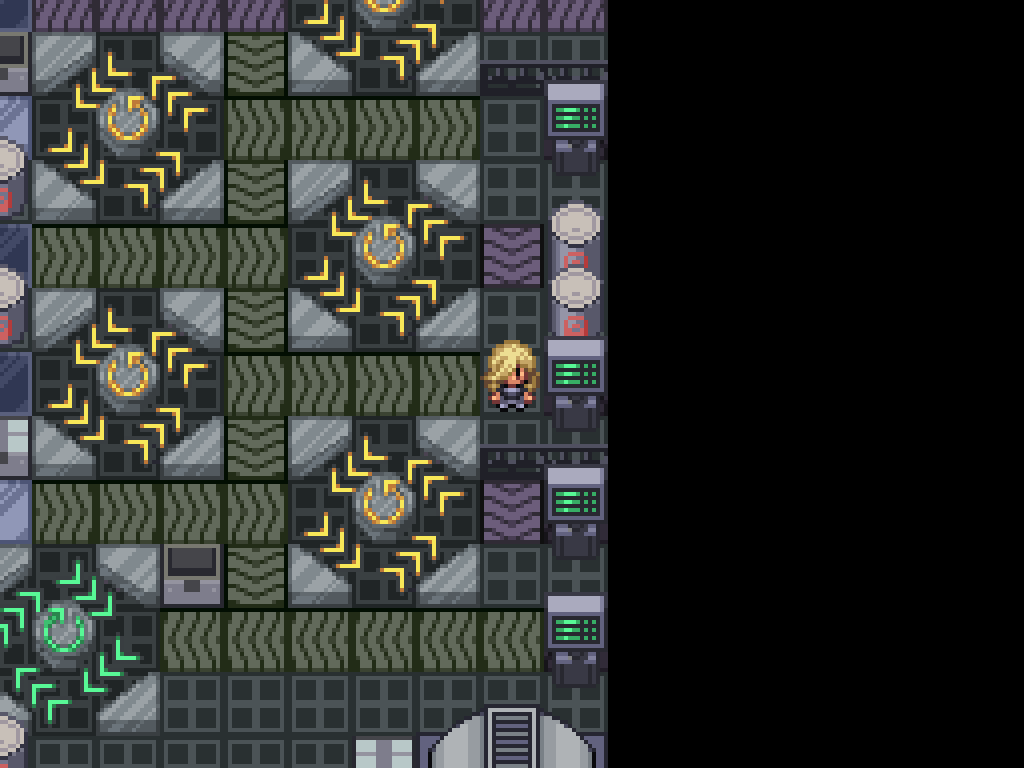
It's difficult to articulate this with a screenshot, so I'll list the steps instead:
- Enter the left-most circular element from the top to drop you to the left.
- Enter it again from the top to drop you to the right.
- Enter the middle circular element from the left to drop you at the bottom.
- Repeat Step 1 and 2 again.
- The middle circular element will now be green; enter it to drop you at the top.
- Enter the right-most circular element from the top to drop you at the left.
- Enter the middle circular element from the right to drop you at the top.
- Enter the right-most circular element from the top to drop you at the right.
If you activate this computer, all of the shock tiles in this room will become inactive. There's nothing hidden in this room that warrants going back, but you can if you want? If you got shocked you can go and get healed in the first room. Otherwise, enter the stairs to find another arena.
Enter the obvious trap cage again to find DJ Ark this time; both dialogue options here lead to the same battle, but differ in relationship points (Fight: +Victoria, +Arc / Refuse: -Victoria, -Arc, ++Adrienn). This one's a bit easier than the previous one, but some more tips:
- He's a mostly Electric type trainer. So... uh... Ground types. Or Grass types.
- His Noivern is scary, but a Ghost type deals with it. Something like Chandelure, especially if you destroyed the field with Earthquake previously.
- His Primarina will happily kill your ground types, though; but that's what the Grass type is for.
DJ Arclight
| Sprite | Name | Level | Ability | Held Item | Moves | EVs |
|---|---|---|---|---|---|---|
|
|
Luxray | 80 | Intimidate | Amplifield Rock |
|
4/252/252/0/0/0 |
|
|
Raikou | 80 | Pressure | Wise Glasses |
|
252/0/4/252/0/0 |
|
|
Primarina | 80 | Liquid Voice | Sitrus Berry |
|
252/0/0/252/0/4 |
|
|
Noivern | 80 | Infiltrator | Wide Lens |
|
0/4/0/252/0/252 |
|
|
Jolteon | 80 | Volt Absorb | Petaya Berry |
|
0/4/0/252/0/252 |
|
|
Ampharos | 80 | Static | Ampharosite |
|
0/32/0/224/252/0 |
After beating him down, there's Another tile puzzle to suffer through. Yay.
FULL Devon Corp? Sub-Puzzle 2 Solution
First, walk straight upwards through the right-side passageway to find a circular element; pass through it to find a computer. Activate it, then walk back through the element to walk on the newly flipped conveyor belt. Walk through the circular element to the right twice to make it to the left side.
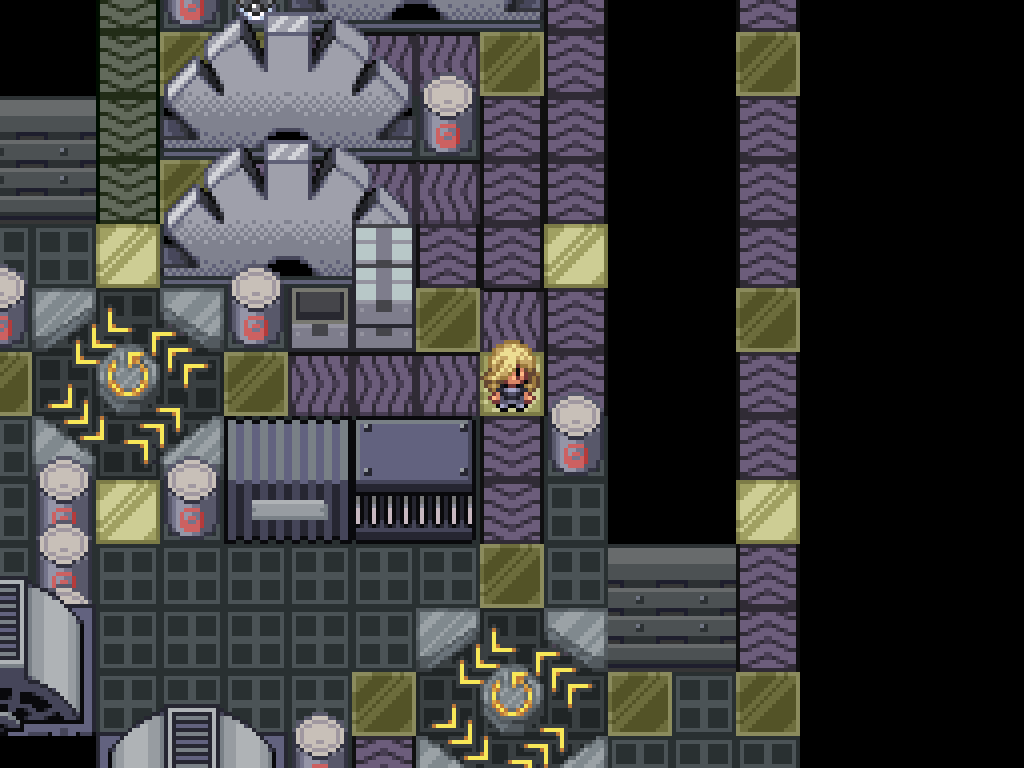
At this junction, walk to the right and then upwards, then go up into the circular element once to be spat out to the left. Do a loop around to get back to the junction, where upon you must go down and loop through the circular element twice to get to the right.
Once here, walk up on the right path to return to the circular element at the top of the room. Access the computer to toggle the conveyor immediately above. You need to loop all the way back to the lowest circular element (sigh), whereupon you can walk straight upwards to make it to a new section at the top of the room. The computer here will flip the conveyor belt immediately below you to going upwards.
Return back to the conveyors on the right and pass below the upper circular element to access the conveyor belt you just flipped; walk to the left to activate the computer that turns off the shock panels. Finally, activate the computer below this section to toggle the conveyor below to the right, letting you proceed into the final room.
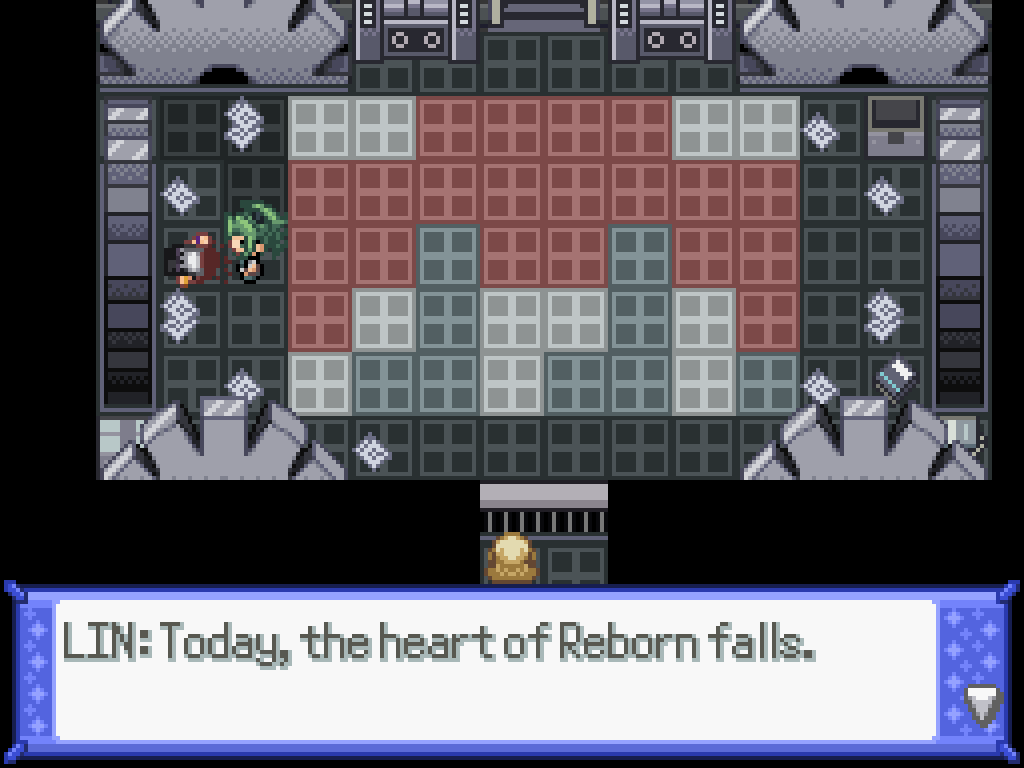
You'll see Ame battling Lin. Ame dies (adult game for adults), which technically makes Lin the Pokémon Champion (for some reason). Then ANOTHER puzzle in the next room. (Fuck!)
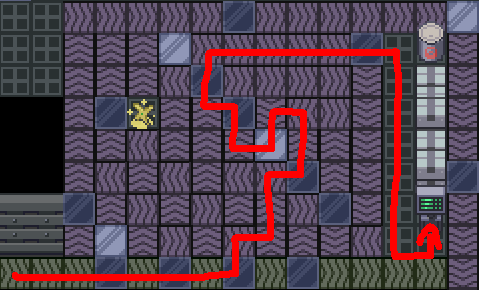
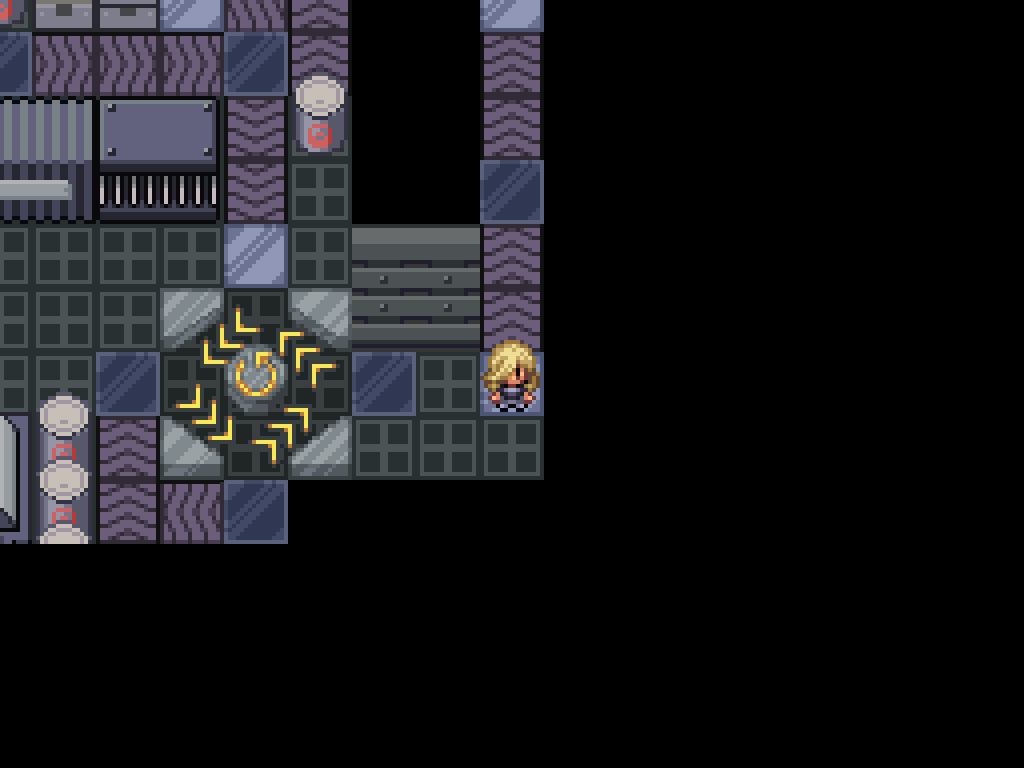
Devon Corp? Sub-Puzzle 3
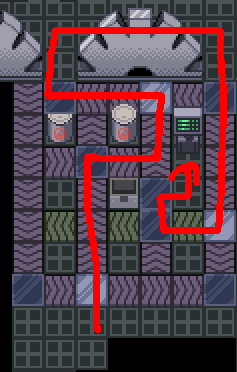
This one is a straightforward maze. Follow the red line to get to the computer, then toggle the computer to flip the direction of the green conveyor.
The next segment is functionally linear. Use the lowest computer to flip the belts, then walk through it to get to the second computer to flip the belt next to the second circular element. Walk back down, flip the belt again, and walk through the lowest circular element three times from the right side.
It'll spit you out up here. Activate the computer, then walk back on the left belt and you'll be carried all the way down. Just repeat this process until you eventually end up at the top in front of a computer; flip it, then walk on the flipped belt to the right slightly and activate the second computer. Ride the belt up to the top, save your game, and prepare for a boss fight.

Once you walk into the final room at the back, you'll be greeted with a cutscene. Say No for some free relationship points, before a boss fight with Zel.
Meteor Admin ZEL
| Sprite | Name | Level | Ability | Held Item | Moves | EVs |
|---|---|---|---|---|---|---|
|
|
Avalugg | 80 | Ice Body | Assault Vest |
|
252/252/0/0/0/4 |
|
|
Glaceon | 80 | Serene Grace | Synthetic Seed |
|
0/252/0/0/252/4 |
|
|
Alakazam | 80 | Magic Guard | Life Orb |
|
4/0/0/252/0/252 |
|
|
Espeon | 80 | Magic Bounce | Synthetic Seed |
|
0/252/4/252/0/0 |
|
|
Umbreon | 80 | Magic Guard | Leftovers |
|
0/252/0/0/0/252 |
|
|
Magnezone-PULSE | 85 | Levitate | Wiki Berry |
|
0/252/0/0/252/0 |
After defeating them, you can talk to Zero and then exit the room via the stairs; the exit from Devon Corp is, mercifully, to the left side of the wall and not by tracking all the way back through the puzzles.
Devon Corp, Again
There's an optional quest you can do now, which will finally remove all of those annoying invisible objects in the Jasper and Beryl Wards; plus, there's a handful of good items you missed, and a Treecko in it for you! See the starter appendicies for more information.
The Fairy Gym

After that ordeal, it's time for your next gym badge. You can find Adrienn in the Coral Gym; if you talk to xem, you'll get asked to round up a bunch of volunteers to do some tasks around the city. The rewards here are terrible, so say "no" and continue onto the gym battle. Adrienn is the Fairy leader (very subtle!) and uses a team that I built from the ground up (as the old team was terrible), including a very trolly lead designed specifically to screw a certain strategy.
As per usual, some tips:
- This one's custom built! By yours truly!
- The gimmick here is based around the two fields. The field starts on Misty Terrain which obviously boosts Fairy moves, but when xer Whimsicott comes out it will blow away the misty terrain and switch the field to Fairy Tale field, which boosts Fairy moves as well—but more importantly, Steel moves. If Tapu Fini comes out after that it'll set the field back to Misty Terrain for several turns, too!
- This means that if you survive, your Steel moves will do extra damage. But you have to survive first.
- Xer Togekiss is the most dangerous thing here, with Serene Grace boosted Air Slash for flinches and Aura Sphere for dealing with your Steel types.
- You'll want something with Fake Out support, as usual for double battles. Purugly has it, and on the Fairy Tale field it has Steel-type Slash for extra damage!
- Whilst Fire types resist Fairy defensively, on the Fairy Tale field fire attacks gain a Dragon secondary typing—so your fire attacks become completely useless.
- Xer Umbreon is extremely bulky and has 75% healing on Wish! Bring some Fighting coverage to deal with it.
- Tinkaton is so good here, with Gigaton Hammer annihilating the enemies and even getting some bonus damage under the Fairy Tale field.
- This battle's difficulty does depend a bit on how stupid the AI is, because it's not that good at managing the dual fields.
Visionary Adrienn
| Sprite | Name | Level | Ability | Held Item | Moves | EVs |
|---|---|---|---|---|---|---|
|
|
Gardevoir | 80 | Trace | Elemental Seed |
|
0/0/4/252/0/252 |
|
|
Togekiss | 80 | Serene Grace | Leftovers |
|
0/0/4/252/0/252 |
|
|
Umbreon | 80 | Magic Guard | Magical Seed |
|
252/0/252/0/4/0 |
|
|
Whimsicott | 80 | Prankster | Focus Sash |
|
4/0/0/252/0/252 |
|
|
Tapu Fini | 81 | Misty Surge | Leftovers |
|
74/252/184/0/0/0 |
|
|
Mismagius | 80 | Magician | Mismagiusite |
|
0/0/80/116/0/252 |
With that done, you finally get your next level cap increase, all the way to Level 85. You now have access to the Toumaline Desert, but before that, let's take a look at the City Restoration projects and their associated quests.