Victory Road, Part #1: Battle of the Bulge
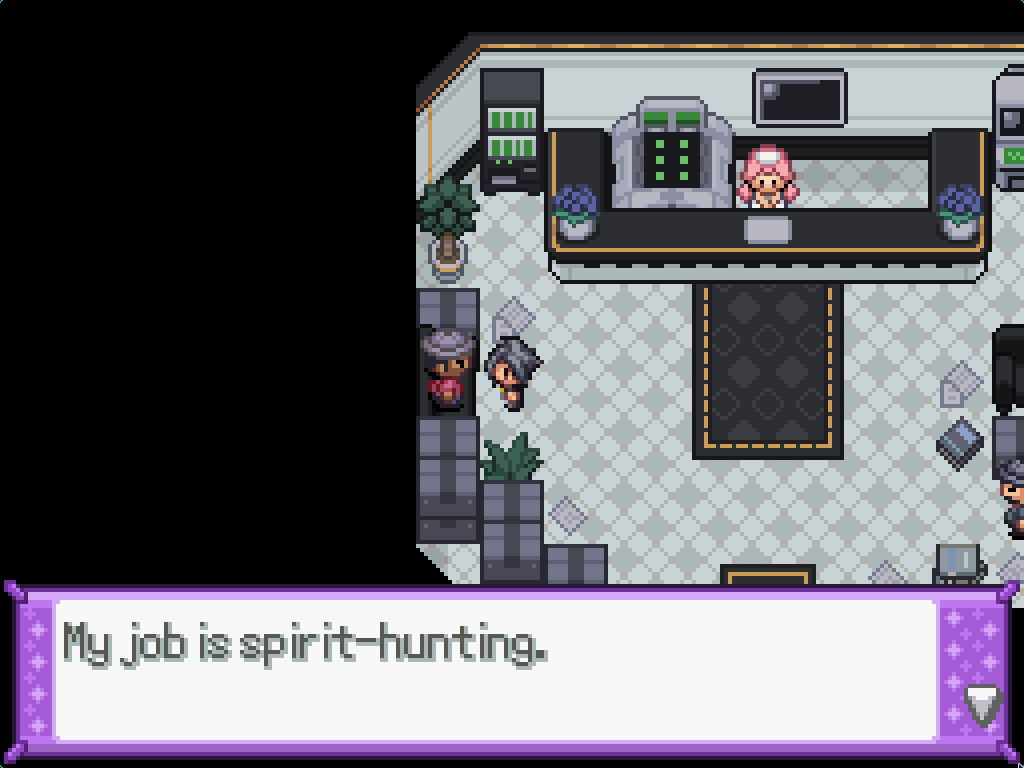
After exiting out of the arena, if you're on the R route, you'll get a small cutscene with Solaris. Ignore the actual dungeon up ahead and walk into the Pokémon Centre, then talk to this guy sitting on the boxes to get a side quest: spirit hunting!
I'll guide you through killing all of the spirits, don't worry. But they run Level 100 teams—and I've changed a lot to use a selection from my oomfies (─‿‿─)♡—so you might want to come back in the postgame when you can wipe them easily. You do need to actually kill them all to get the Paradox Pokémon later on.
You can also buy a bunch of REALLY good TMs in the Pokécentre here.
It Begins

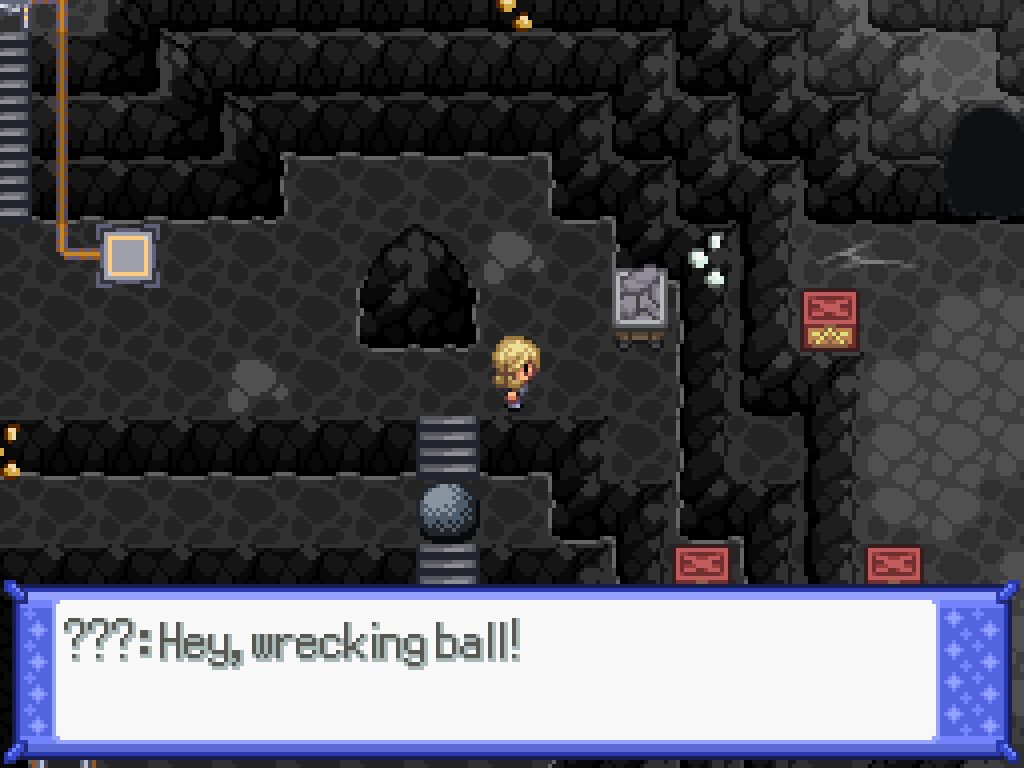
Enter Victory Road to the north to enter Reborn's first real dungeon. Keep going into the second room; the path here is blocked by a gate, so walk to the right and push the rock up onto the plate for a small cutscene. In this first room you'll be assaulted by icicles non-stop; if they hit you all your Pokémon take (ice) damage, so try to avoid it. Walk up the now open gate and into the next room.
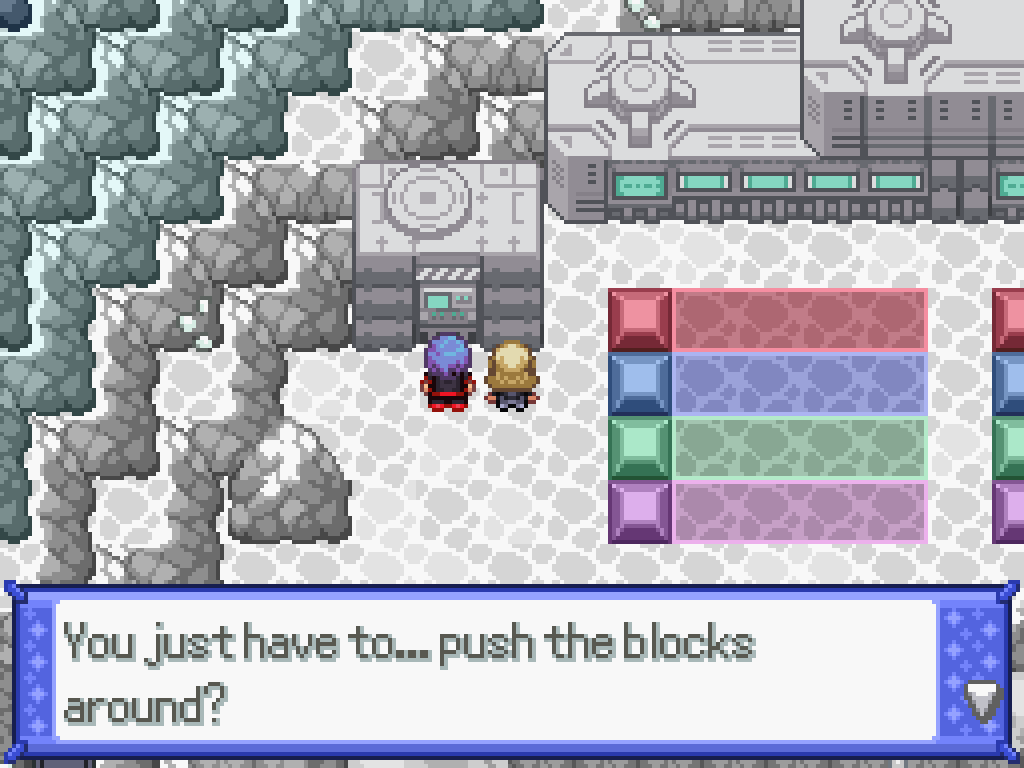
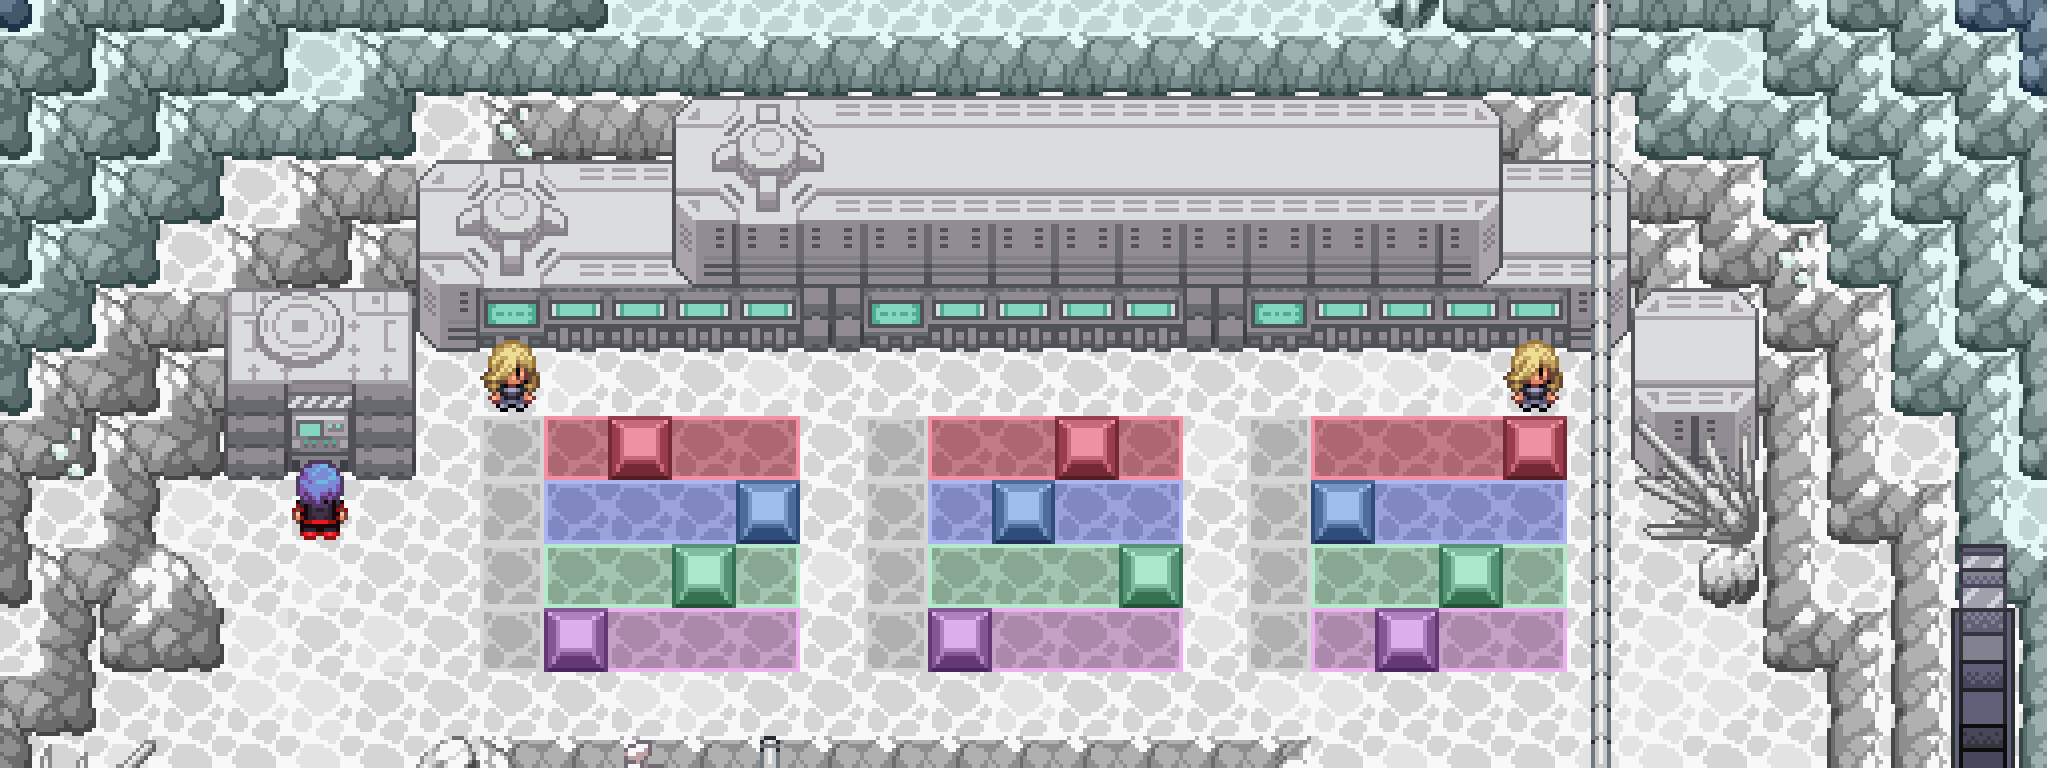
Oh fucking boy. This is the first of approximately six of these so-called "logic" puzzles, where you have to push the blocks into the right place according to the rules on the computer. Interact with the computer and Cal will spawn; he'll show you the rules for this puzzle. I'll just show you the solution.
Logic Puzzle #1
You might have noticed that you flashed a few times whenever you entered the room. That's your spirit checker or whatever the item is telling you there's a spirit in this room. Instead of going through the now-open gate, walk to the right of it and up on the cliff and you'll find your first spirit to kill!
Wandering Spirit Mariechen
| Sprite | Name | Level | Ability | Held Item | Moves | EVs |
|---|---|---|---|---|---|---|
|
|
Zoroark-Unova | 100 | Illusion | Life Orb |
|
4/0/0/252/0/252 |
|
|
Spiritomb | 100 | Infiltrator | Leftovers |
|
252/0/0/252/4/0 |
|
|
Krookodile | 100 | Intimidate | Choice Band |
|
4/252/0/0/0/252 |
|
|
Gothitelle | 100 | Competitive | Leftovers |
|
4/0/0/252/0/252 |
|
|
Weezing-Galar | 100 | Neutr. Gas | Magical Seed |
|
4/0/252/252/0/0 |
|
|
Sigilyph | 100 | Tinted Lens | Life Orb |
|
4/0/0/252/0/252 |
Exit through the door and then walk up the stairs to find your next spirit. This one's a tough one; you might want to put her off for a while.
Wandering Spirit Aria
| Sprite | Name | Level | Ability | Held Item | Moves | EVs |
|---|---|---|---|---|---|---|
|
|
Zapdos-Galar | 100 | Pressure | Choice Scarf |
|
4/252/0/0/0/252 |
|
|
Mimikyu-Disguised | 100 | Disguise | Life Orb |
|
0/252/4/0/0/252 |
|
|
Absol | 100 | Pressure | Absolite |
|
4/252/0/0/0/252 |
|
|
Chandelure | 100 | Flash Fire | Synthetic Seed |
|
4/0/0/252/0/252 |
|
|
Meowscarada | 100 | Protean | Leftovers |
|
4/252/0/0/0/252 |
|
|
Marshadow | 100 | Technician | Life Orb |
|
4/252/0/0/0/252 |
Minecarts
Welcome to floor B1F! You know what this means...
It's time for the first minecart puzzle. Walk down the stairs, along to the right, and down to find a minecart; push it, then walk to the left and across the gap in the tracks to find a switch. Flip the switch once, but don't push the minecart again. Instead, walk across the gap, flip the switch to connect the tracks fully, and then push the minecart to move it to the left and create a shortcut to the start. Flip the switch again, and get in the minecart to make it to the next area. That was easy... too easy?
In the second room, take the minecart to the top. You should be able to immediately figure out your goal: get that strength rock below you to the panel that will unblock the gate. Walk slightly to the right to get a cutscene with Charlotte, then to the left to ride a minecart to a single switch. Flip the switch, get back in the minecart, whereupon you will exit to the south. This one is scarier than it looks, but don't worry, it's mostly just backtracking. For the west portion:
- First, get in the other minecart to find a switch. Flip it.
- Get back in that minecart to find a THIRD switch. Flip it, then return to the minecart where it will take you to the previous switch.
- Flip that switch, then get back in the minecart and it will take you back to the south.
- Get in the minecart at the south to be taken to the east portion of the area.
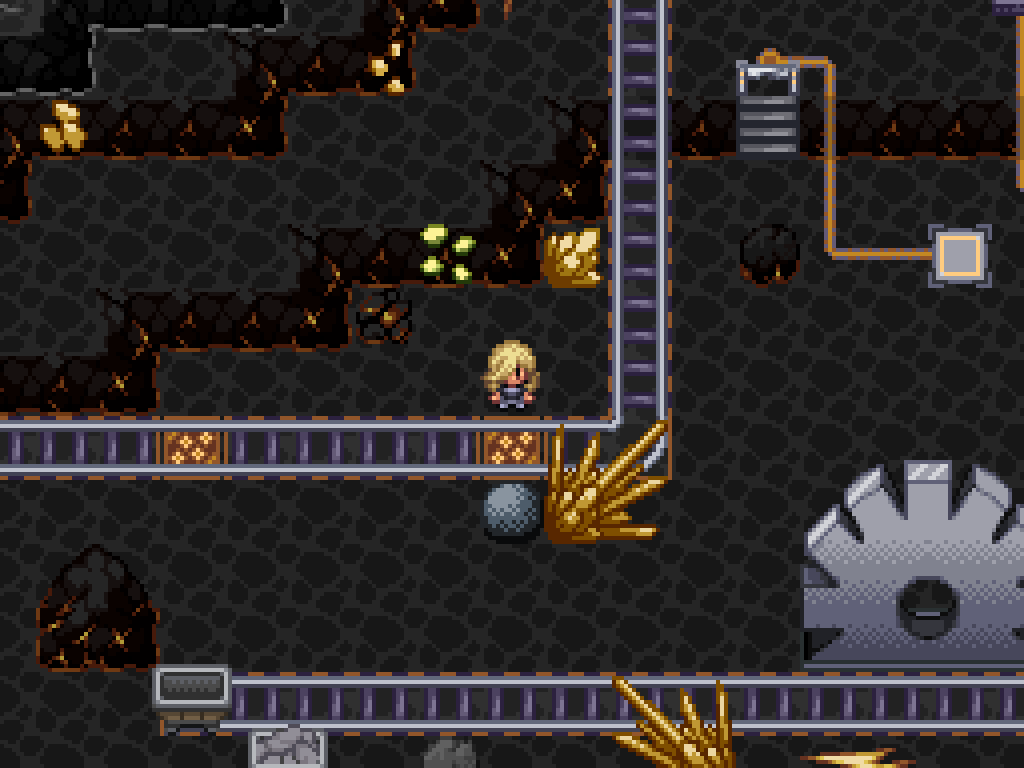
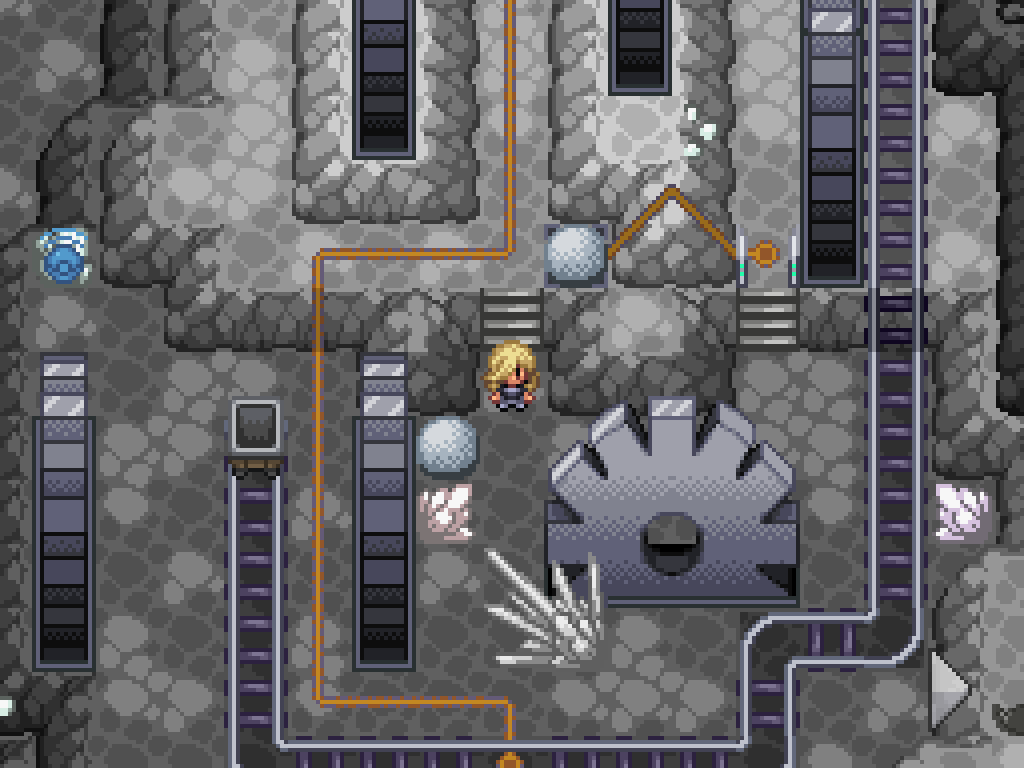
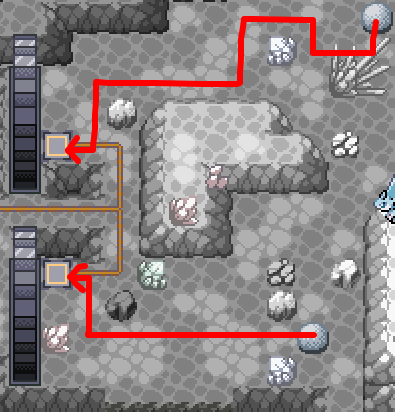
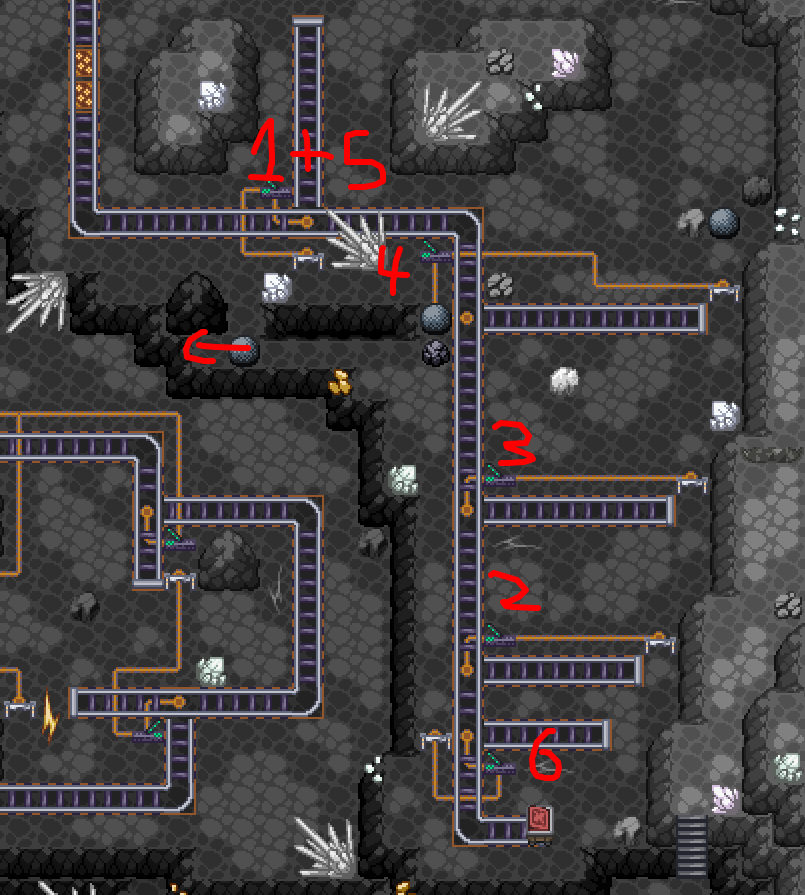
The next area is a bit more complex. First, follow all of the minecarts here until you reach a strength rock; move it all the way along to the stairs, then push it up and around the left of a big rock. You'll eventually need to move it to the spot in the screenshot above, then go through the gaps in the track to push it down and onto the panel. But whilst you're there, climb up the Rock Climb point and walk to the left to find another spirit.
Wandering Spirit Maya
| Sprite | Name | Level | Ability | Held Item | Moves | EVs |
|---|---|---|---|---|---|---|
|
|
Pelipper | 100 | Drizzle | Damp Rock |
|
252/0/0/4/0/252 |
|
|
Phione | 100 | Hydration | Elemental Seed |
|
4/0/0/252/0/252 |
|
|
Manaphy | 100 | Hydration | Life Orb |
|
4/0/0/252/0/252 |
|
|
Absol | 100 | Justified | Elemental Seed |
|
0/252/0/0/4/252 |
|
|
Latias | 100 | Levitate | Latiasite |
|
252/0/0/252/0/4 |
|
|
Peppermint | 100 | Gluttony | Leftovers |
|
4/252/0/0/0/252 |
With the gate opened, flip the switch then enter the available minecart at the bottom left to get to the second switch. Flip it, then enter the minecart again to be brought back to the lower left area. Walk back up to the gate and flip the first switch again, then re-enter that minecart. This lets you reach the Strength rock from the start of this area, and you can push it up across the stairs... but it blocks your path. Walk along the newly available area to the left to find the Tyranitarite (yuck).
Now you need to go all the way back. First, get back in the minecart, then back in the more minecart, and flip the switch behind the gate. Return back to the minecart, flip the other switch near the rock, then flip the switch behind the gate again. This will send you all the way back to the southern area; first, get in the available minecart and flip the switch. Get back in the minecart, walk to the left, and flip the switch again. Eventually, you'll make it back to the other side of the strength rock.
This finally unlocks the switch at the top of the room, behind the gate. Flip it, then use the minecart to your side to exit out into—you guessed it—the first room! Again! With the ice spikes being thrown at you constantly!
Strength Rocks
Who doesn't love strength puzzles? I love them so much that in my first few runs through this area, I walk-through-walls this entire section. Lovely. I can't do that now because I'm actually writing a walkthrough for you.
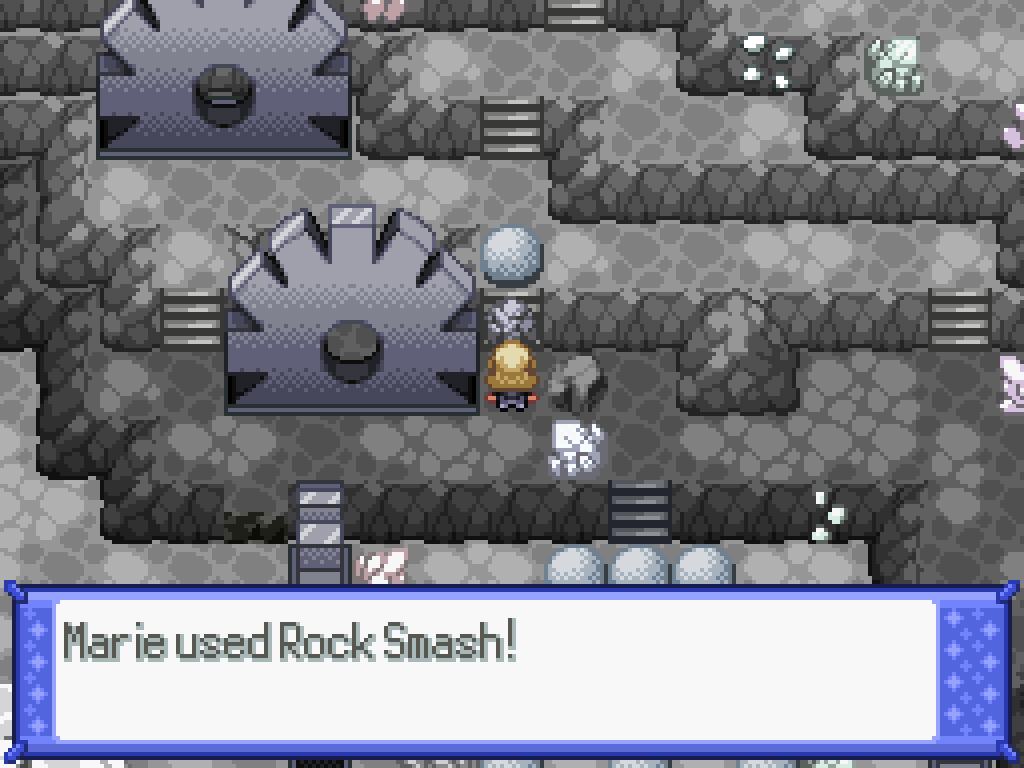
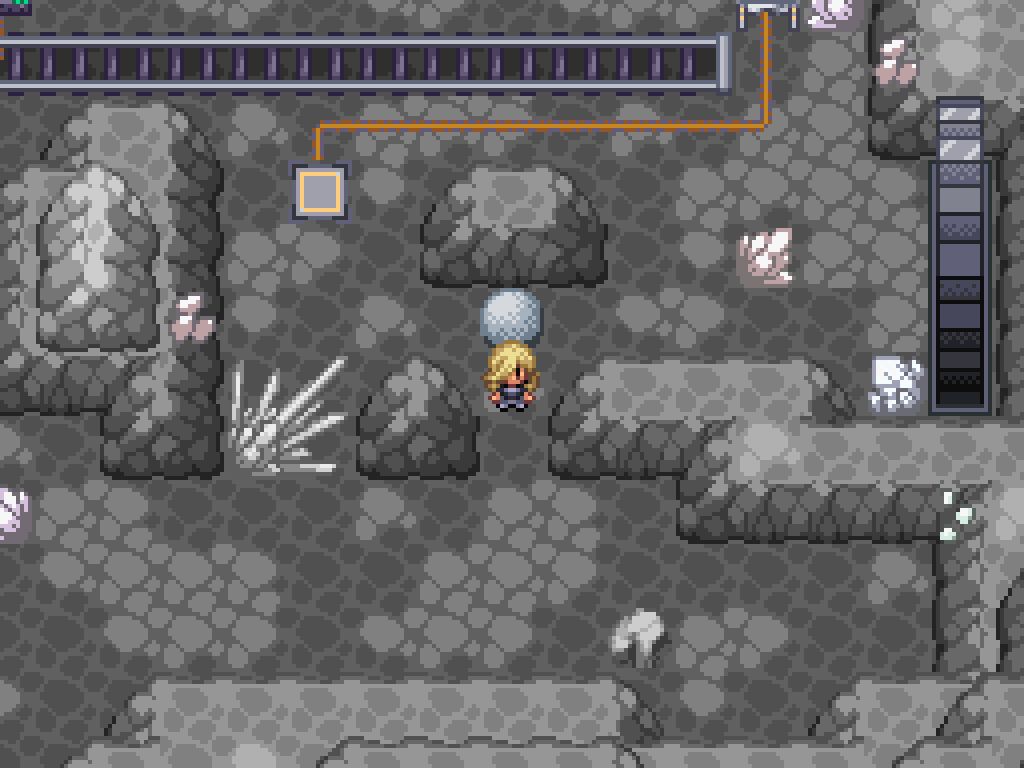
First, push the first Strength rock to the right to unblock the path downwards, then push the second rock downwards one tile. Walk down the left< stairs (DO NOT JUMP DOWN THE LEDGE) and then smash this rock to open up some more stairs. Push the rock back up to open up the right-side stairs, whereupon you are faced with a Strength rock "puzzle". I recommend quicksaving so that if you mess it up you can reset easily.
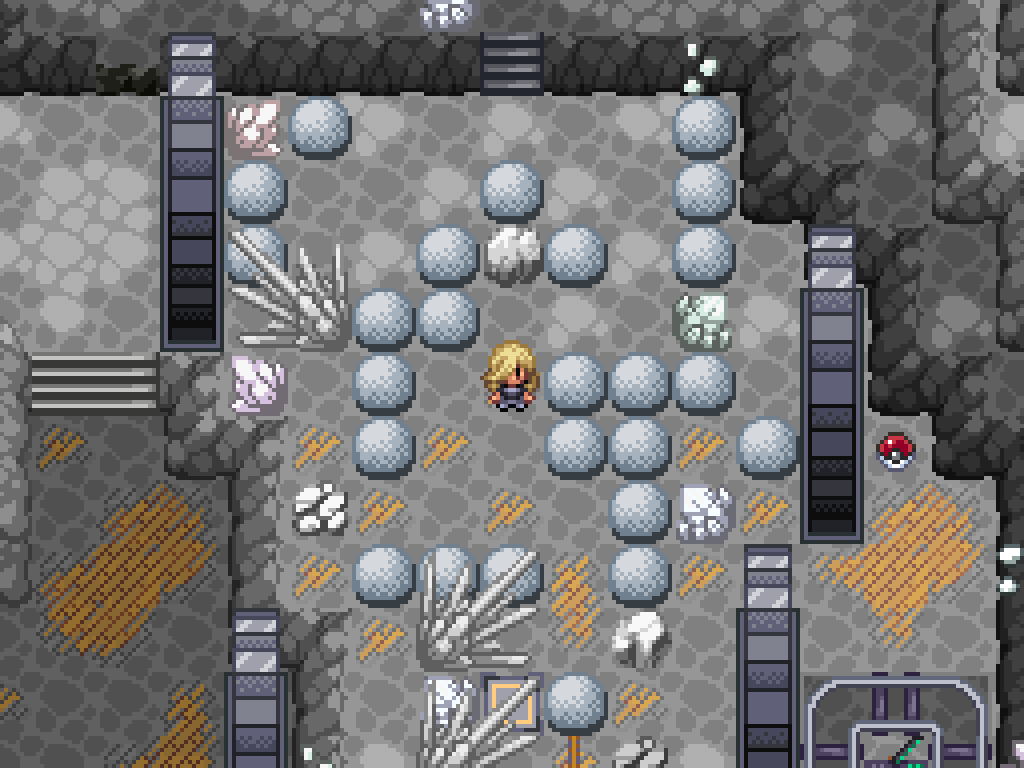
Push all the rocks at the top to the most left or most right sides. Next, you need to push the rocks around to make a corridor like this; remember, you can't push two rocks at once. When you make it to the bottom, push the rock directly next to the pad down one, then walk around and push the other rock to the left one, allowing you to push the rock above it up one tile and then onto the pad.
Push the lower rock right one tile onto the pad to open the gate. Walk up and around to push the lower rock left one tile, unblocking the path from the stairs. Get in the minecart to reach the switch, flip it (which unlocks a gate back to the previous puzzle), then get back in the minecart to reach a lower area. If you take the Rock Climb route to the right, you'll reach your fourth spirit.
Wandering Spirit Mel
| Sprite | Name | Level | Ability | Held Item | Moves | EVs |
|---|---|---|---|---|---|---|
|
|
Galvantula | 100 | Swarm | Choice Scarf |
|
4/0/0/252/0/252 |
|
|
Nidoqueen | 100 | Sheer Force | Life Orb |
|
4/0/0/252/0/252 |
|
|
Scolipede | 100 | Swarm | Scolipite |
|
0/252/0/0/4/252 |
|
|
Lurantis | 100 | Sharpness | Life Orb |
|
4/252/0/0/0/252 |
|
|
Emolga | 100 | Motor Drive | Leftovers |
|
4/0/0/252/0/252 |
|
|
Seviper | 100 | Infiltrator | Telluric Seed |
|
252/252/0/0/0/4 |
More Minecarts
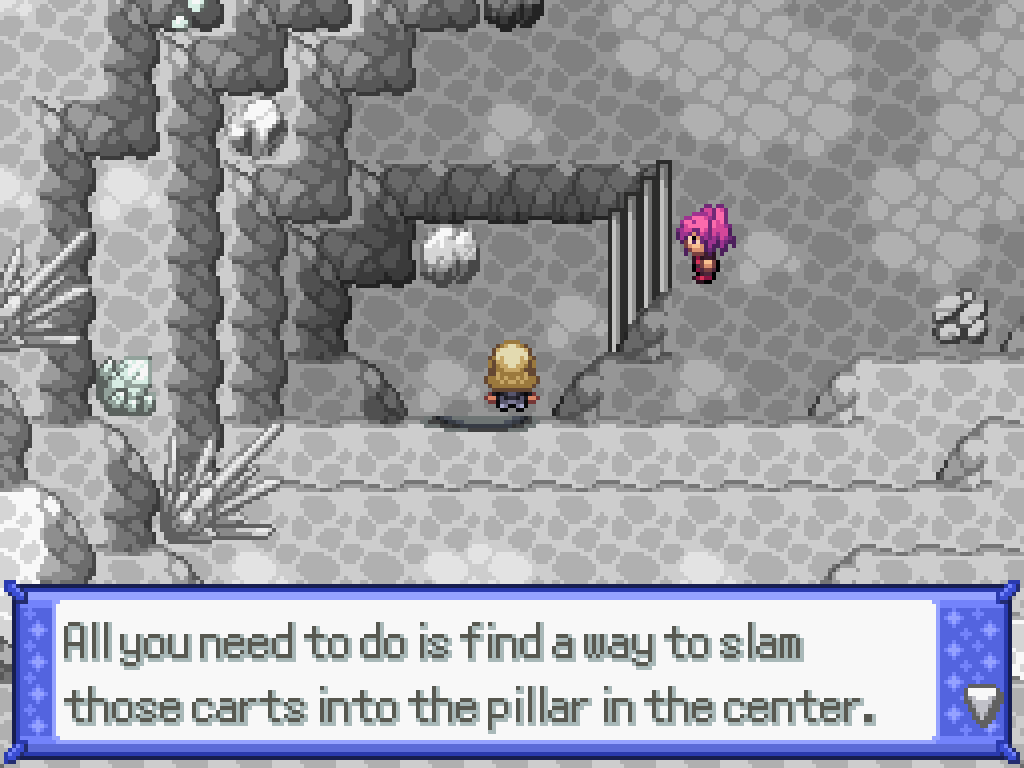
The goal here is to blast the pillar from four separate areas. This means... four separate puzzles. Wonderful. Before you go to the minecart switcher, you should instead fight the three spirits here; the rock climb paths all over the room lead directly to them.
First, on the top middle island:
Wandering Spirit Camille
| Sprite | Name | Level | Ability | Held Item | Moves | EVs |
|---|---|---|---|---|---|---|
|
|
Sableye | 100 | Prankster | Leftovers |
|
252/0/112/0/144/0 |
|
|
Mismagius | 100 | Magician | Magical Seed |
|
4/0/0/252/0/252 |
|
|
Glaceon | 100 | Ice Scales | Assault Vest |
|
252/0/0/252/4/0 |
|
|
Heracross | 100 | Swarm | Heracronite |
|
4/252/0/0/0/252 |
|
|
Slowking-Kanto | 100 | Regenerator | Leftovers |
|
252/0/4/0/0/252 |
|
|
Gardevoir | 100 | Trace | Life Orb |
|
4/0/0/252/0/252 |
Next, at the very top left:
Wandering Spirit Lewi
| Sprite | Name | Level | Ability | Held Item | Moves | EVs |
|---|---|---|---|---|---|---|
|
|
Chatot | 100 | Soundproof | Telluric Seed |
|
4/0/0/252/0/252 |
|
|
Vespiquen | 100 | Q. Majesty | Life Orb |
|
252/252/0/0/4/0 |
|
|
Azumarill | 100 | Huge Power | Leftovers |
|
4/252/0/0/0/252 |
|
|
Empoleon | 100 | Competitive | Life Orb |
|
4/0/0/252/0/252 |
|
|
Colin | 100 | Chlorophyll | Victreebelite X |
|
0/252/4/0/0/252 |
|
|
Quagsire | 100 | Unaware | Telluric Seed |
|
200/252/0/0/52/0 |
Finally, at the bottom right:
Wandering Spirit Jamiea
| Sprite | Name | Level | Ability | Held Item | Moves | EVs |
|---|---|---|---|---|---|---|
|
|
Ninetales-Kanto | 100 | Drought | Heat Rock |
|
252/0/4/0/0/252 |
|
|
Rapidash-Galar | 100 | Flash Fire | Choice Scarf |
|
160/92/0/0/0/252 |
|
|
Sawsbuck-Winter | 100 | Slush Rush | Life Orb |
|
4/252/0/0/0/252 |
|
|
Volcarona | 100 | Flame Body | Elemental Seed |
|
0/0/4/252/0/252 |
|
|
Delphox | 100 | Blaze | Delphoxite |
|
4/0/0/252/0/252 |
|
|
Lycanroc-Midnight | 100 | Sturdy | Heavy-Duty Boots |
|
0/252/4/0/0/252 |
When you're ready, return to the minecart switcher just above the stairs. We'll do this anticlockwise, starting with the top-most minecart.
North Minecart Area
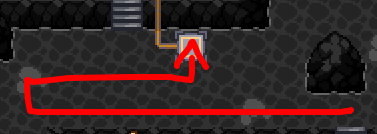
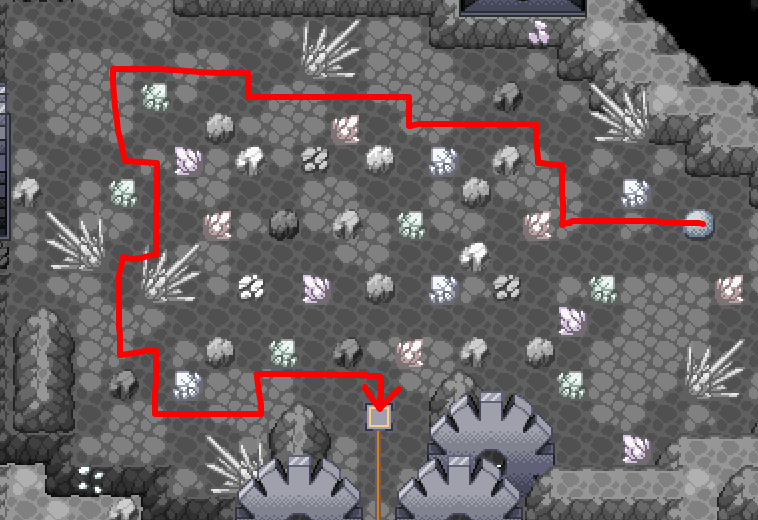
This area starts with a very basic strength puzzle. Make sure not to get softlocked, but follow the arrows. You need to push the boulders from the right side, so walk all the way around before pushing each one in; if you try pushing both into the slot simultaneously, you'll softlock yourself. Use the Rock Climb point to jump down to the lower area.
This one is deceptively simple; load the rocks up here using the minecart, then let them fly off the end of the tracks to create a rock climb point, allowing you to access the next switch. Do this two more times until you can reach the explosives cart, then set it off to blow up the pillar partially. Exit via the Rock Climb point to the left to get back to 2F.
West Minecart Area
The strength puzzle here is purely designed to trick you. Push the rock up and around the crystals, rather than trying to figure out a way through. Jump in the minecart to be brought to the lower area. This puzzle also looks scarier than it is, but it's another one of those backtracking ones.
- Flip the switch to your top right, then activate the explosive cart to move it along. Flip the switch back.
- Flip the switch immediately below you, then activate the explosive cart again.
- Go through the gate to the right, flip the switch, then return and flip the lower switch. Activate the explosive cart again to move it to the right.
- Open the gate with the lower switch, flip the switch behind the upper-right gate, then return and flip the switch behind the lower gate. Activate the explosive cart to move it to the top-right.
- Flip the switch behind the lower gate to unblock the upper-right gate; ignore that switch and instead flip the one behind the upper-middle gate. Walk to the left and flip the very first switch too, to open the upper gate.
- Flip the upper-right switch and activate the cart to move it to the upper-middle area. Flip the upper-right switch again.
- Flip the upper-middle switch and activate the minecart to send it to a brand new area.
- The next switch is only accessible by walking all the way around to the bottom, left, up, and finally right to get it. Flip it, then activate the minecart.
- Finally, do another complete circle to reach the final switch at the top. Flip it, and then send the explosive cart straight into the pillar. Use the rock climb point to the east to return to the pathway to the minecart selector.
South Minecart Area
You get the idea by now. A simple area with a strength puzzle, followed by a stupid puzzle. Move the strength rock up into the fork, then get in the minecart and walk down to move the rock onto the pad. Get back in the minecart, then walk up through the now unblocked fork and into the gate to flip the switch. Return back to the minecart to get back to B1F again.
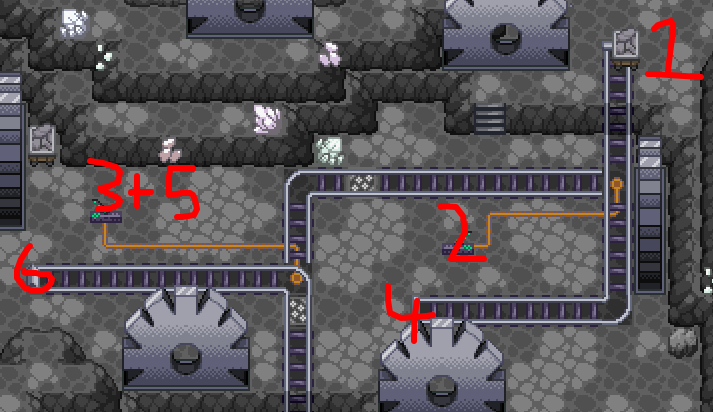
This puzzle is the inverse of the previous one. Rather than flipping the switches to open the gates, you flip the switches to close the gates.
Before doing anything, walk through all the open gates and to the left side to find two strength rocks and a rock smash rock.
- Smash the rock and move the strength rock to your left out of the way.
- Walk up and cross the tracks to find the switch #1; flip it to open the gate.
- Ignore the newly available switch; instead, walk back around and flip switch #2 and then switch #3. This closes the gates leading directly below you.
- Walk up to switch #4 above the strength rock and flip it, closing off the area to the right entirely.
- Activate switch #5 again to block switch #4, then walk all the way down and activate switch #6.
- Activate the explosive cart to send it into the pillar.
The way out is a rock climb point near the northeast—where you came in—blocked by a strength rock.
East Minecart Area
I think the icicle crashes are happening more frequently. This one's the hardest strength "puzzle" of them all.
- Get in the minecart and flip the switch.
- Get in the minecart to the left, then push the boulder onto the pad.
- Return to your first minecart to find a third minecart with rocks in it. Push it to move it to the top left.
- Return to the bottom with the first minecart, then get in the second one. Flip the switch above you, then push the rock minecart to make a small Rock Climb route.
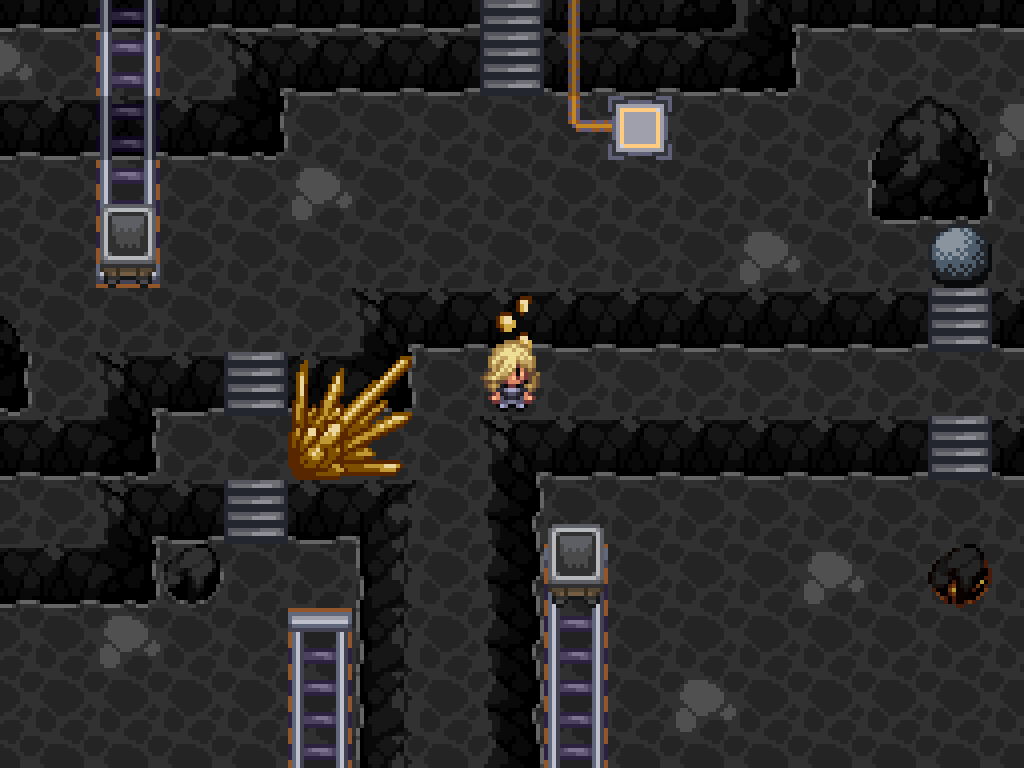
In the lower area, there's only one element—the strength rock. But you need to push it into the central area. Genuinely: this one is too easy for a screenshot. The path is extremely obvious, and every gap in the tracks is right next to where you need to switch the direction of the rock.
Push the cart to finally blow up the central pillar fully. Enter the upper area and speak to Charlotte if you wish; otherwise, take the south exit from this room and walk up into the now-destroyed main room. Take the minecart up to find a Rock Climb point; keep going all the way to the right side of the room. Take the Light Shard and enter the second part of Victory Road.