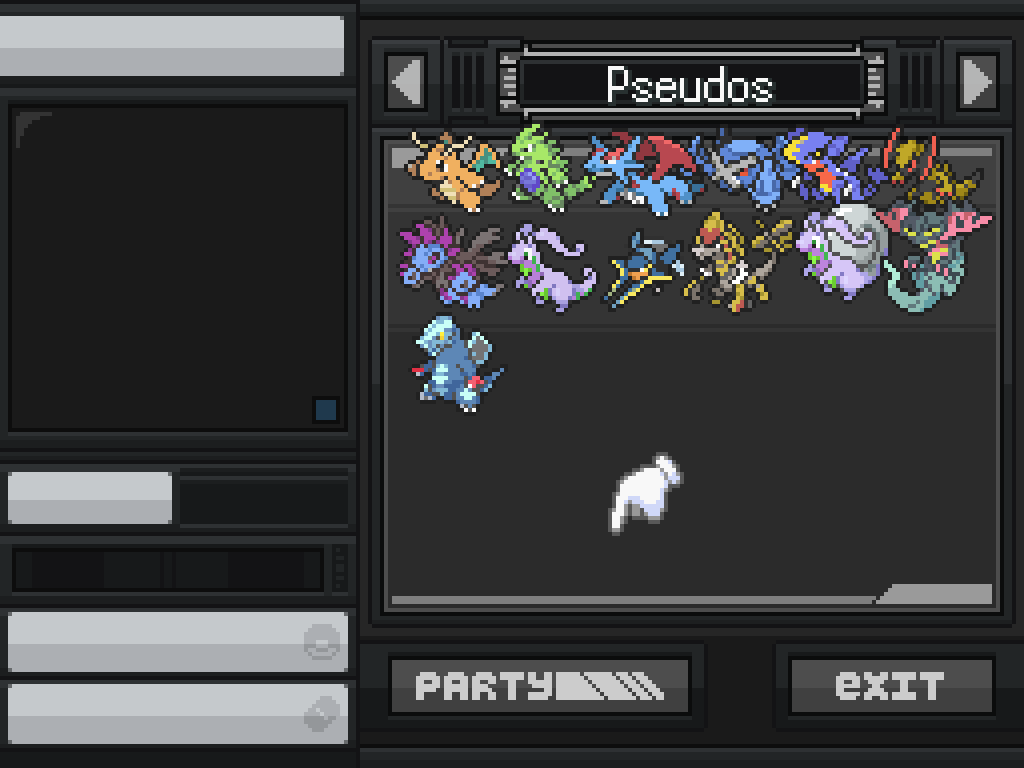
Appendices: Pseudo-legend Quests
The pseudo-legends are a set of Pokémon that satisfy the following criteria:
- Is not legendary. (Obviously.)
- Is a three-stage evolution.
- Has one million EXP at level 100.
- Has a base stat total of six hundred.
The mainline series has ten of these, and I've added two more— Haxorus and Vikavolt. Most importantly, every single one of these has either a quest involved in getting them or is only found in a hard to reach late-game area.
Haxorus
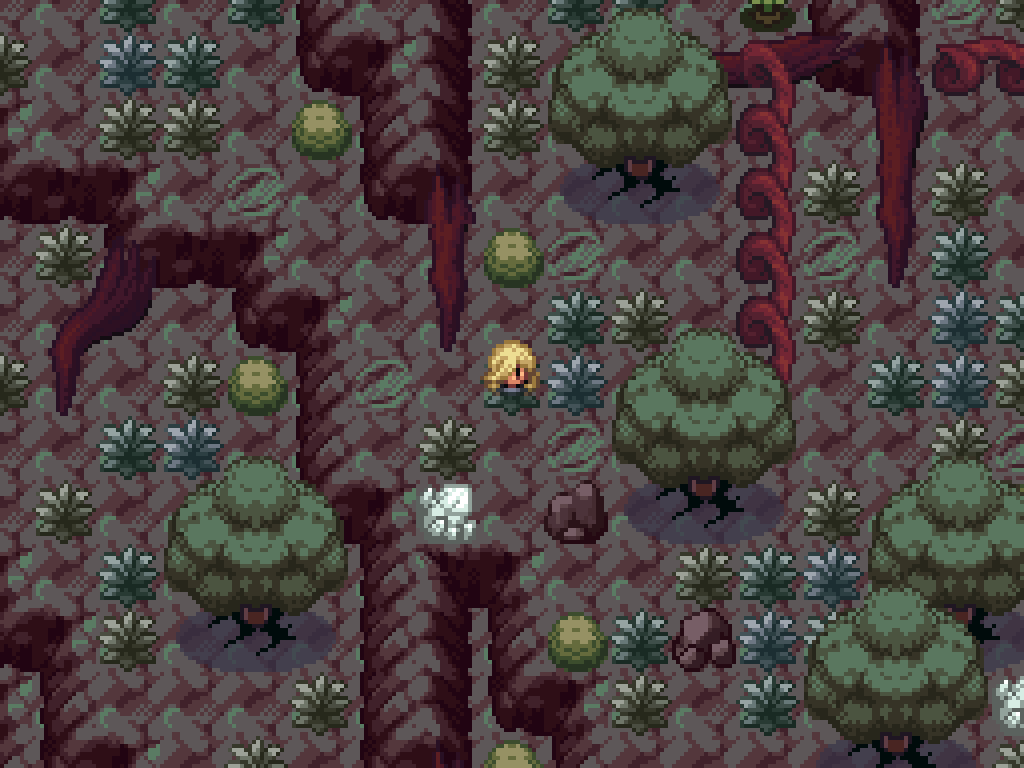
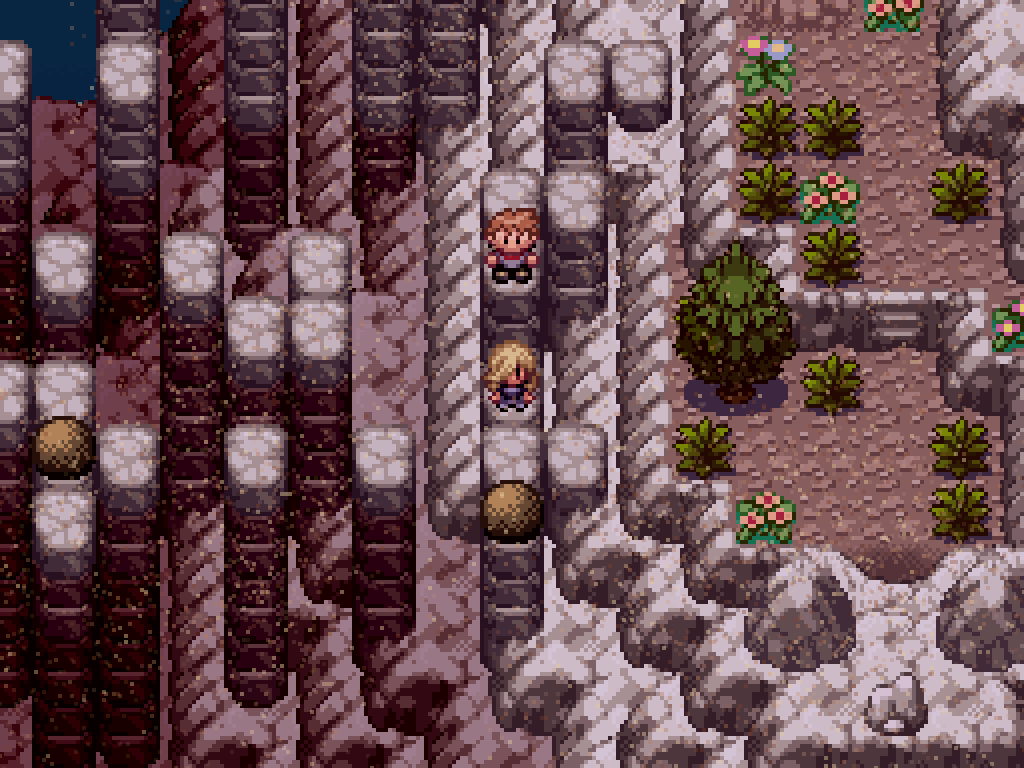
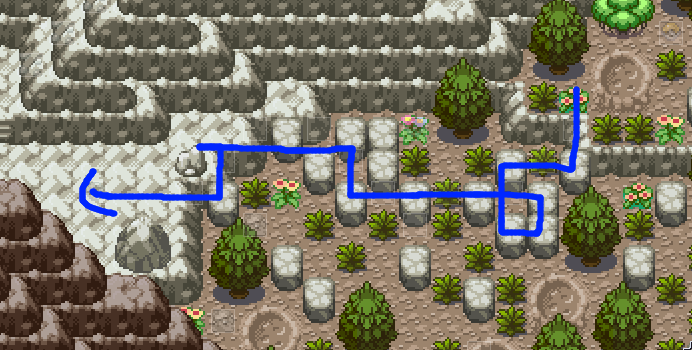
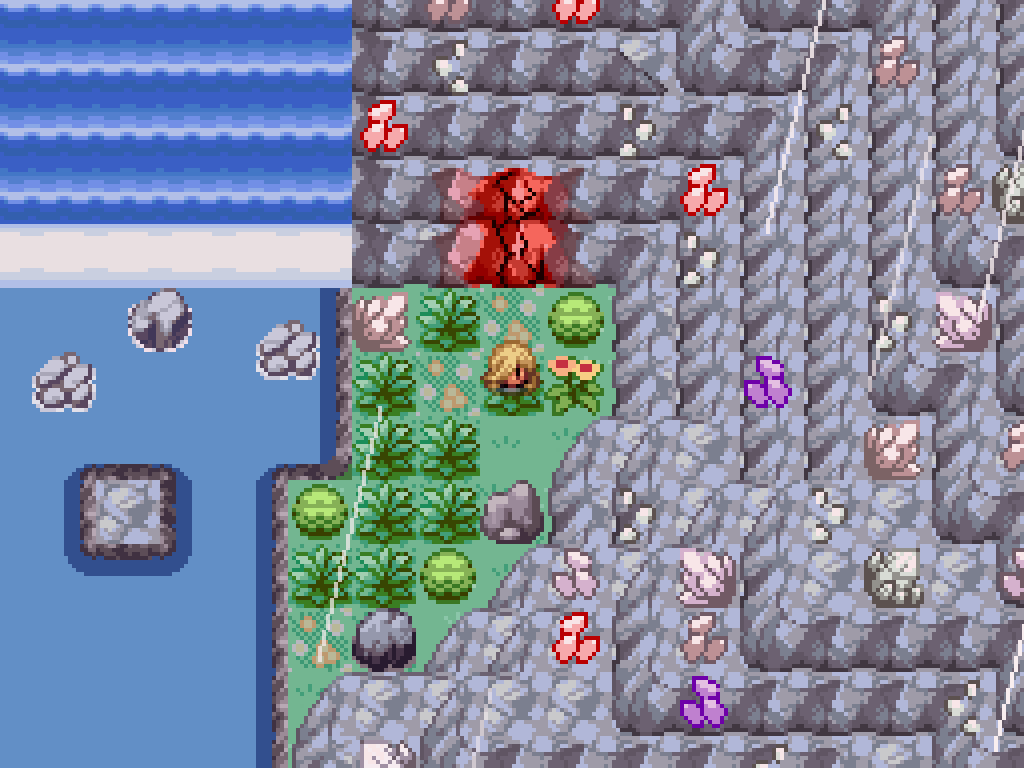
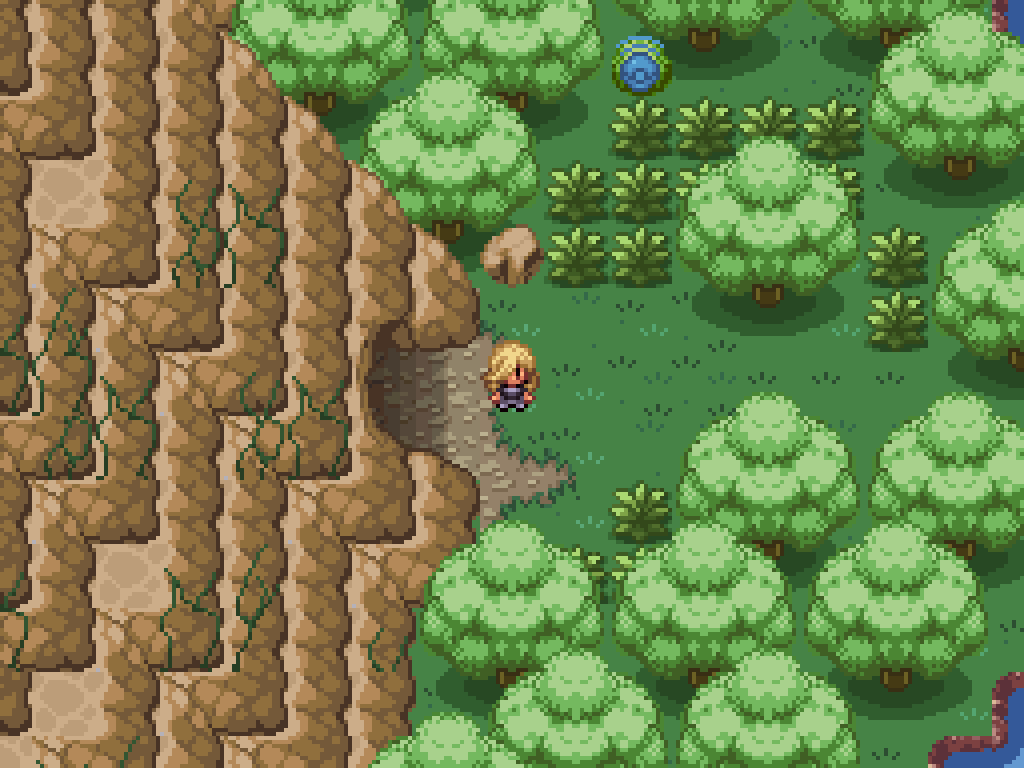
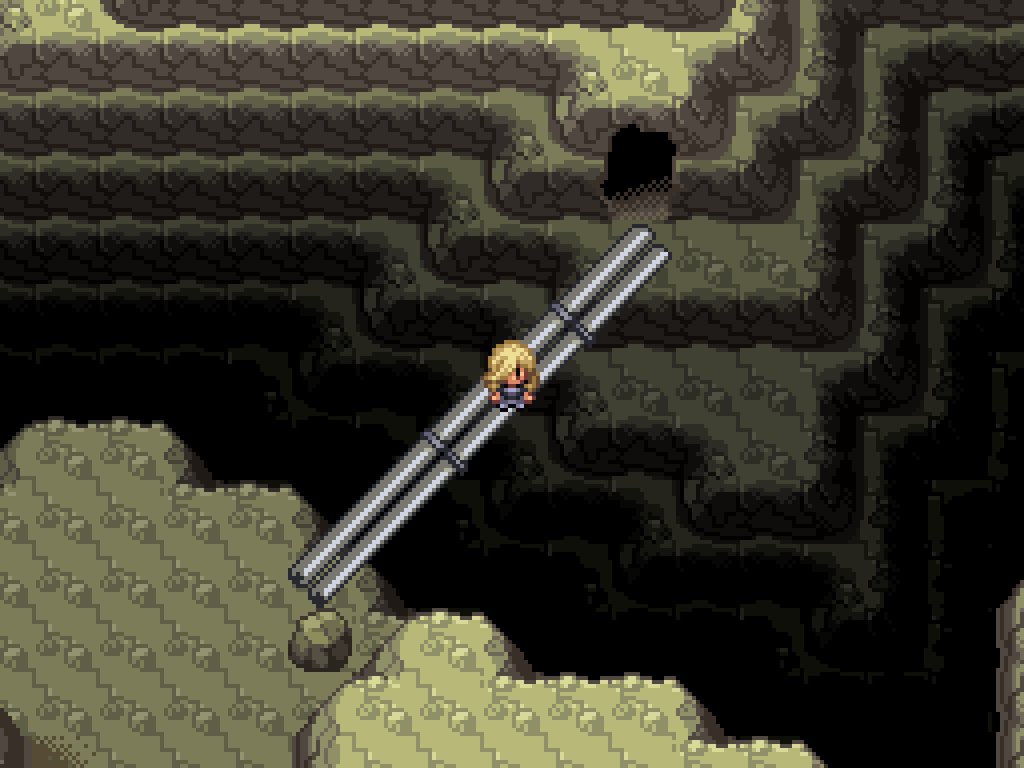
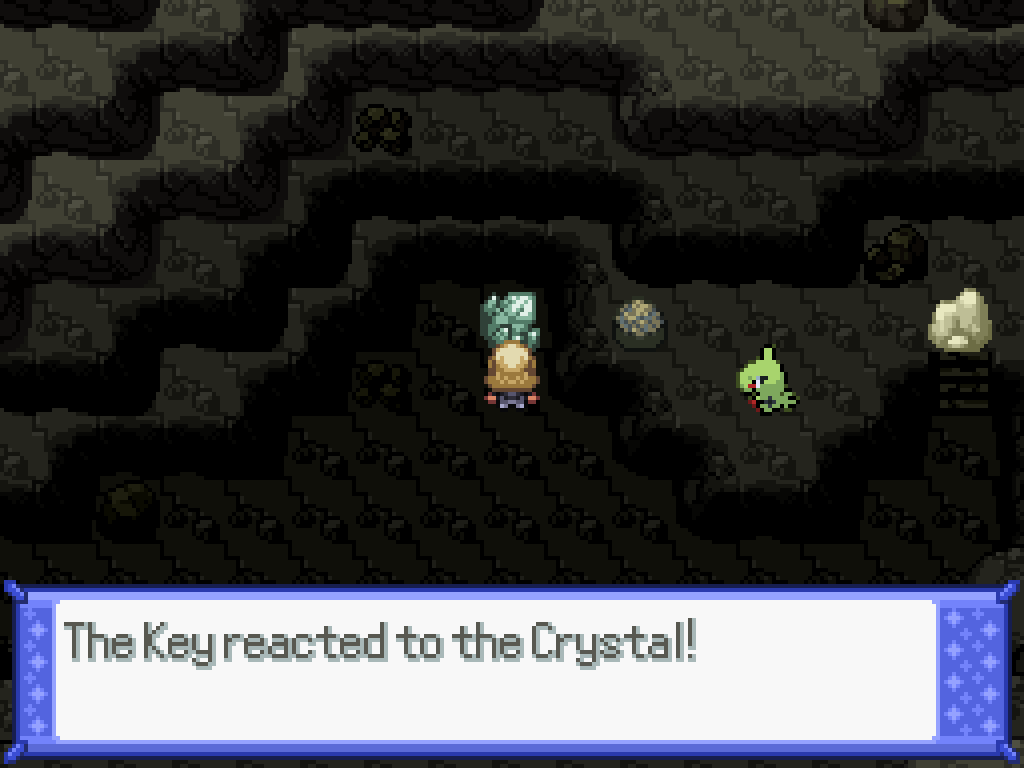
This one is fairly easy; as soon as you have the green crystal key from the Iolia Valley, find the glowing green rocks in the right side of the Underroot. The easiest way to get here is by falling down in the trap immediately by the lower entrance to the jungle.
Activate the rock and then break the crystals to be able to cut down a tree. Repeat this several times for every set of rock/crystal/tree, then move into the area with the Pokéball to find a Meadow Plate and an abandoned Axew egg.
Metagross
One of those stupid ones. This is probably the strongest walkthrough check in the whole game; I genuinely do not believe anyone would figure this out naturally.
Beldum Quest Walkthrough
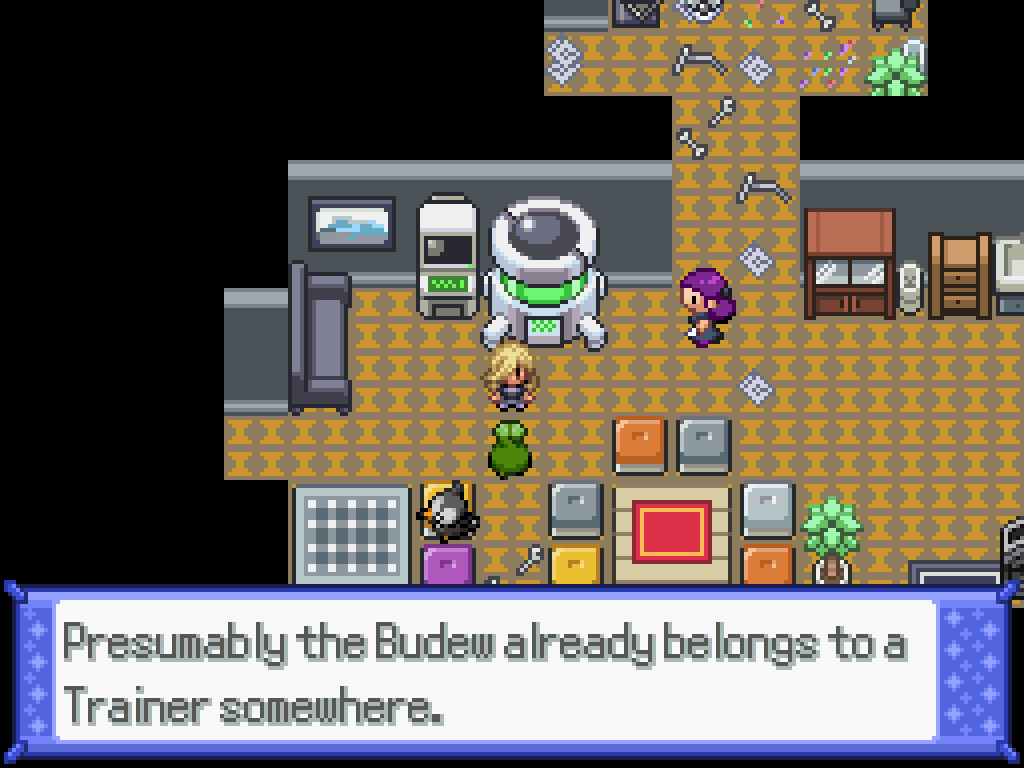
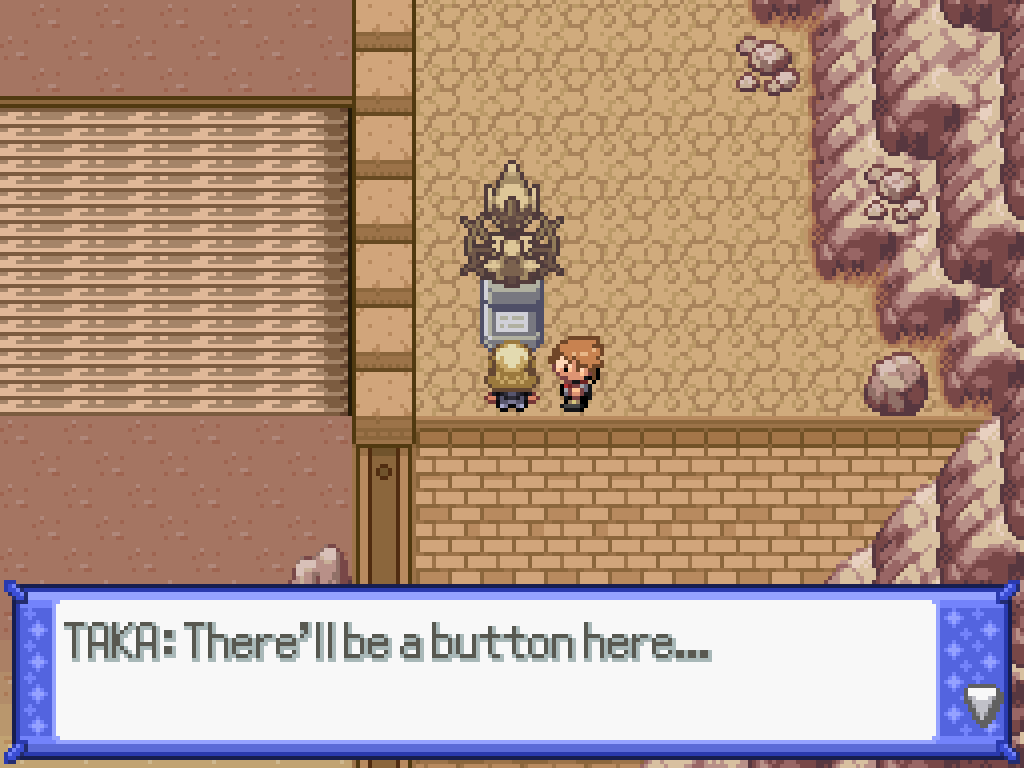
First, make your way to the Bysb- the Whatever Wasteland. Enter the hideout and activate the broken healing machine; say yes when prompted to break it even more. Then, activate the healing machine before leaving. Do NOT heal anywhere else until you're done!

Next, discard all of your Pokémon into a box except for one; it needs to be strong enough to kill a Bouffalant on Route 1, but weak enough to wipe out to a random battle. Something with recoil will work. Fly to Route 1 and kill a Bouffalant (anywhere will do) to start riding a Tauros. Start a wild battle (or several) and lose; you'll be teleported back to the Wasteland healing spot whilst still riding the Tauros.

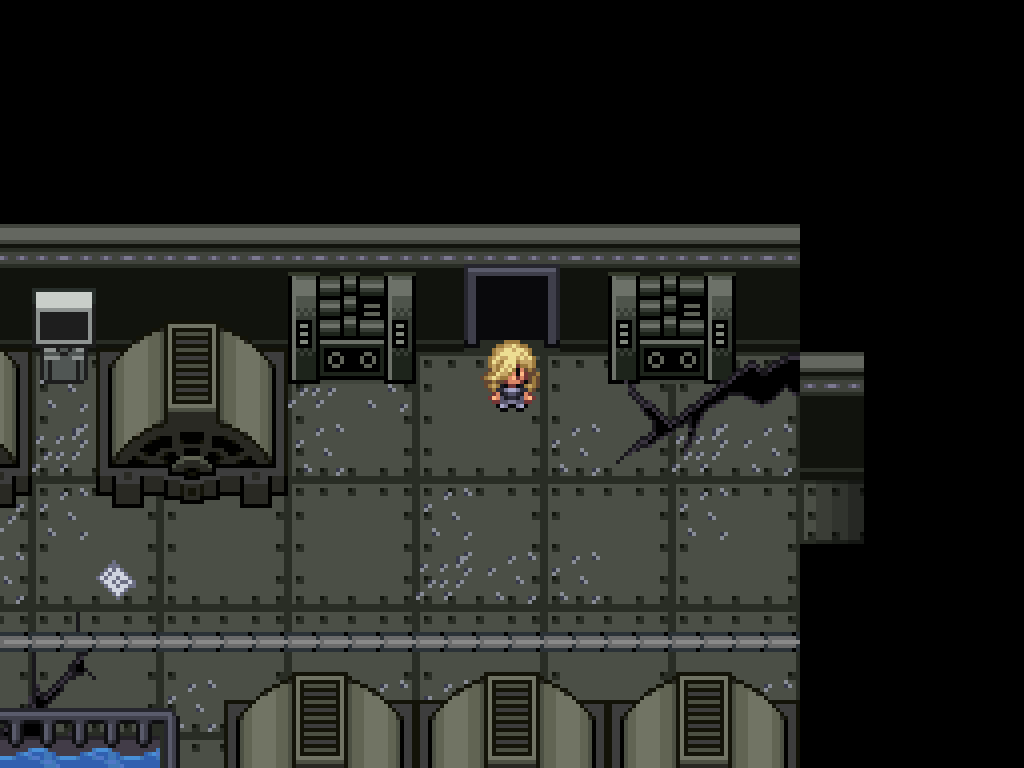
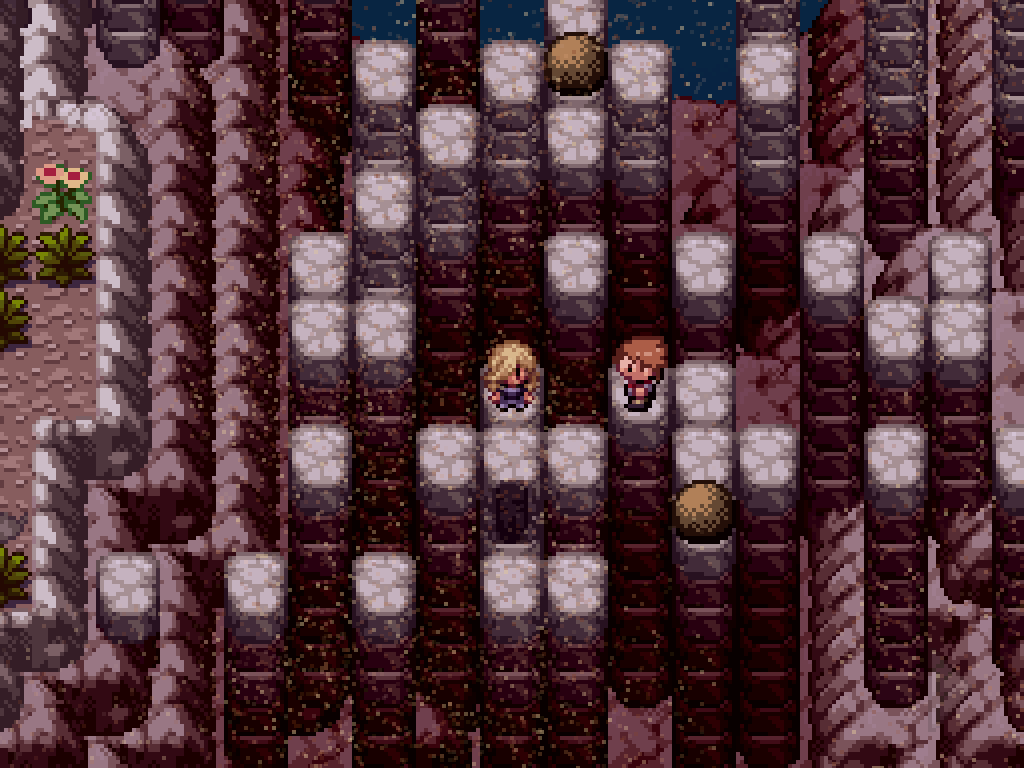
Use the Tauros to ride down into the cave at the bottom of the map behind a ledge. (You might've come here before, but you need the Tauros for a few extra ledges). Go through the secret door in the room with the tubes (it's behind the left tube, if you ignored it back in the last wasteland chapter) then follow the path through the caves until you find a long ledge inside a cave, below a set of stairs with a strength rock.
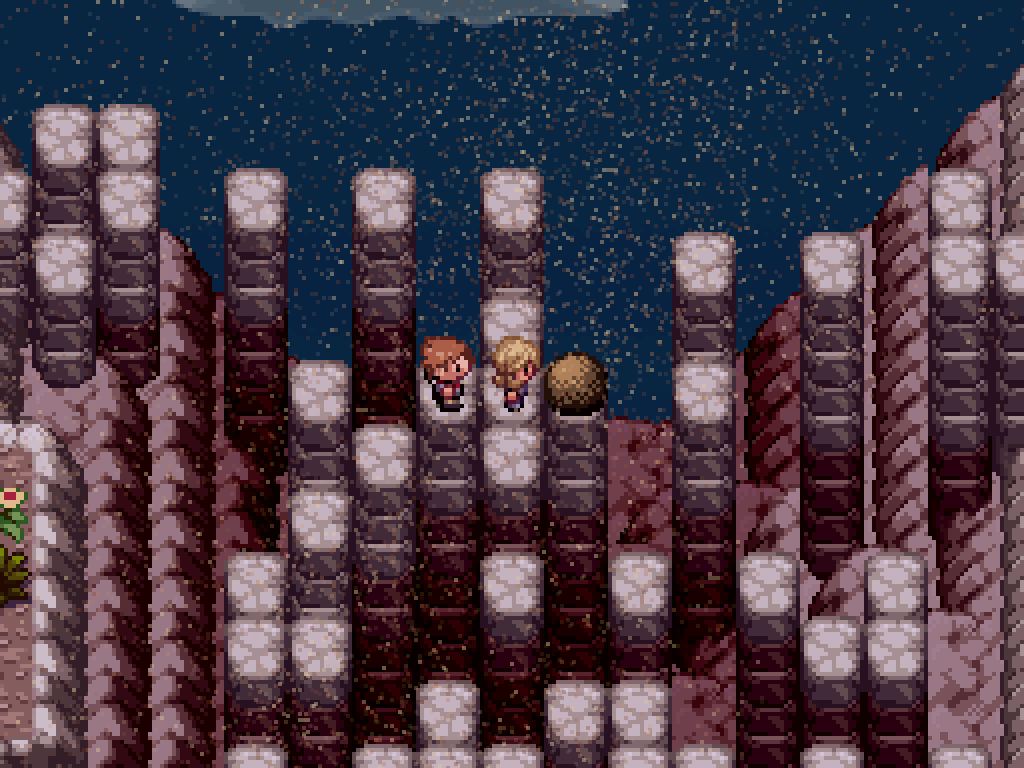
Jump up the ledge but ignore the stairs; instead, jump down to where the strength boulder is and push it aside. Exit out of the door at the top left of the cave to be spat out next to a pair of ledges; climb both of them to find a room with a broken tube. Interact with it to find a level 1 Beldum. Hope you have enough Pokéballs. You can also find the Dragalgite here.
Goodra

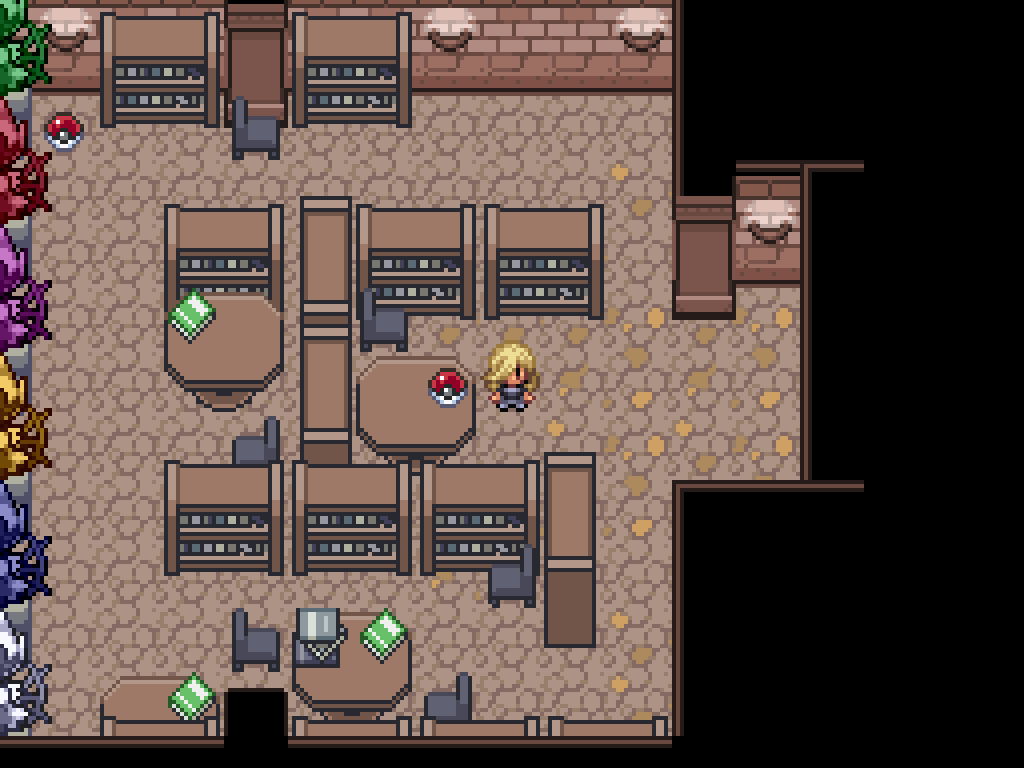
Once you've paid for the low-income housing project after the City Restore, talk to this guy in the SOLICE Lobby to get the GUM key. Return to 7th Street and re-enter the Water Treatment Facility; inside the Central Obsidia room you will find a locked door near the top. Try entering it to unlock it.
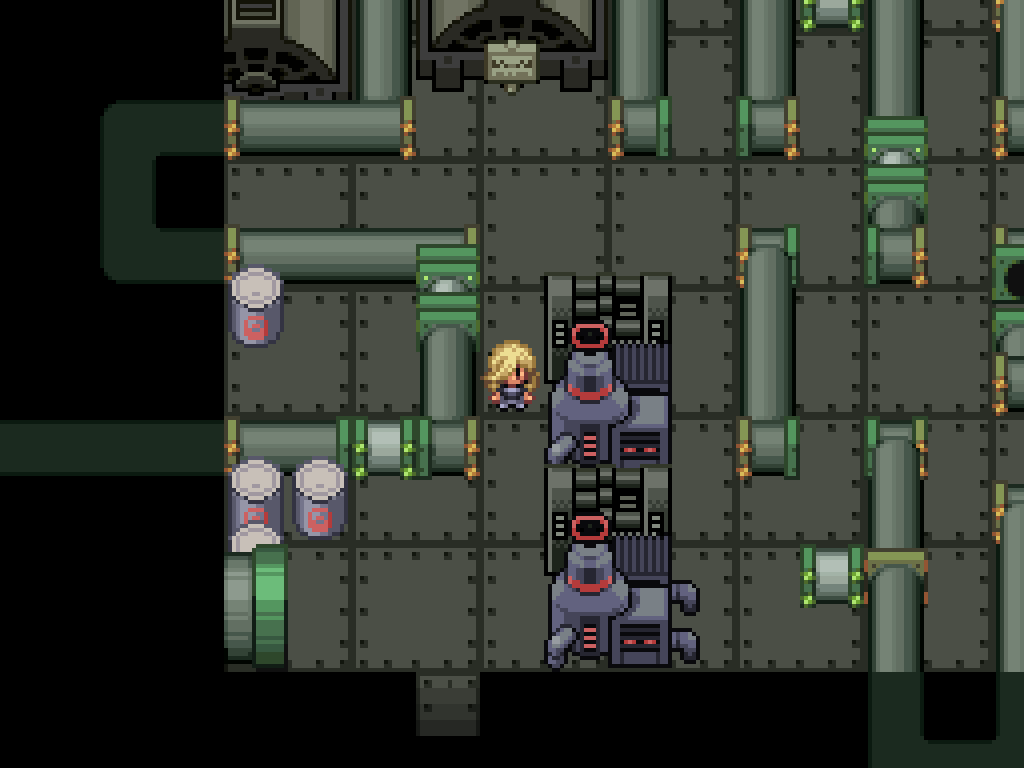
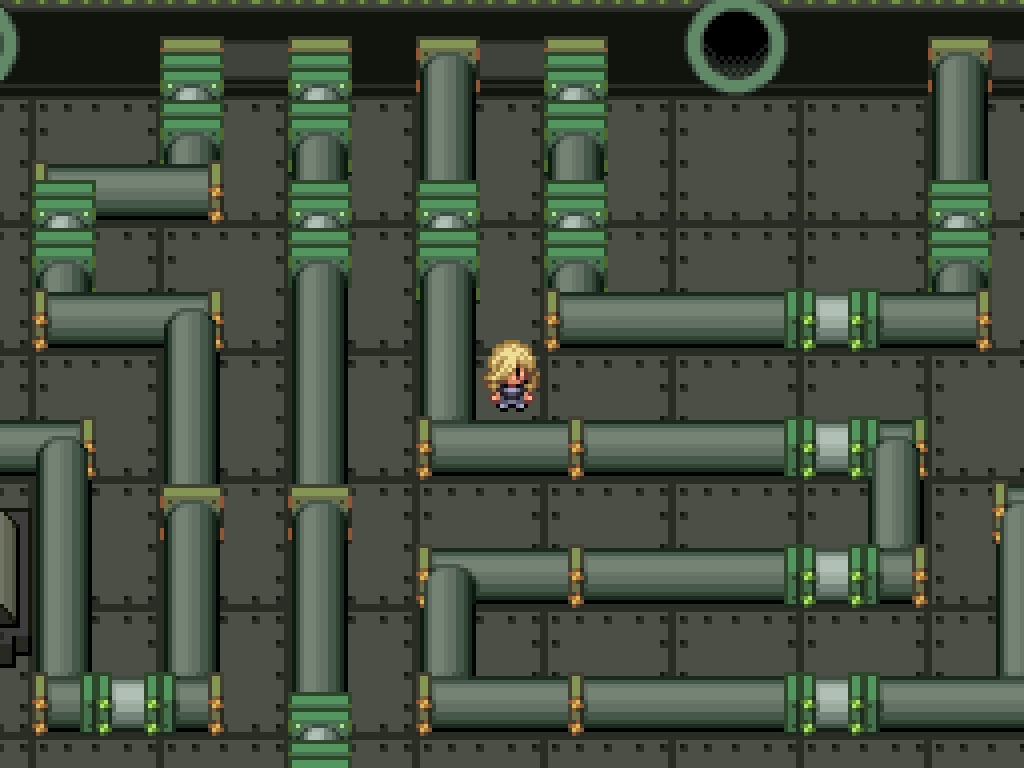
FULL GUM Room puzzle solution
You should be able to tell immediately what the puzzle is here. You have to push every fucking bit of pipe into place to have the water flow from one end of the room to the other. The difficulty mostly comes from figuring out how to do this without either trapping yourself or blocking yourself from getting to one of the other pipe pieces.
It's not at all obvious, but you only need to connect between pipes with green terminators; the ones with the two orange sparkles act as corners instead. Pipes can only be pushed in two directions, so you don't need to finangle pipes downwards or anything like that. Let's get into it. It's a bit hard to represent with just screenshots, so bear with me a bit.
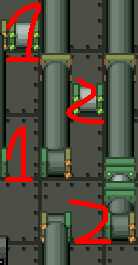
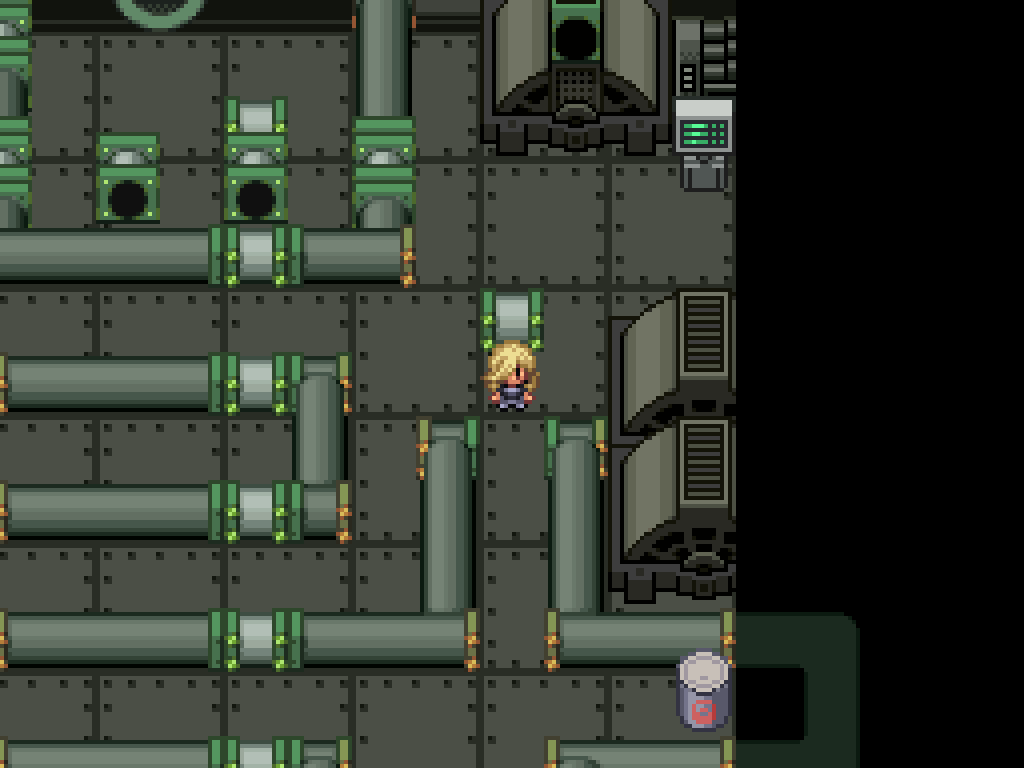
Obviously, push these ones into place. Push the upper one right first, and then push the lower one up after that.
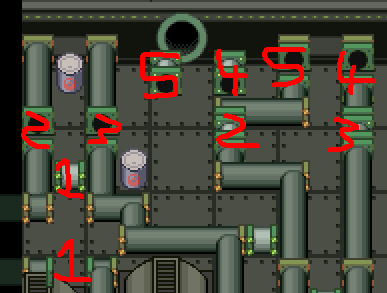
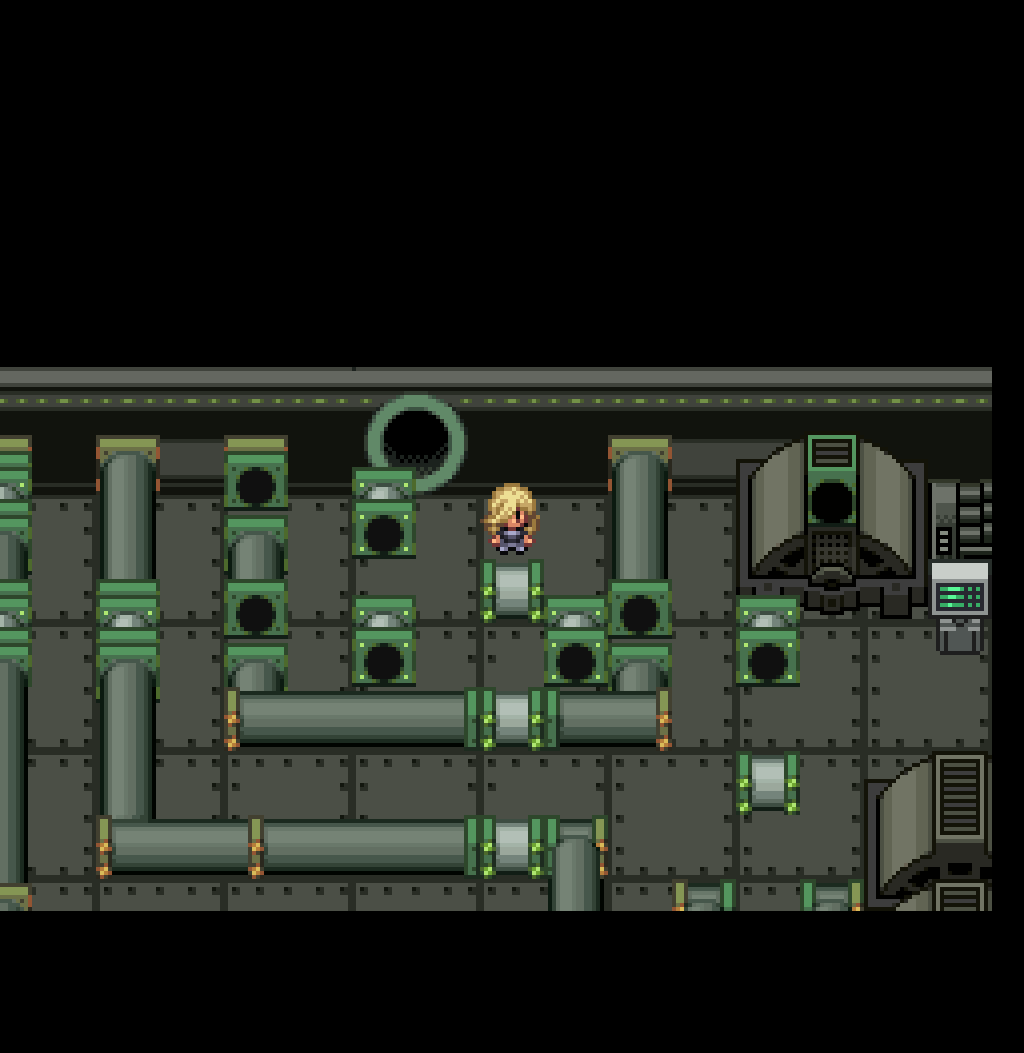
You can make your way up into this section at the top; move each pipe into its numbered area.
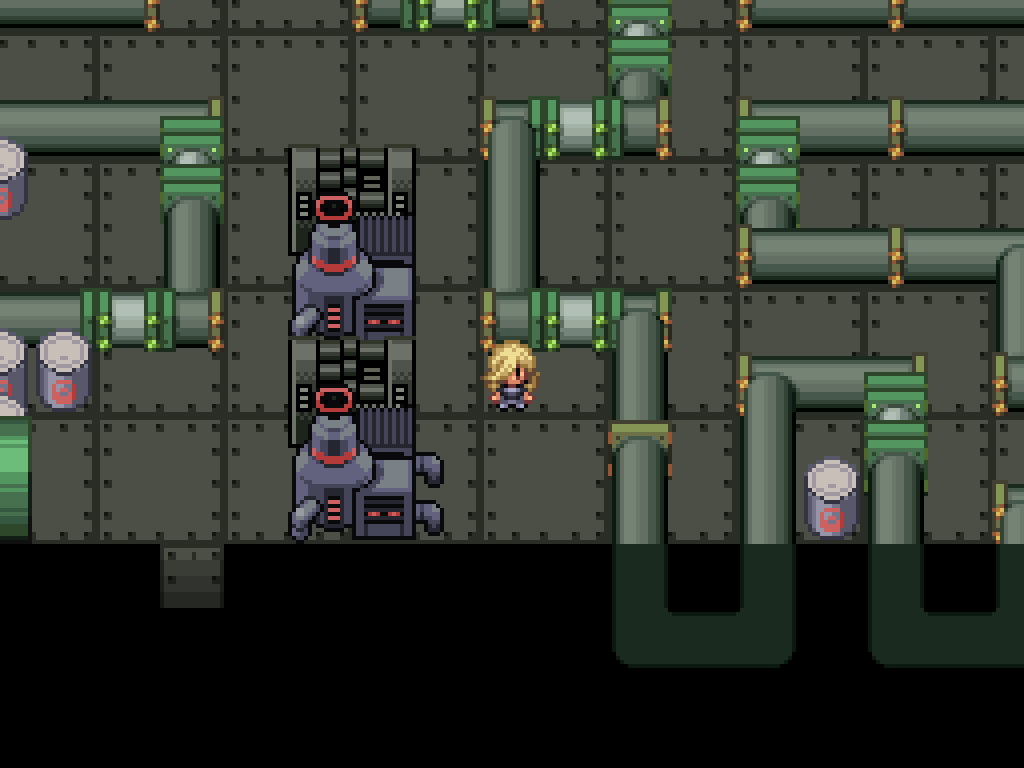
Move downwards and push both of these pipes into their numbered slot.
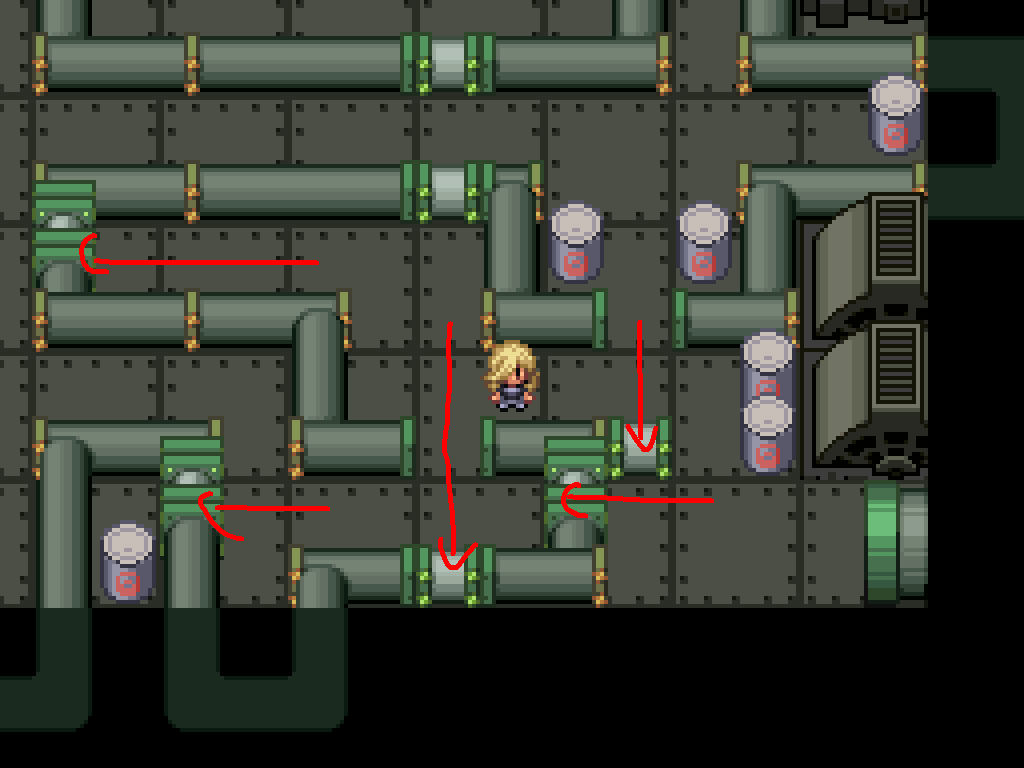
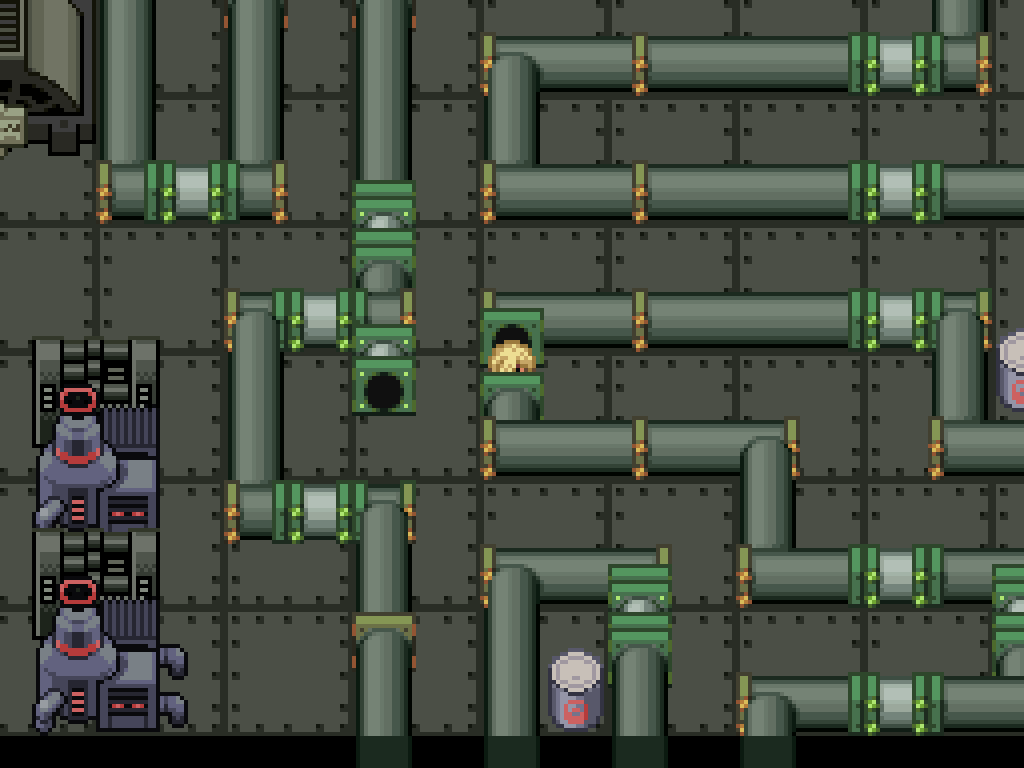
Walk through the gaps to the right of the room; you'll be blocked by a pipe already in position. Move it down two tiles, like the arrow shows; then move the pipes shown into position. These ones are all safe to move and won't cause a softlock. Save now in case you mess up the next step.
Move this pipe up and out of the way; don't push it all the way up, as you'll need to replace it later.
In the upper section, re-arrange all of the pipes like this; you will be able to push them back later. Make sure the right-most pipe is two tiles out of the way! Next, you need to move every single vertical pipe down one section; this is fairly easy, just start from the bottom one and work your way up.
Go back to the starting area and push this pipe upwards. This seals a route to the lower right area, but you have another path there, so it's okay.
Push this pipe back out into this area to keep a path open to the lower area.
Push this lower pipe back into position, then reseat the pipe from the previous step. This fully seals off the lower right area. Double check the pipes in the rest of the room as you are about to be trapped.
Finally, push every pipe in the upper section into place; you'll need to start from the left pipe and work your way along. Return the pipe below the computer into place, then activate the computer to verify your solution.

After all that, a Goomy will pop out of the area next to the computer. If you want, you can evolve it in this room to get an Hisuian Goodra; evolve it anywhere else to get the... regular Goodra. To get out, move the pipe directly below the computer downwards, and then walk to the big pipe in the lower right corner of the room. Interact with it to be returned to the start. I hope you remember how to get out of the Water Treatment Centre. Make sure to pick up the TM for Poison Jab whilst you're down here.
Dragapult

Follow the Finding the Mirage Tower guide in Chapter 20 to find the mirage tower. Break all the glass at the back of the bottom floor; on the last hit, you'll open a doorway to the basement.
A Dreepy will be flying around in a fixed pattern. Intercept it and press the action button to start a wild battle with it.
Garchomp

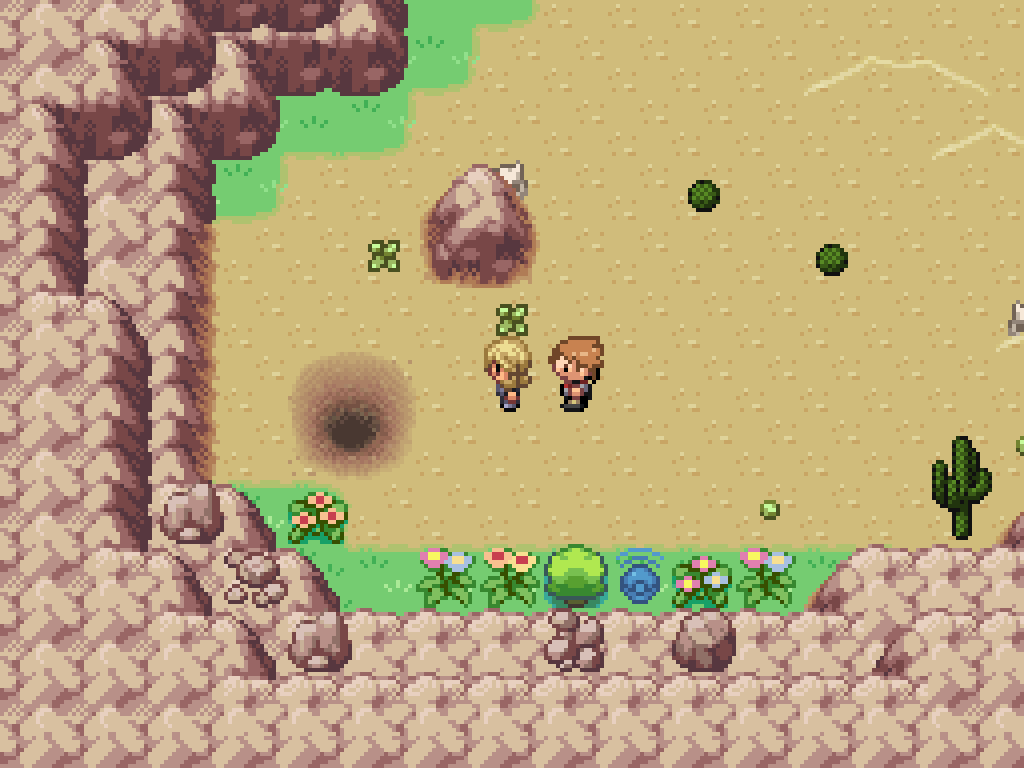
I don't really like this one. There's a bunch of holes in the floor, and falling through them will take you to other areas of the cave.
Sugiline Cave walkthrough
AAaaaaagh. Some of the holes will teleport you back to the cave entrance, so you can't get stuck here. It's mostly trial and error, and the topology doesn't always make sense; one hole drops you all the way at the other side of one room. I've never been more grateful to have a working map renderer than now.
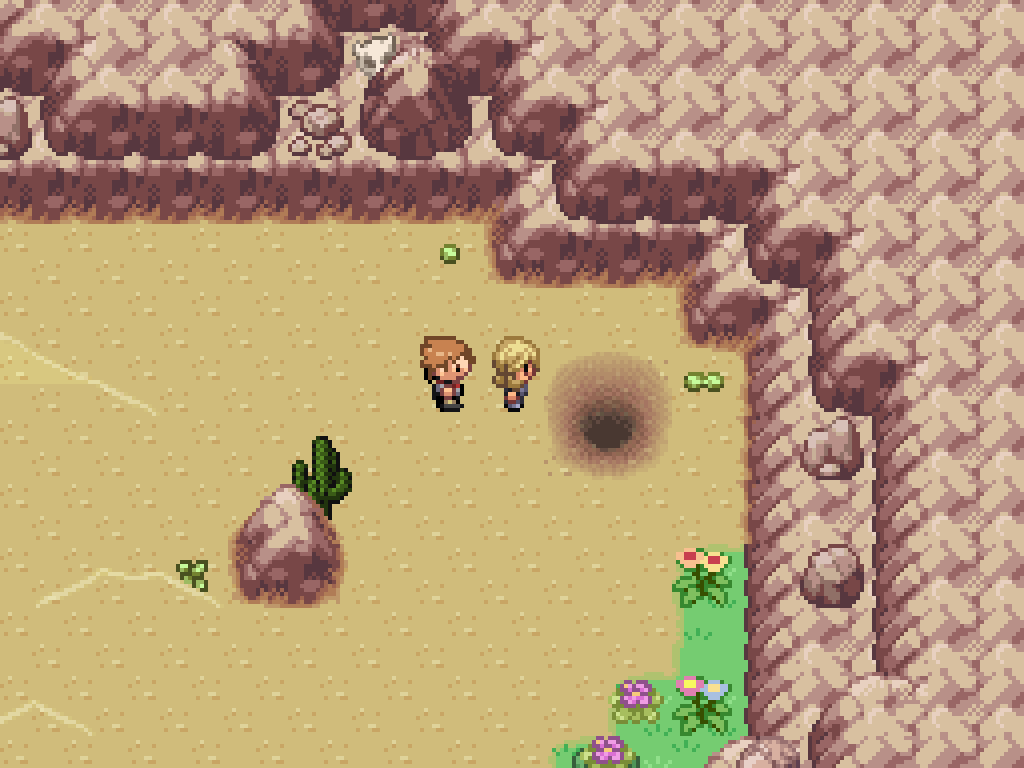
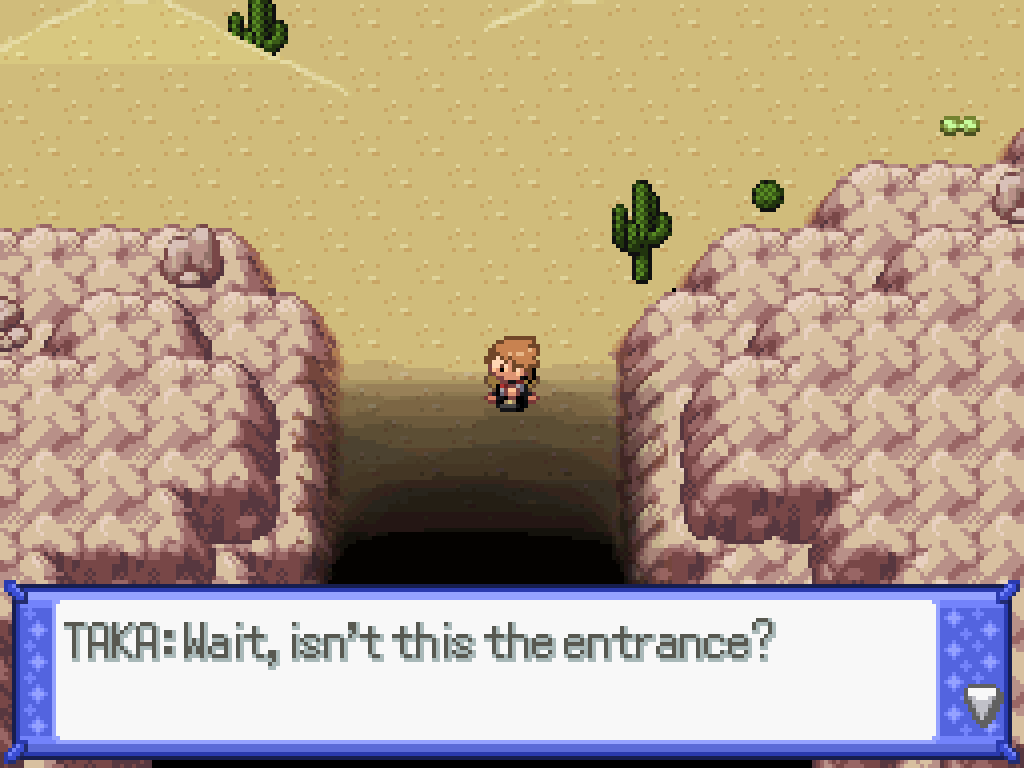
First, fall down this hole on the right side of the main room. This will lead you to a lower floor; ignore the hole on this floor for now and walk up the ladder to the top right instead.
Walk to the very top of the room and fall into this hole. In the subsequent room, ignore every single hole in the floor; instead, climb the ladder at the bottom-left of the room.
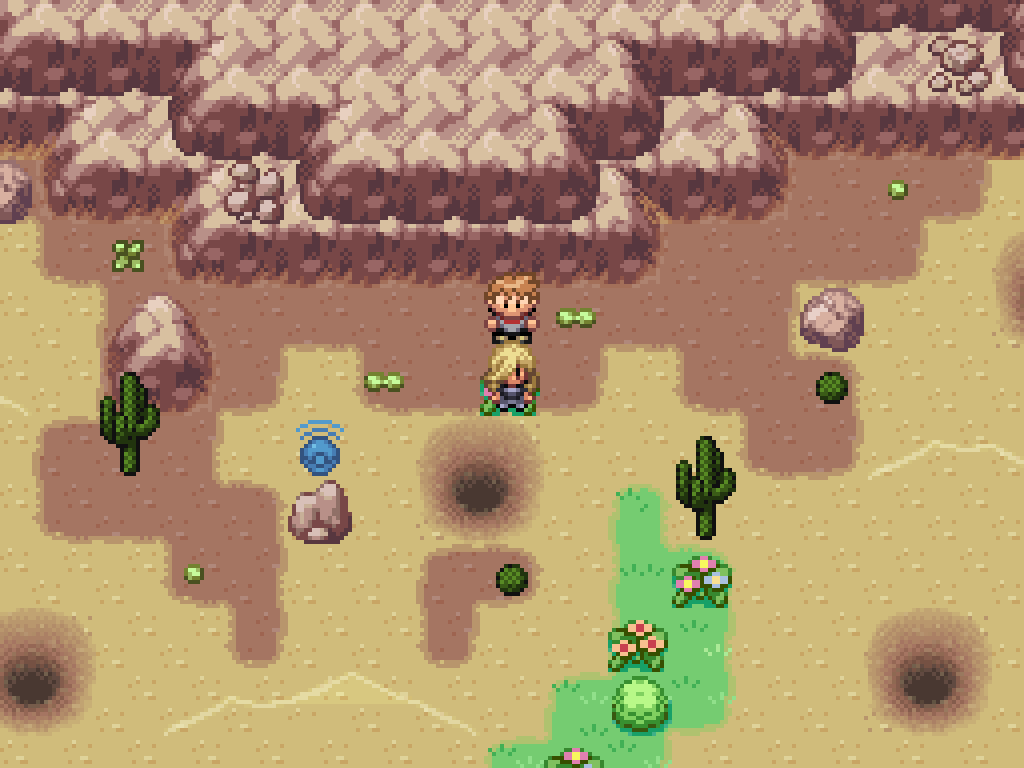
Walk down and activate this statue. Climb back into the previous room and then walk down any hole to return to the start of the cave.
In the main room, fall down into this hole. This will put you in a room with a hole and a ladder; climb the ladder as the hole just returns you to the start of the cave.
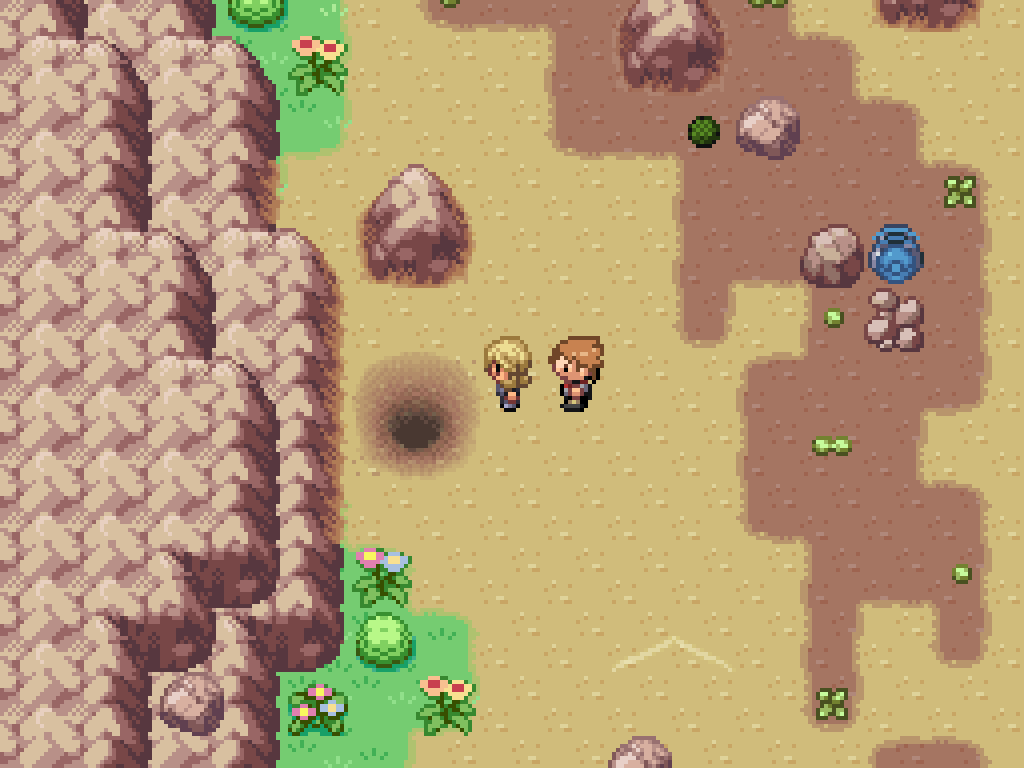
Fall down this hole at the east of the room to be placed on a cliff area; walk upwards along the cliff area to find another ladder.
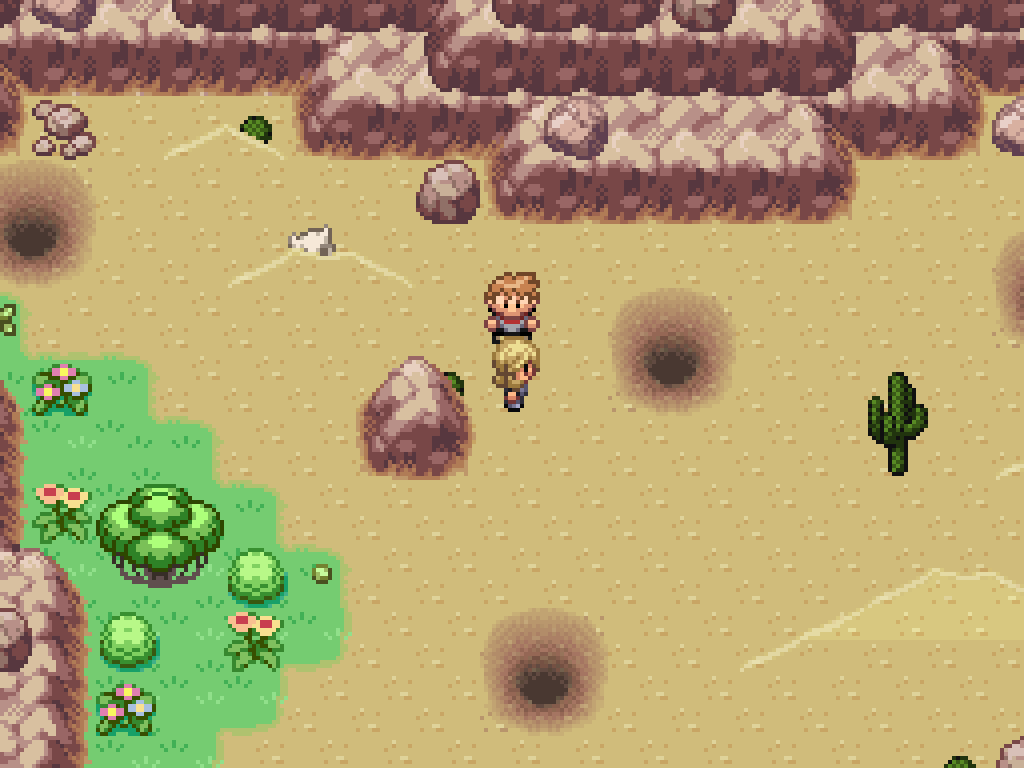
Again, fall down this hole at the very north of the room to find yet another map. At the right side of that area is a ladder (none of the holes work); climb it then go to the right side of the new area to find a cave entrance. Walk through and activate the statue to fix the stairs. Exit this area and jump in any hole in the previous area to return to the start of the cave.

Fall down this hole in the centre of the main room, then proceed directly upwards to find stairs to a different room. Walk up and past the area you just cleared and into a small indoors area.
This is a linear corridor; just run straight upwards to the top end. You'll be mobbed by Level 75 Garchomps, but if you have an Ice type they die fairly easily. If you have Taka with you, you'll get a heal after every battle, so you don't need to worry about dying or using all your move PP.
At the top of this room is the TM for Stone Edge, as well as another Arceus statue; activate it and there will be new sinkholes placed in the room. (Fun!!!!) Go down... any of the sinkholes to find a second layer.
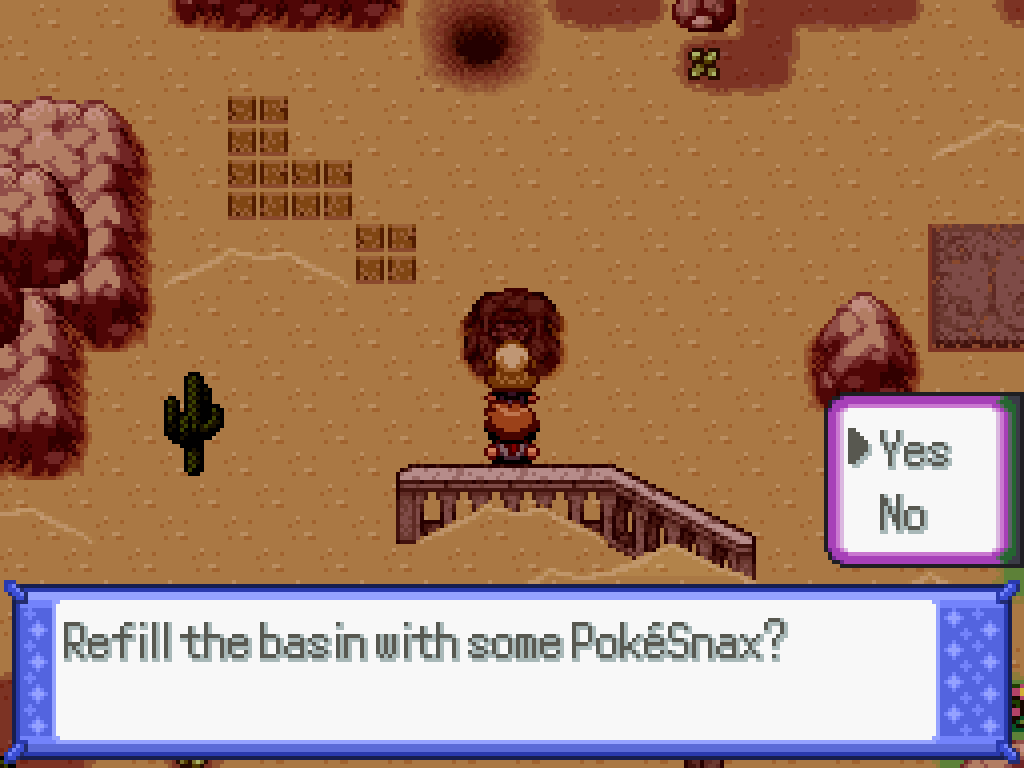
Fill the basin next to you with some Pokesnax, then climb the ladder at the top-left of the room. Fall back down the same sinkhole as the first time to surprise the Gible, and enter a wild battle. Next to the ladder you will find another indoors area; walk all the way to the top to find the Garchompite Z, which lets you mega evolve Garchomp in a more useful way than the regular mega evolution!
Kommo-o
Kommo-o is located on the Teknite Ridge; you need to make your way through the Teknite Cave to get here. You can find the guide in the 20th chapter walkthrough.
Remember these steps, as you'll have to come back here in the postgame. Pay no mind to the Taka following me. You do get some unique commentary if you bring him here, though.
Kommo-o Puzzle Guide
Exit from the left side of Teknite Cave to find this area... with a jumping puzzle. This late into the game? Really?
Jump up and push this boulder down to the bottom. This unblocks your path.
Do the same for both of these boulders. For obvious reasons, don't push it to the left.
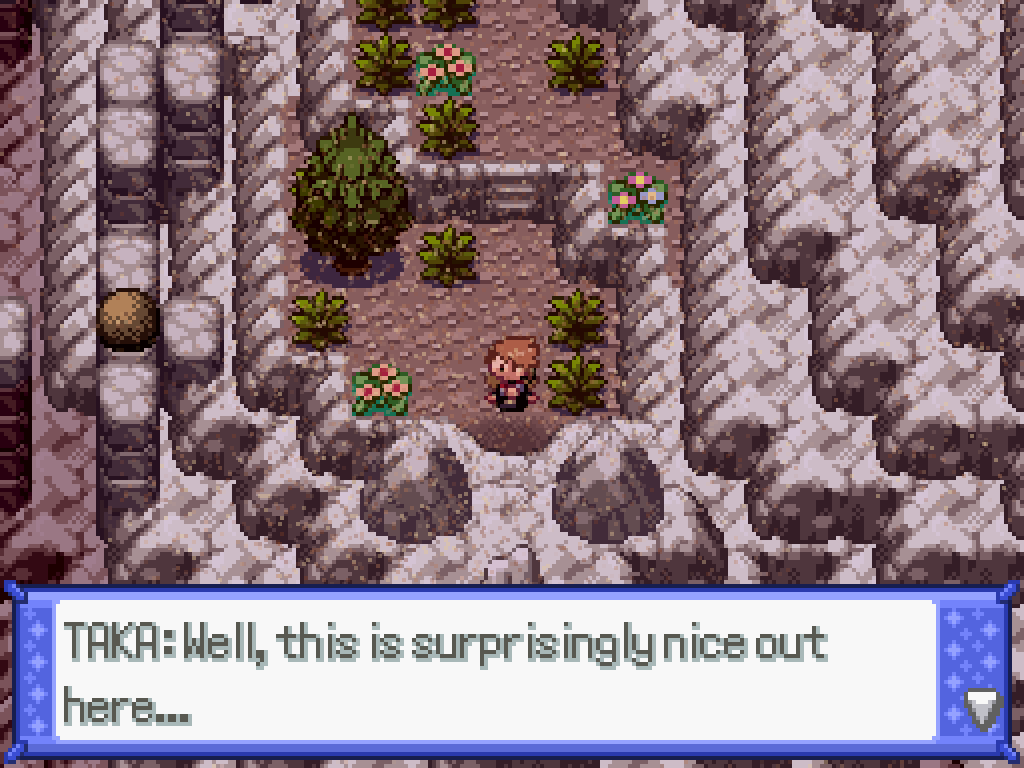
Push this boulder straight to the right to unblock your path again. Jump up and onto the other cliff, then walk straight through both caves. You'll pop out in an area with the TM for Swords Dance.
Jump along the path here and use Rock Climb to get up the cliff, whereupon you'll find a Jango-mo egg.
Vikavolt
I considered making a quest for this one, but I really don't care enough. You can find Charjabug as a wild encounter on the Teknite Ridge.
Hydreigon
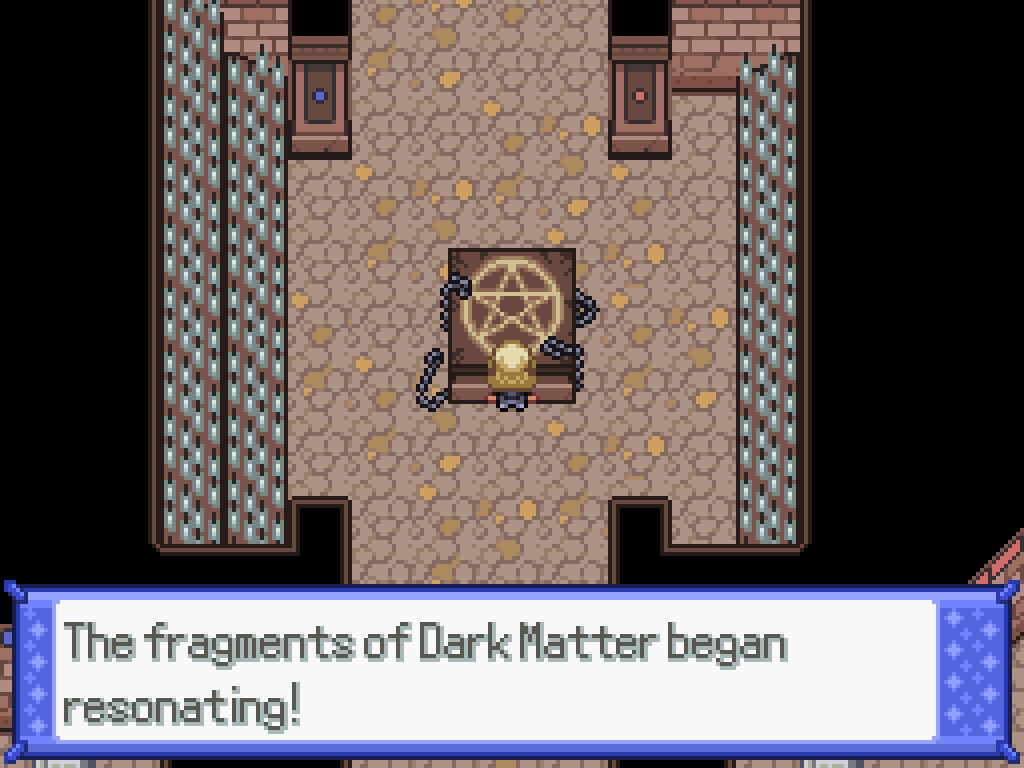
This is by far the easiest one. You need to find three Dark Materials [sic] and bring them back to the Subseventh Sanctum, then use a Soul Candle on the altar. Instead of a Litwick, an Deino will pop out in a wild battle.
Dark Material Locations
The first one is located in a room inside the Iolia valley, up the waterfall. Activate the red crystal rock, break the wall, and then switch the room inside to find it. (Whilst you're here, you can collect the TM for U-turn too.)
The second one can be found on the side of the
The third one is found in the left room of the Subseven Sanctum. To open the door you need to use the Sanctum Key, which you can find on the Klefki you stole from the bum earlier.
Dragonite

Just so you know, if you decide to use the most boring and lame design as part of your team, I will be judging you very harshly. Dragons have literally never been cool.
Dragonite Location
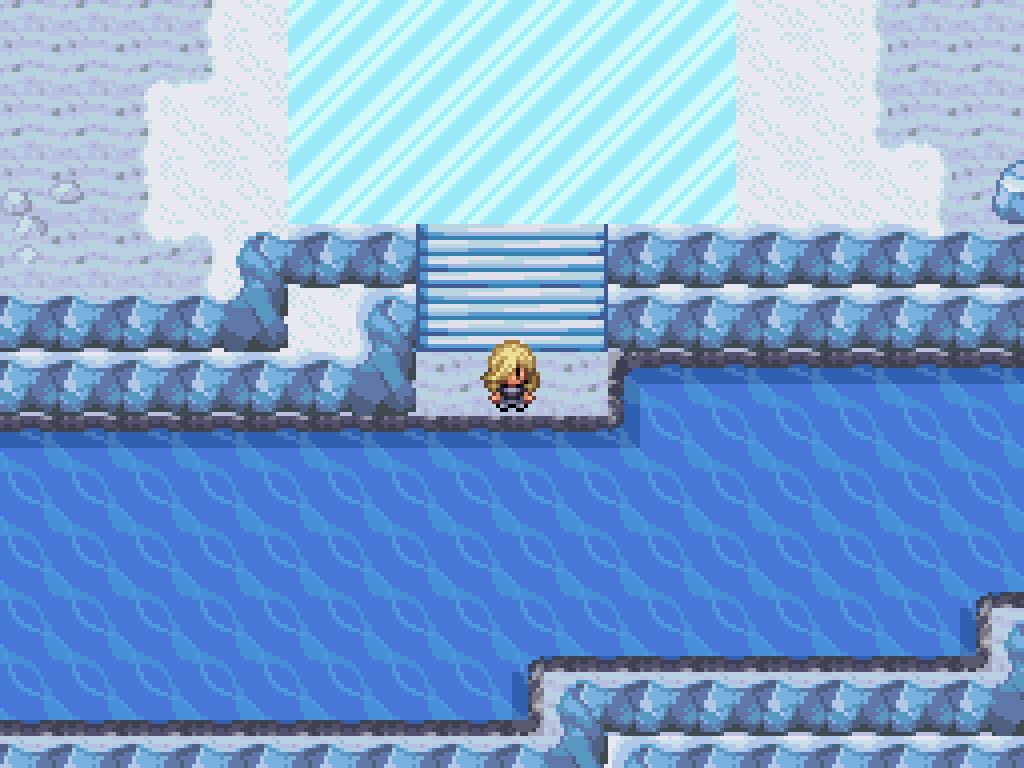
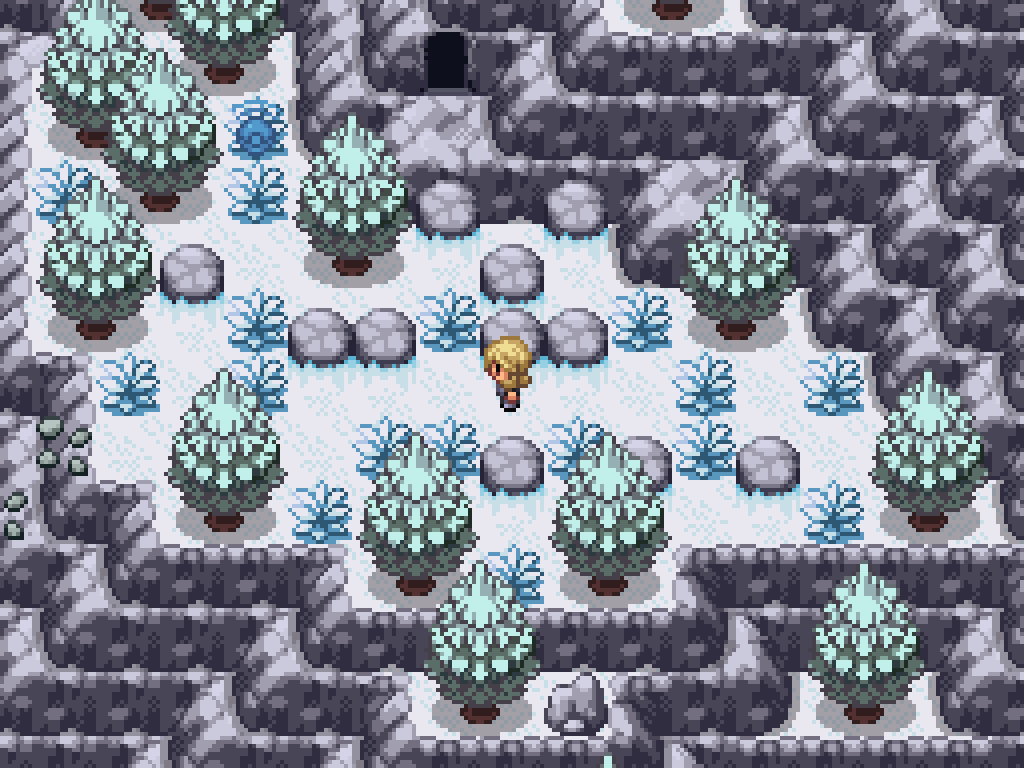
This one's a lil annoying to get to. First, make your way to Ametrine Mountain from the Route 3 entrance, surf, and go up the waterfall. Surf to the left until you find this patch of ice. Slide up into the Secret Area.
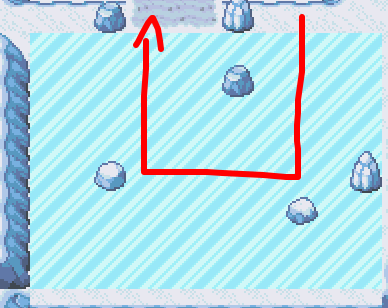
"Solve" the ice puzzle like so, then surf upwards and go up the waterfall.
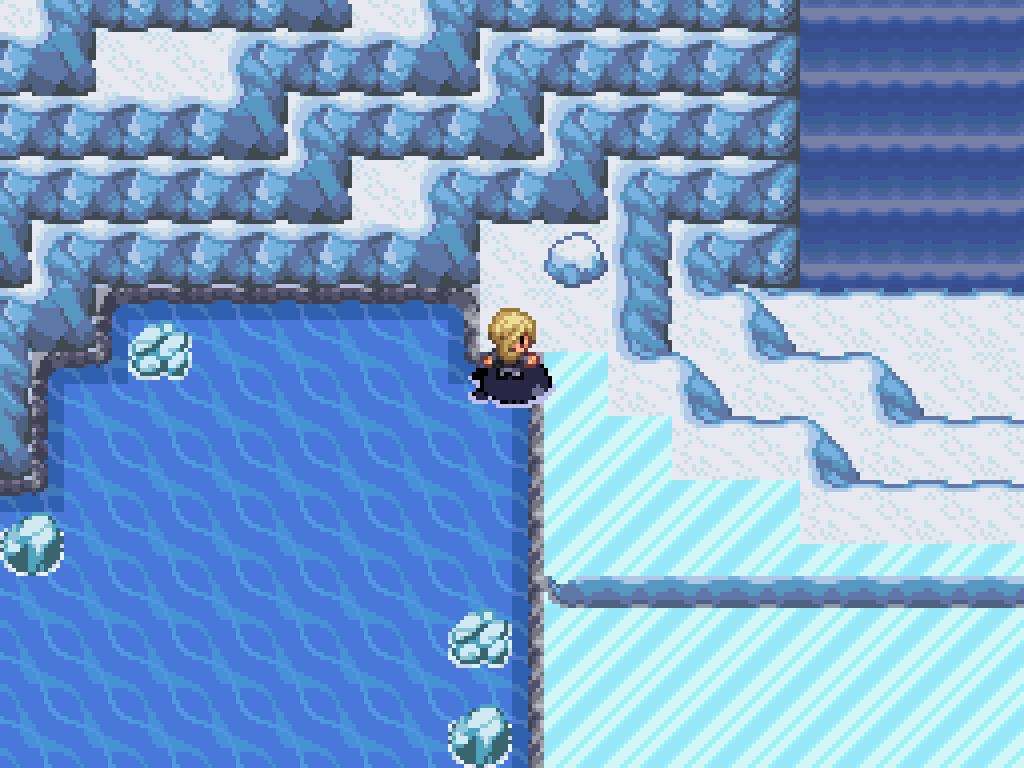
Dismount onto this tile to the right, slide down until you hit the rock, then slide to the right. This will lead you to a Rock Climb area and a new part of Ametrine Mountain.
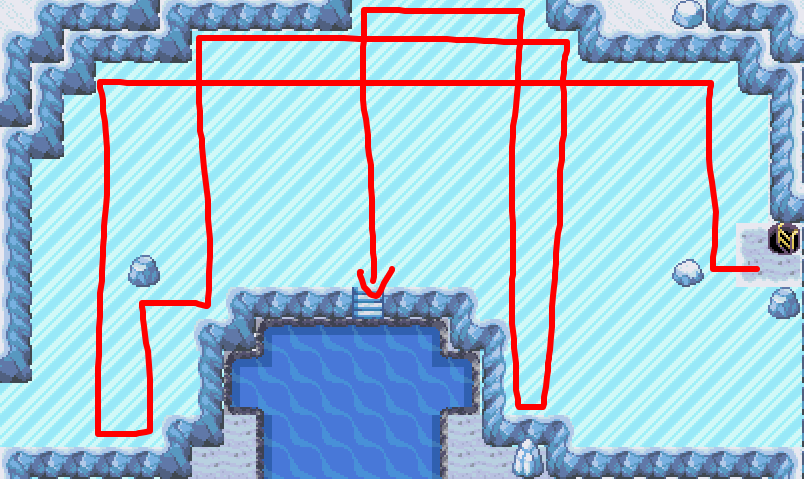
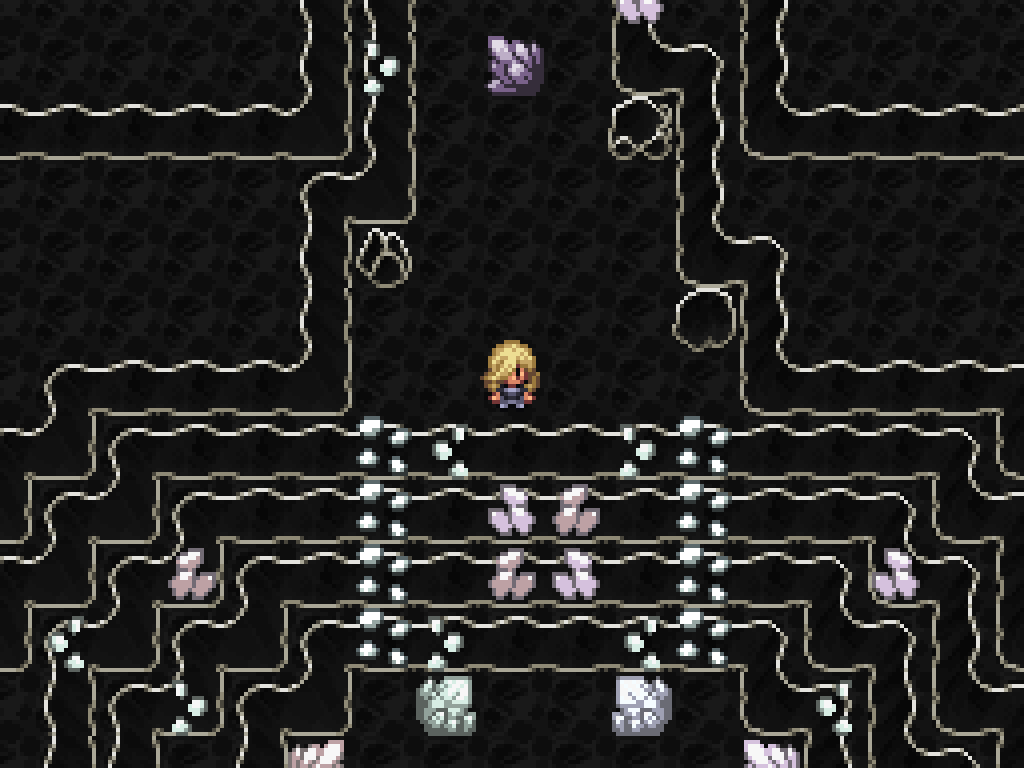
Solve the ice puzzle here like so, then surf downwards. Take the waterfall ALL the way down to Ametrine Mountain B4F. You can catch a Dratini here using the Super Rod.
Baxcalibur
Literally just follow the instructions above to get a Dragonite, then catch a wild Frigibax in Ametrine Mountain B4F.
Tyranitar
The second worst pseudo gets a very in-depth quest. This one is genuinely offensive in how much of a walkthrough check it is; you're likely to get HARD stuck if you don't know how to actually, you know, start the fucking quest!!! Especially since it genuinely just looks like the game glitches out for no reason if you don't do the prerequisite.
Larvitar Quest
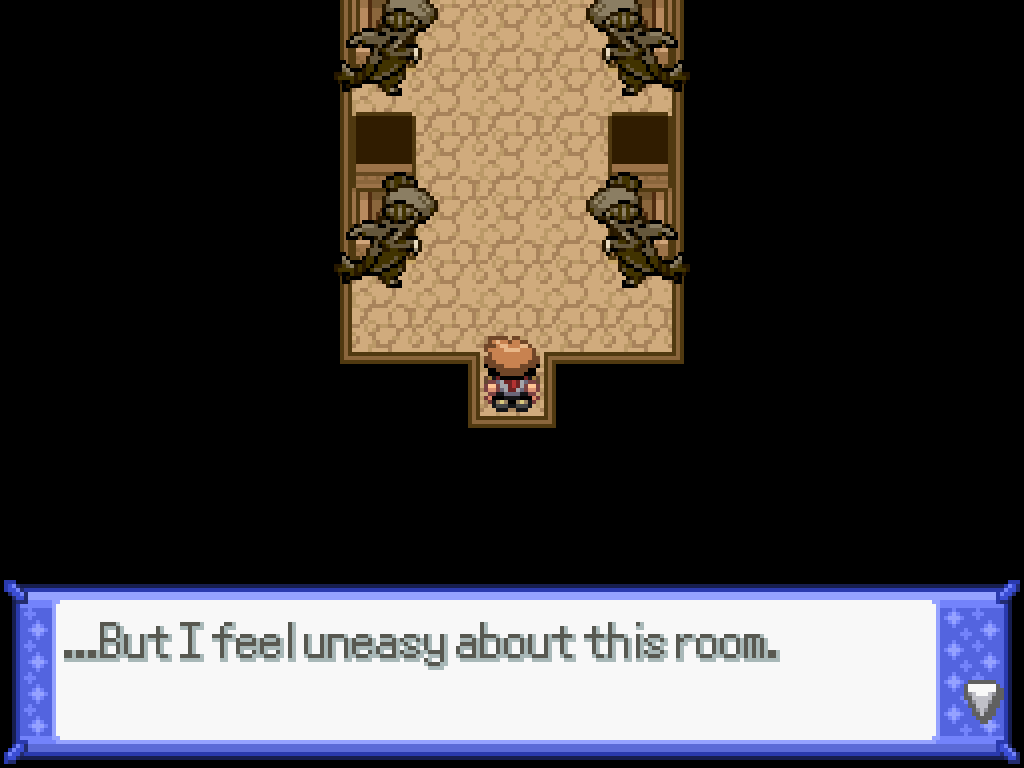
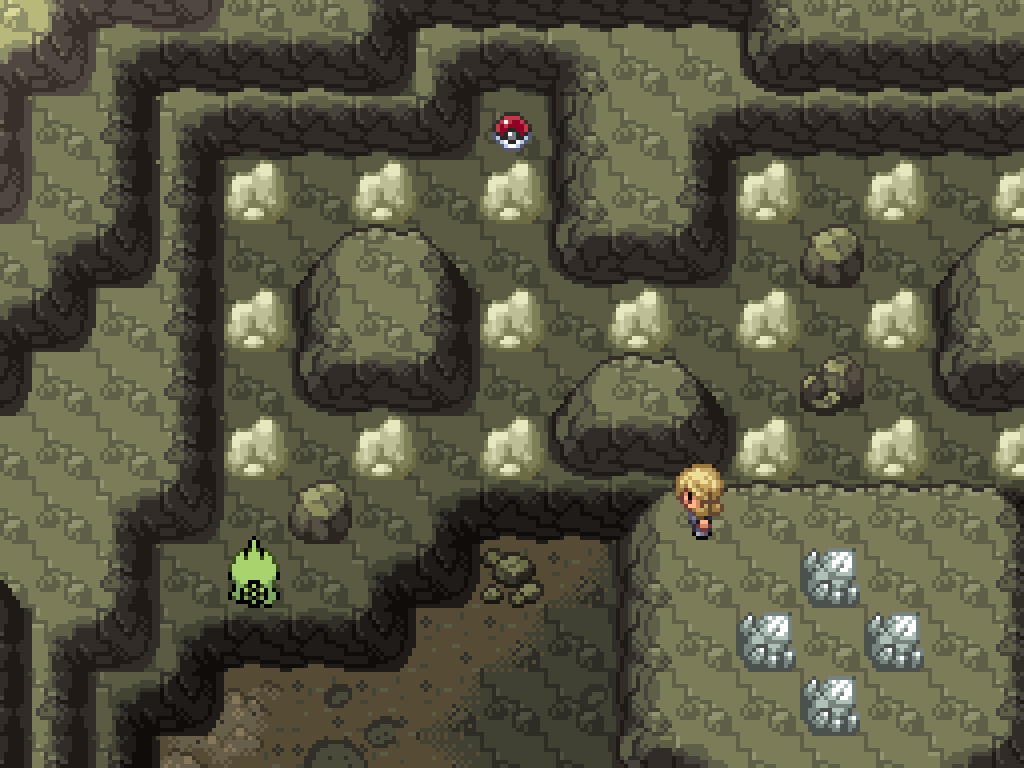
First, you need to go back into the Tanzan Depths, where you fought the Steelix. If you go to the north of the room with the magic tunnels, you'll find a mysterious bridge.

Inside, you'll find an area with three other rooms and a random NPC guarding a mega-stone. In one of the rooms you need to use Earthquake twice (or Bulldoze, etc) in a random battle to destroy the floor and send the weird crystal things plummeting downwards. Once you've done that, escape and return to the cave accessible via Surf in Tanzan Cove.
I hope you've stocked up on Revives. Collapse the floor in the first room to open up another Rock Climb path directly downwards.
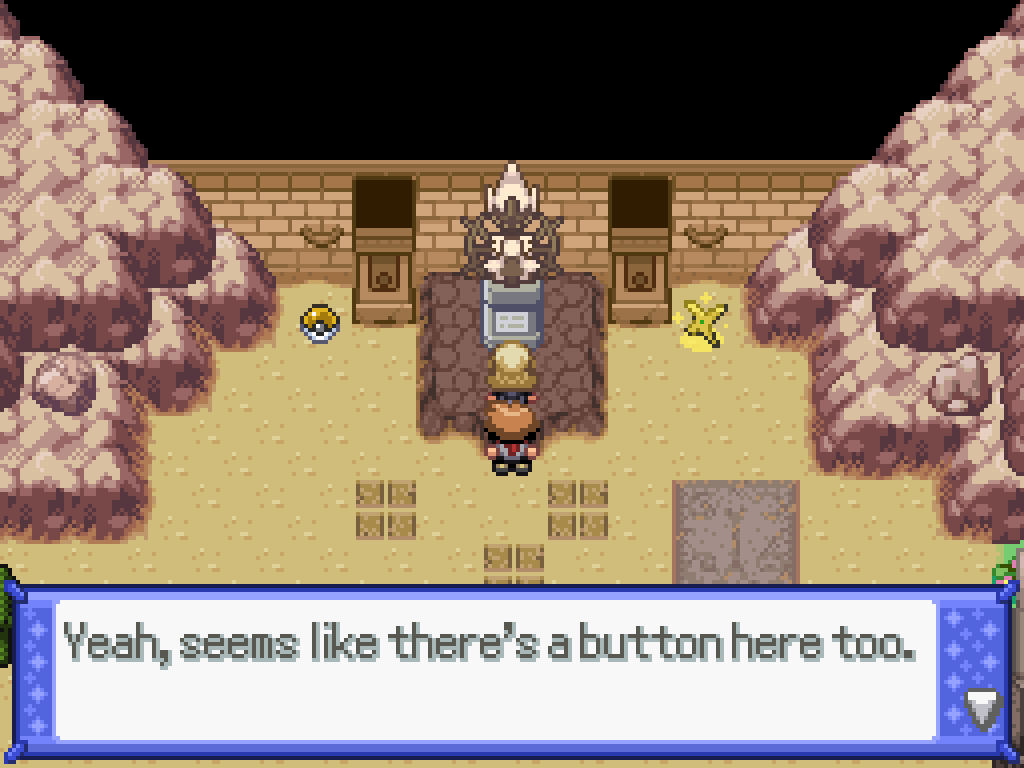
Activate the green crystal rock to unblock the path; the Larvitar makes a run for it afterwards. Walk up and along into the next room.
Here, you'll find that the crystal platform from the place you collapsed has fallen down here (how convenient). The crystals now act as a "control" panel to move Larvitar around; each crystal moves it in the appropriate cardinal direction.
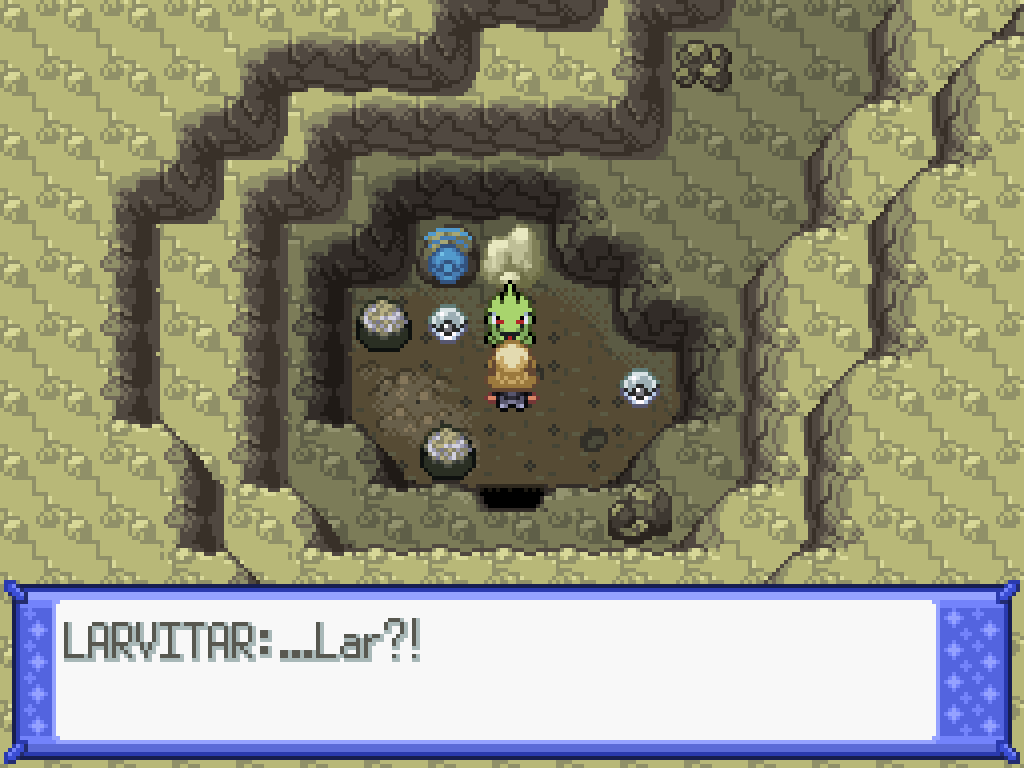
The puzzle here is genuinely so trivial I'm not even going to bother drawing the arrows. The item balls are all mints, but with access to the Pokémon Psychologist in Seventh Street you don't need them. Walk into the final room for a wild battle with the Larvitar.
Salamence
Salamence is found on Route 4 in a place you probably wouldn't find naturally.
Full Salamence Quest Guide
First, you need to get to this area on Route 4; see the chapter 22 walkthrough for more information.
Use a move like Heat Wave or Eruption in a wild battle to melt the field and return it to being a Mountain. Solve the jumping "puzzle" and enter the cave.
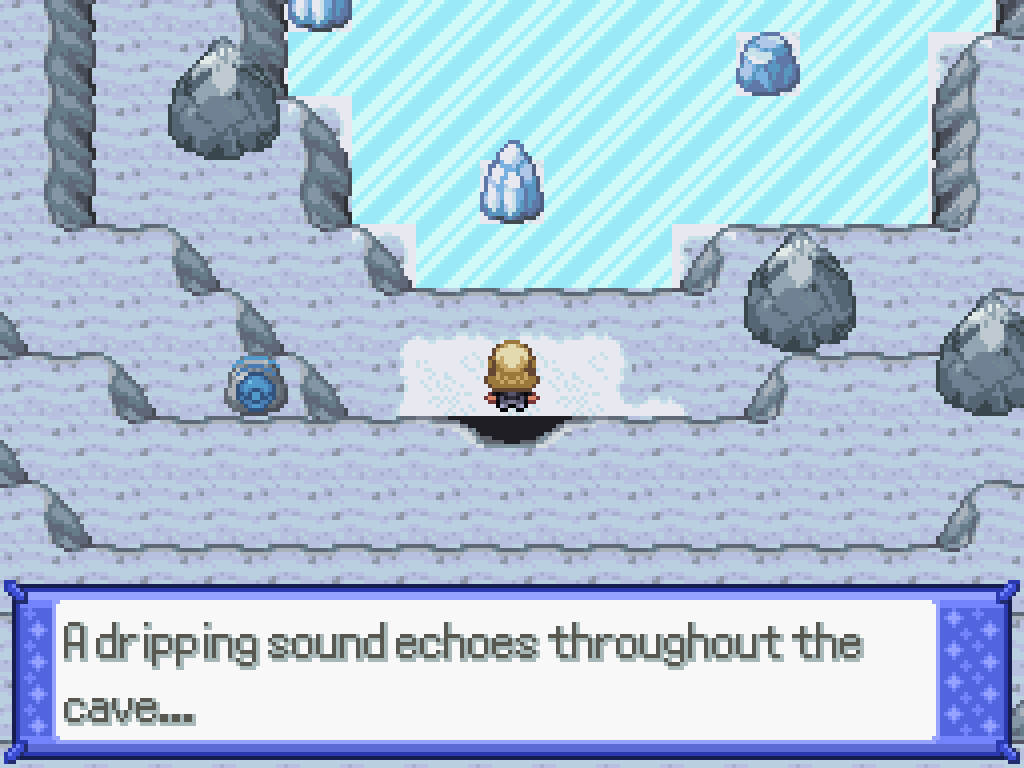
You might notice that the ice puzzle here is, in fact, unsolvable. Use Heat Wave inside here to melt the ice and then surf to pick up the Heracronite.
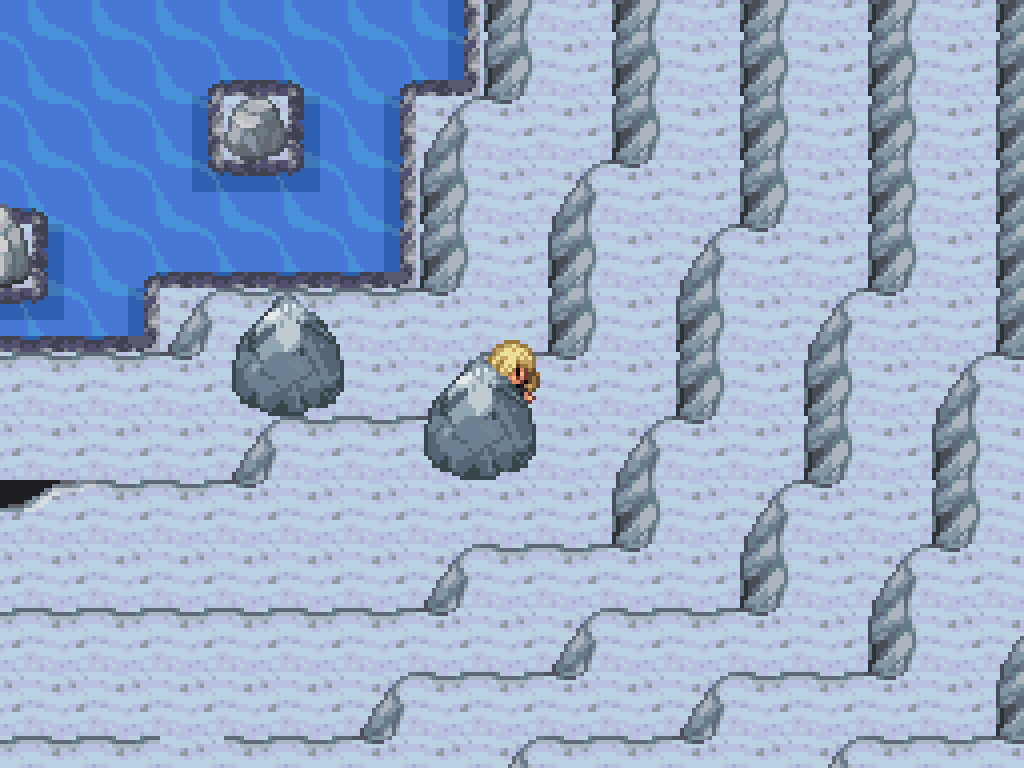
It's not even slightly obvious, but you can walk behind this rock to walk up to a higher level of the cave. Walk clockwise around until you make it to the secret hidden exit located above the main entrance/exit.
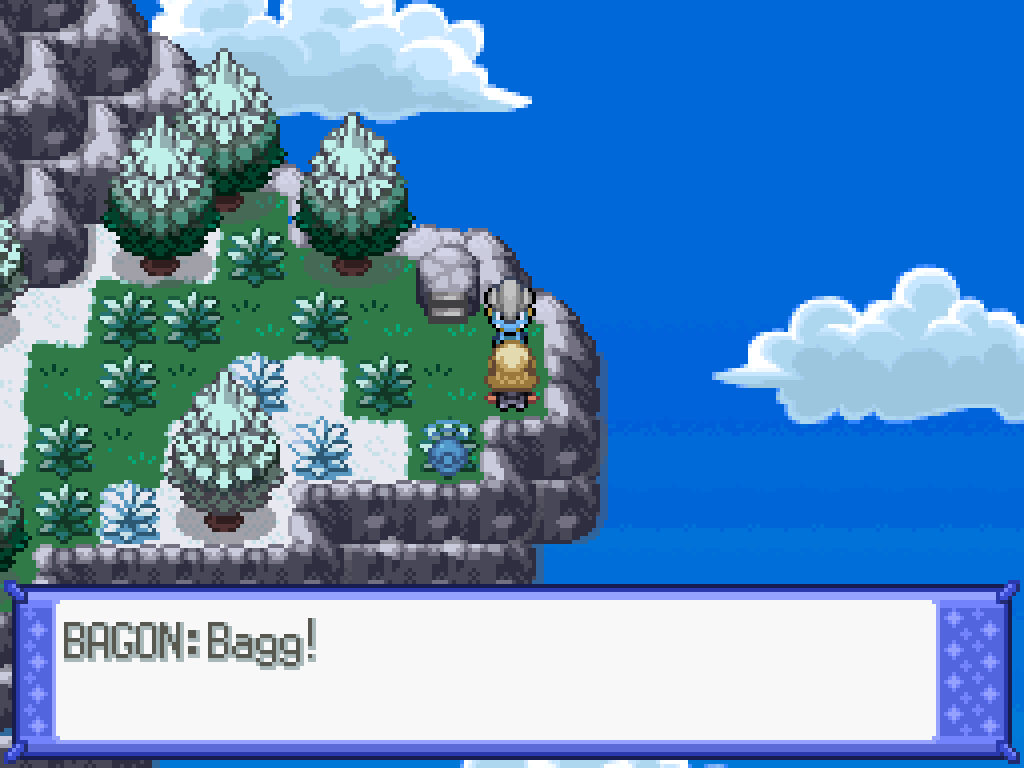
Walk to the right and interact with this Bagon three times. It "flies" away to another area. Return back to the central "puzzle" area of Route 4, and then use the southern Rock Climb point to find a different area. Keep going until you reach the southeast Rock Climb point.
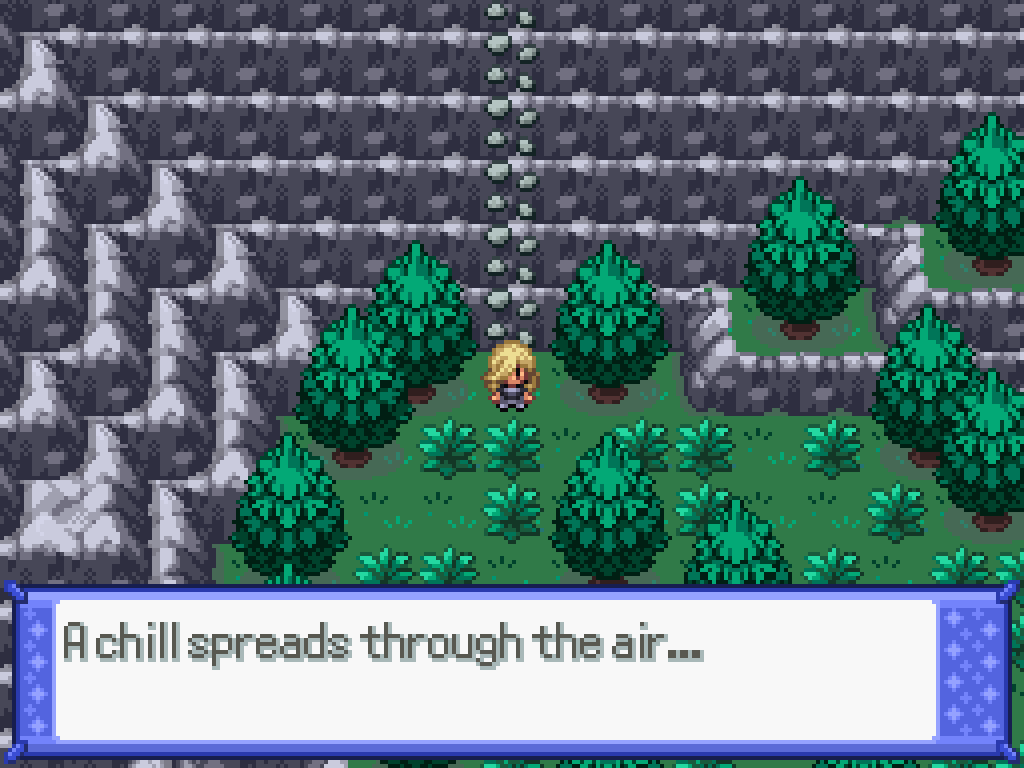
Turn the field into Snow with Blizzard then Rock Climb to the next area. You'll see a suspicious imprint on the floor; use Heat Wave or similar to melt the snow and find the dead Bagon. Activate it with a Revive in your bag and it'll join you.
With that, you'll have successfully caught every single Pseudo-legend in the game!